Nov. 2020

(English follows:)

Cette page est dédiée à ceux qui m'ont souvent demandé à quoi pouvait bien ressembler l'image originale. Je prends et manipule des images depuis plus de 50 ans. Bien que je comprenne tout à fait ceux qui se veulent du mouvement "SOOC" (Straight Out Of the Camera) et qui se disent contre l'édition des images, cela ne nous empêche pas de bien se comprendre.
Selon moi, il y a plusieurs sortes d'adeptes du SOOC, les Pros qui sont bien payés pour leur travail et qui peuvent se payer le meilleur équipement possible ainsi que des assistants, maquilleurs et retoucheurs. Il y a ceux qui ne sont pas assez intéressés par l'art photographique lui-même pour vraiment s'y impliquer - ils shootent généralement en jpg et inondent les réseaux sociaux d'images quelconques. Ces derniers manquent en général de courage pour apprendre à utiliser des programmes d'édition.
En ce qui me concerne, j'ai toujours pris beaucoup de plaisir à manipuler l'image. Après l'école de photo, je me suis toujours assuré de dédier une petite pièce qui pouvait servir de chambre noire. Comme je déménageais souvent, j'ai perdu le compte du nombre de celles-ci qui, d'un endroit à l'autre, devenaient de plus en plus sophistiquées.
La manipulation ne se faisait pas qu'au stade de l'agrandissement. Déjà lors du développement de la pellicule, il était possible de forcer la sensibilité (l'ASA) de la pellicule en modifiant le temps et/ou la température du révélateur. Certains révélateurs se spécialisaient à la maximisation les résultats dans ces conditions particulières. D'autres étaient réputés les plus raffinés, c'est à dire maximiser la finesse du grain à partir d'émulsion de faible sensibilité tel le 25 ASA.  On s'amusait aussi à faire de la solarisation et autre technique de dénaturation de l'émulsion. Certaines de ces dernières donnaient souvent des résultats assez douteux...
C'était surtout au moment des impressions des "épreuves contactes" que le processus de créativité se déclenchait vraiment. Une fois les clichés choisis, le reste se passait à l'agrandisseur. Recadrage, Dodging & Burning etc.
Ceux qui n'ont pas vécu ça peuvent penser que la manipulation est un phénomène nouveau alors que cela a toujours existé. La créativité ne peut trouver d'aboutissement sans manipulation.
Existe-t-il un peintre qui n'aurait pas recommencé une toile, car son premier ciel ne lui convenait plus ? J'ai connu et je connais encore plusieurs peintres et artistes qui le font souvent. Pourquoi alors dire que ce serait moins acceptable d'améliorer une image numérique en remplaçant un ciel pourri par un autre plus approprié à la scène?

Si vous avez des questions concernant soit l'image originale, soit les étapes du procédé de post-production, n'hésitez pas à me contacter en utilisant la page courriel:

*************************************

This page was designed for those who often ask what the original image looked like before I started working on it in order to transform it into the one I had in mind. 
I understand that several philosophies prevail in the world of Photo Editing. The two main groups being what I call the "SOOC" (Staright Out Of the Camera) crowd and the Photoshop Addicts that fear not criticism for showing their personal vision. I belong to the latter group.
My message to the "SOOC" colleagues who often invoke "Purism" to describe or justify their way, is this:
Image manipulation has existed since the early days of photography. With each advance in image recording came different media and techniques. Each era  saw new photographers suggesting their vision of the time. With over fifty years with my hands in the soup, I can say that "Purism" just does not cut it for me. Under that label often hide a slew of rather lazy snapshooters who would never use RAW and usually inundate social media with their jpg's. They usually lack the courage to learn to use editing software and are usually more concerned with "GAS" & "pixel peeping" rather than with image creation. Most are also convinced that their photography will improve with the latest gear and the ever increasing packing of photosites on sensors that can hardly physically accomodate it.
Of course, there is also another group, the well-paid Professionals who can afford the latest equipment, assistants to make sure everything is on site and loaded, the make-up and the retouching artists. Obviously, my hat is off to them for wanting to do as much as possible In-Camera so as to minimize costs. But even in their case, the scene in front of the lens if far removed from the image eventually published.
Finally, with the advances in AI, sky & background replacement has become quite the controversy recently. To those who say they would never do such a thing because it would be unethical, I counter: painters and other traditional artists have often replaced a sky they did not quite like either by covering it with things like Gesso and painting a new sky over it or starting from scratch. Even great painters like Rembrandt have done it. So, unless you are a photojournalist or a documentarian, there is nothing wrong in pursuing such a course.
Photoshop and certain plug-ins are my tools of choice.
This being out of the way, let me show you a selection of "Before & After" examples.

I won the Digital Artistry February 2022 contest at the Nikonians.org with this Photoshop version of the Welder you see on the right. Another example of before & after.

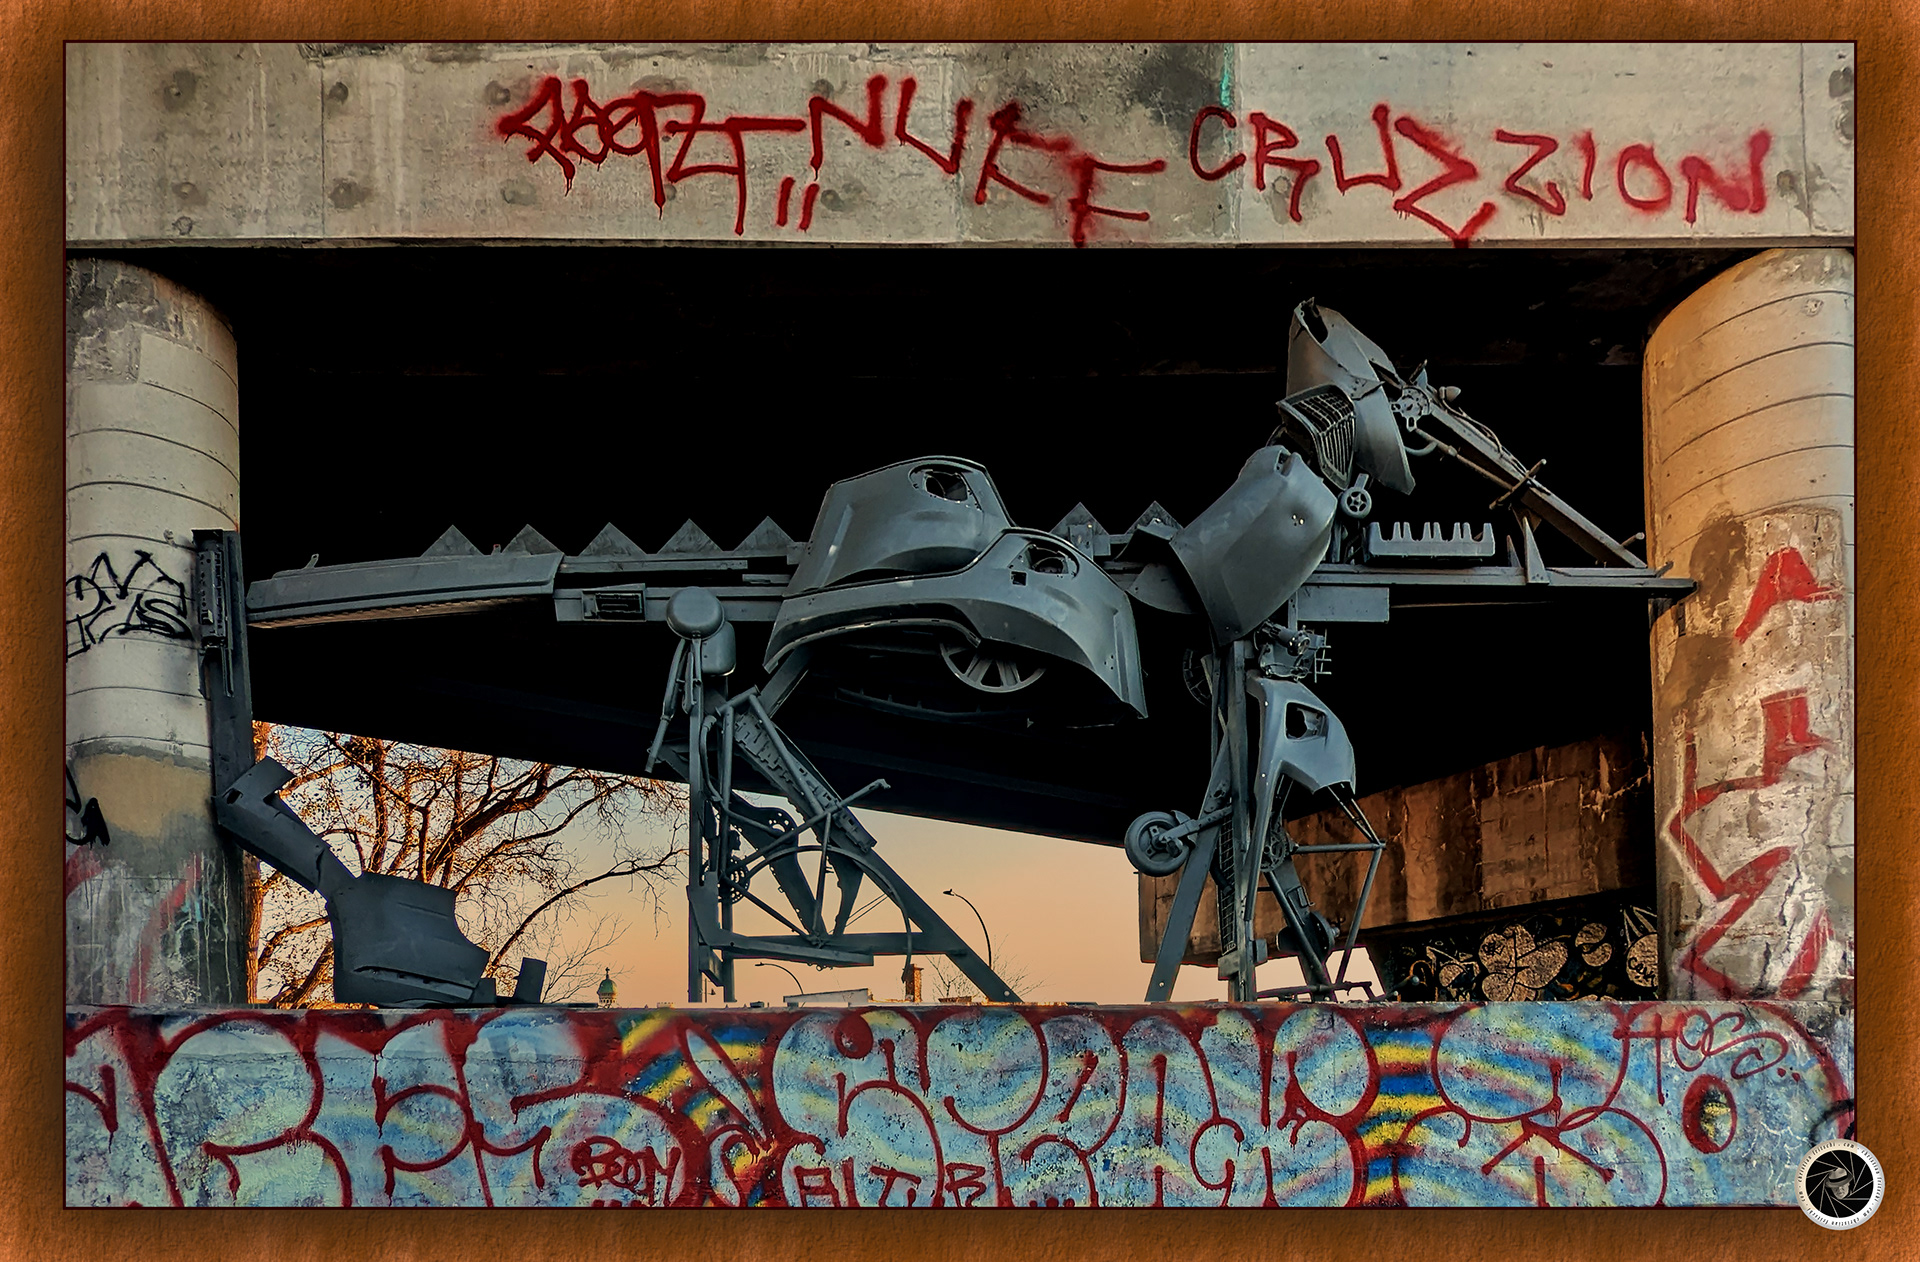
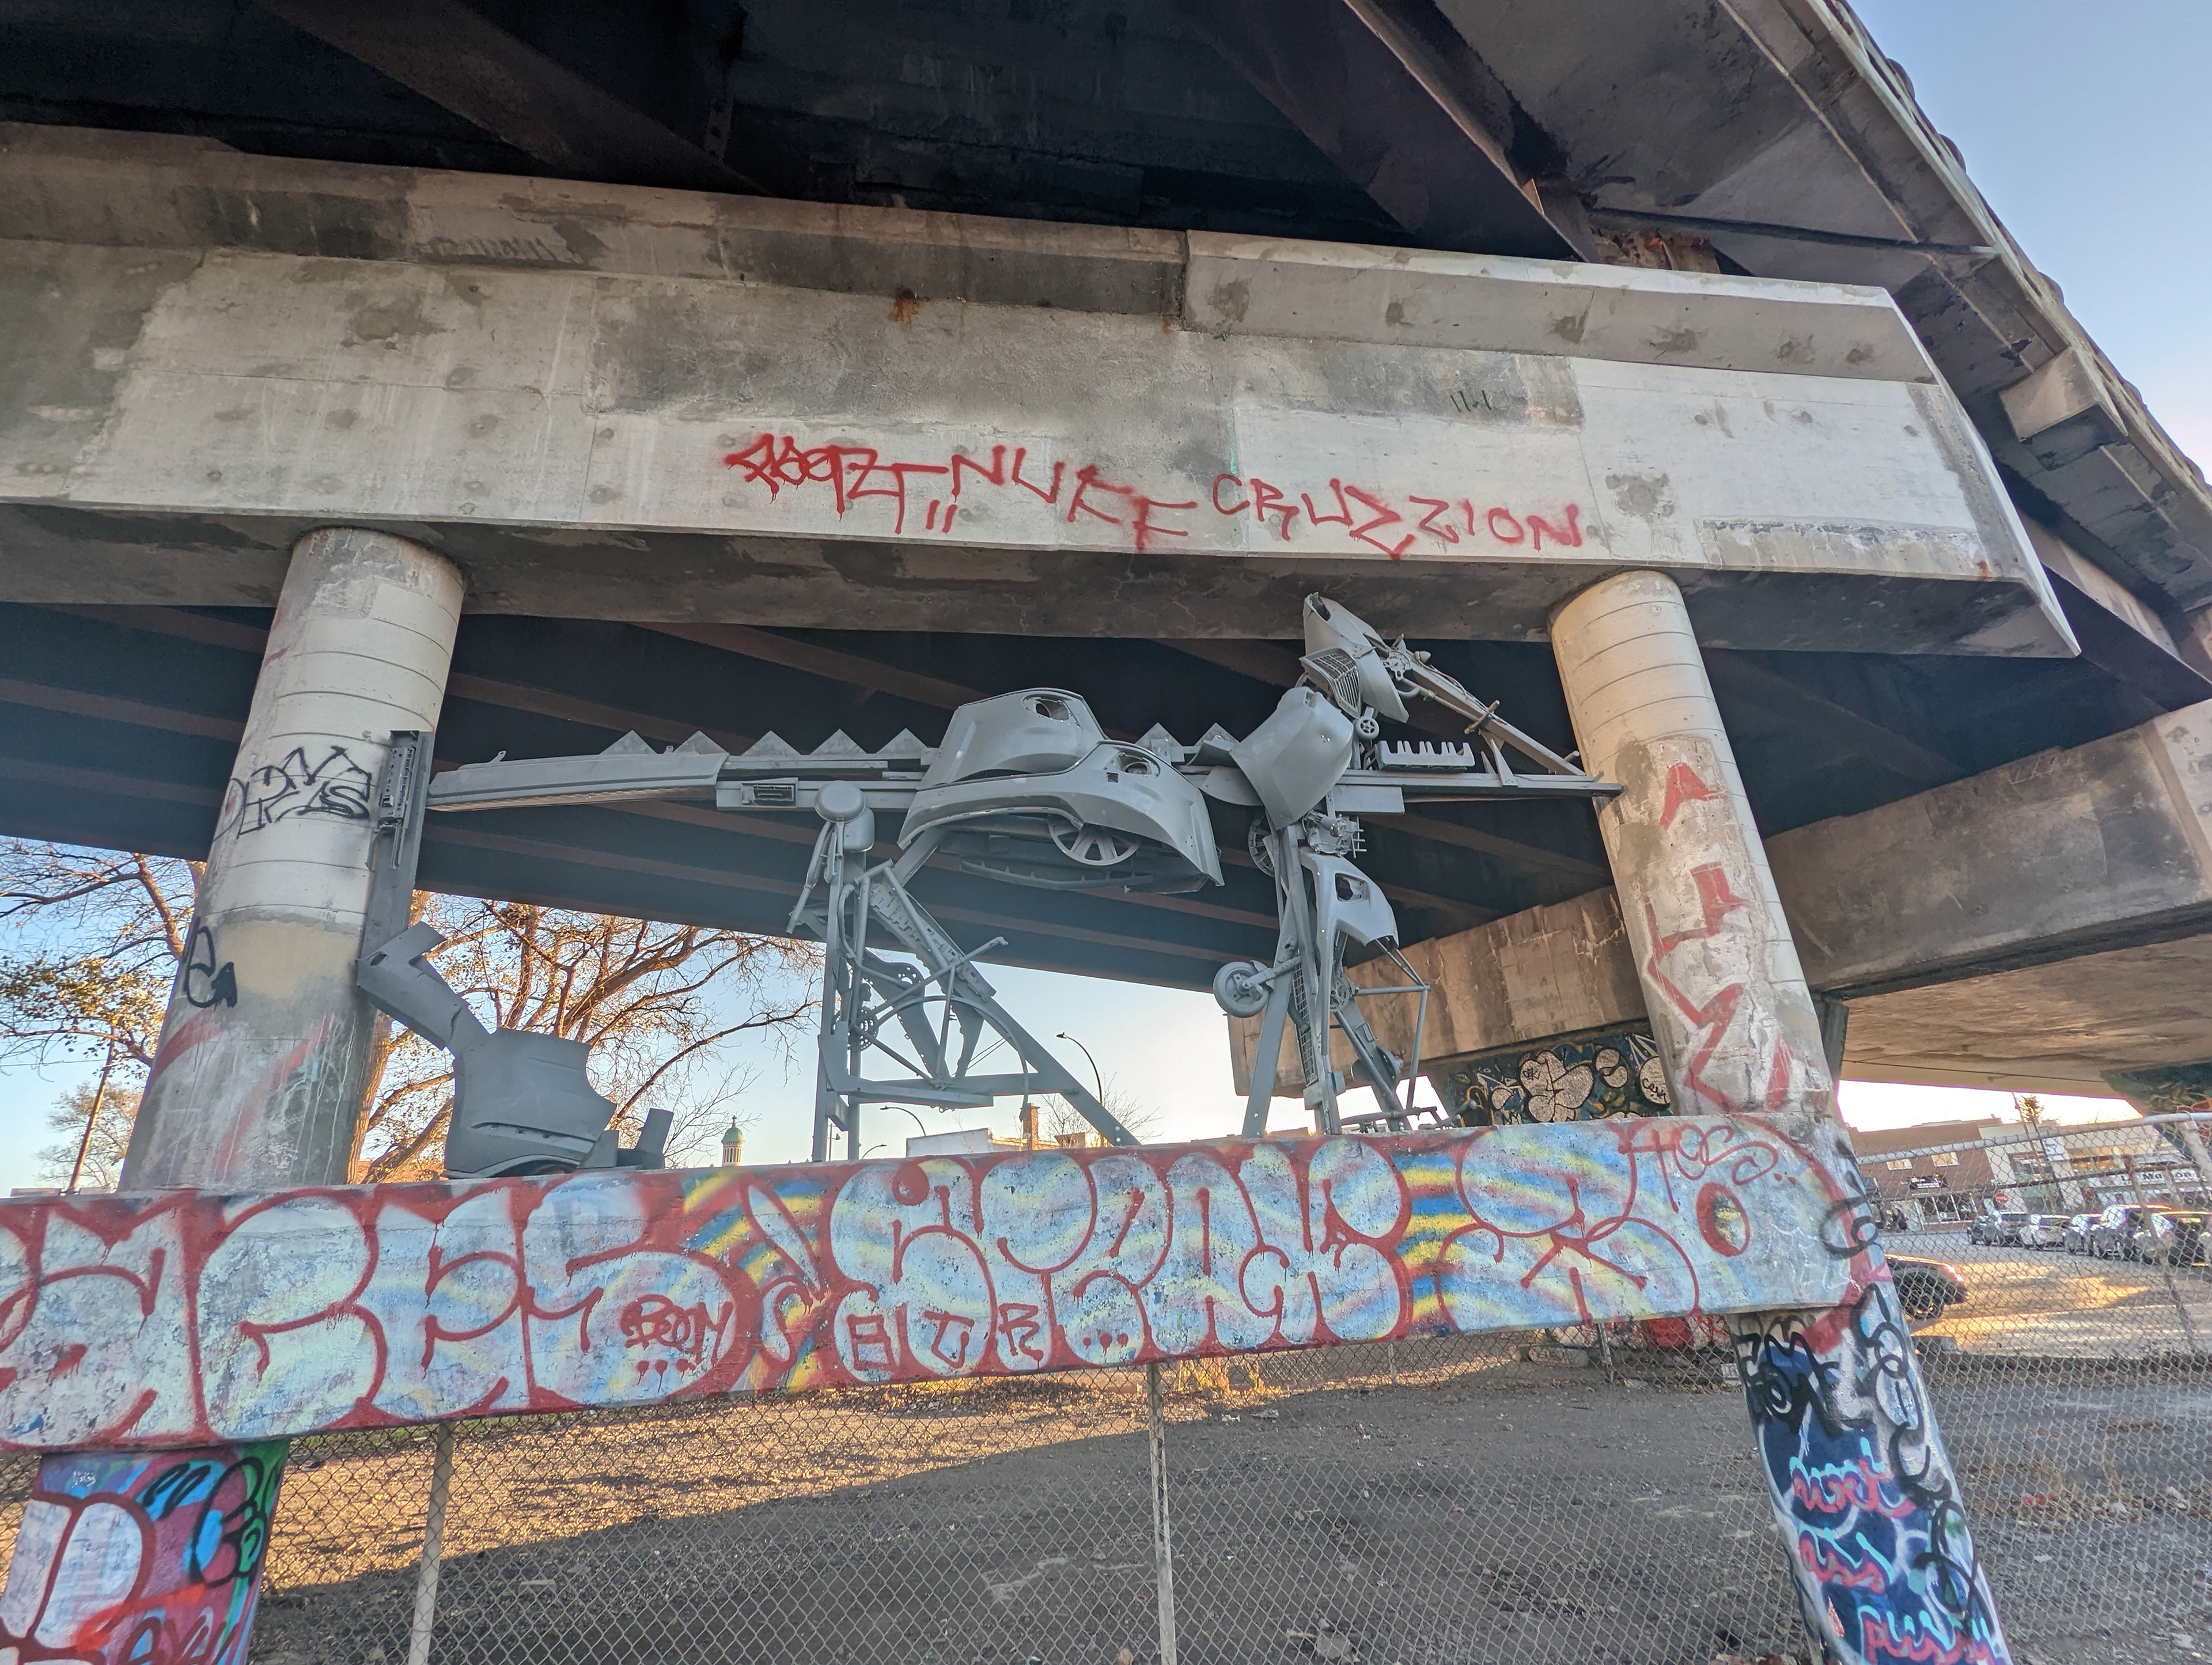
Junko Installation Van Horne Skatepark

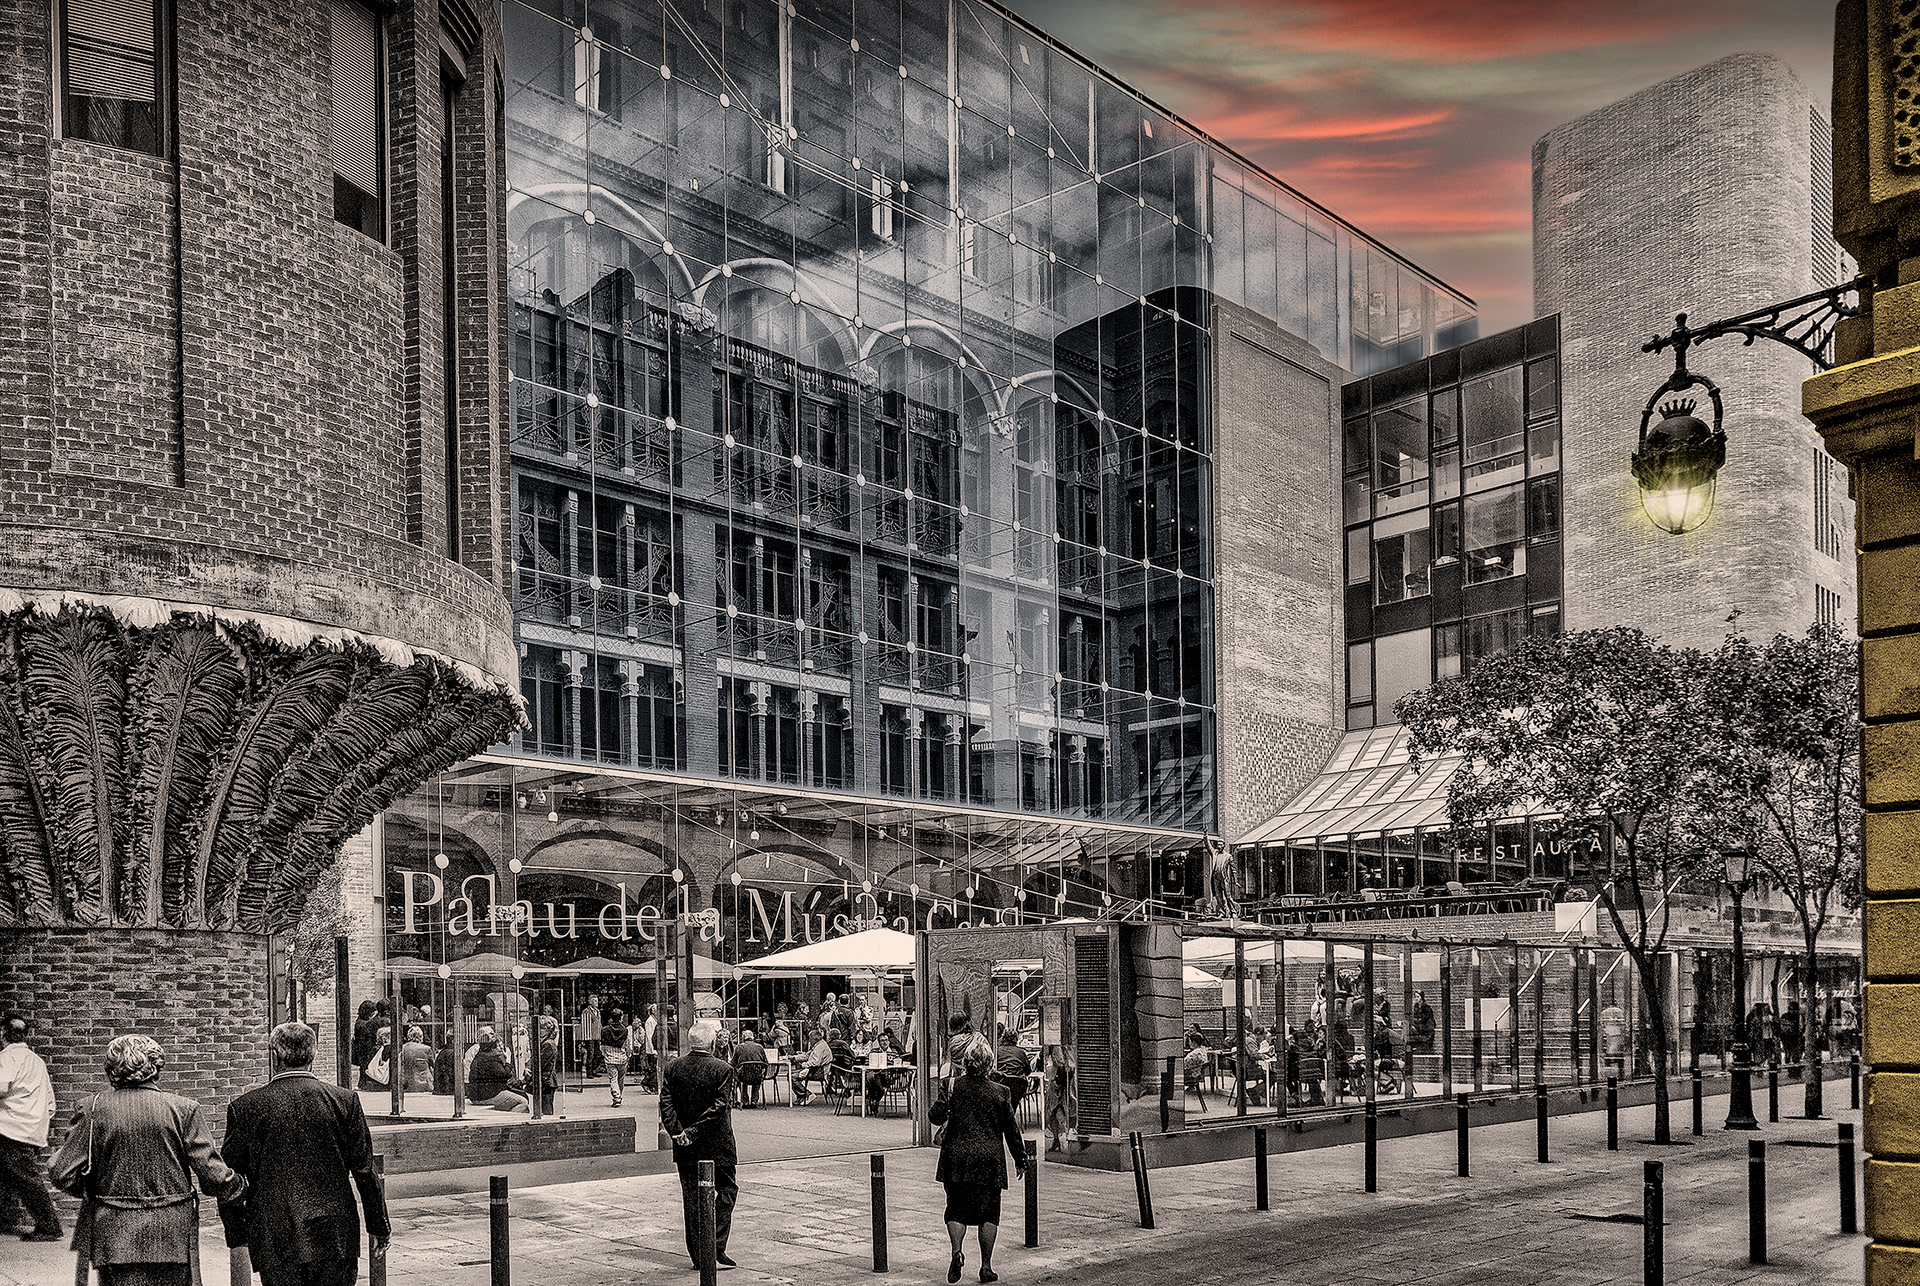
Palau de la Musica, Barcelona

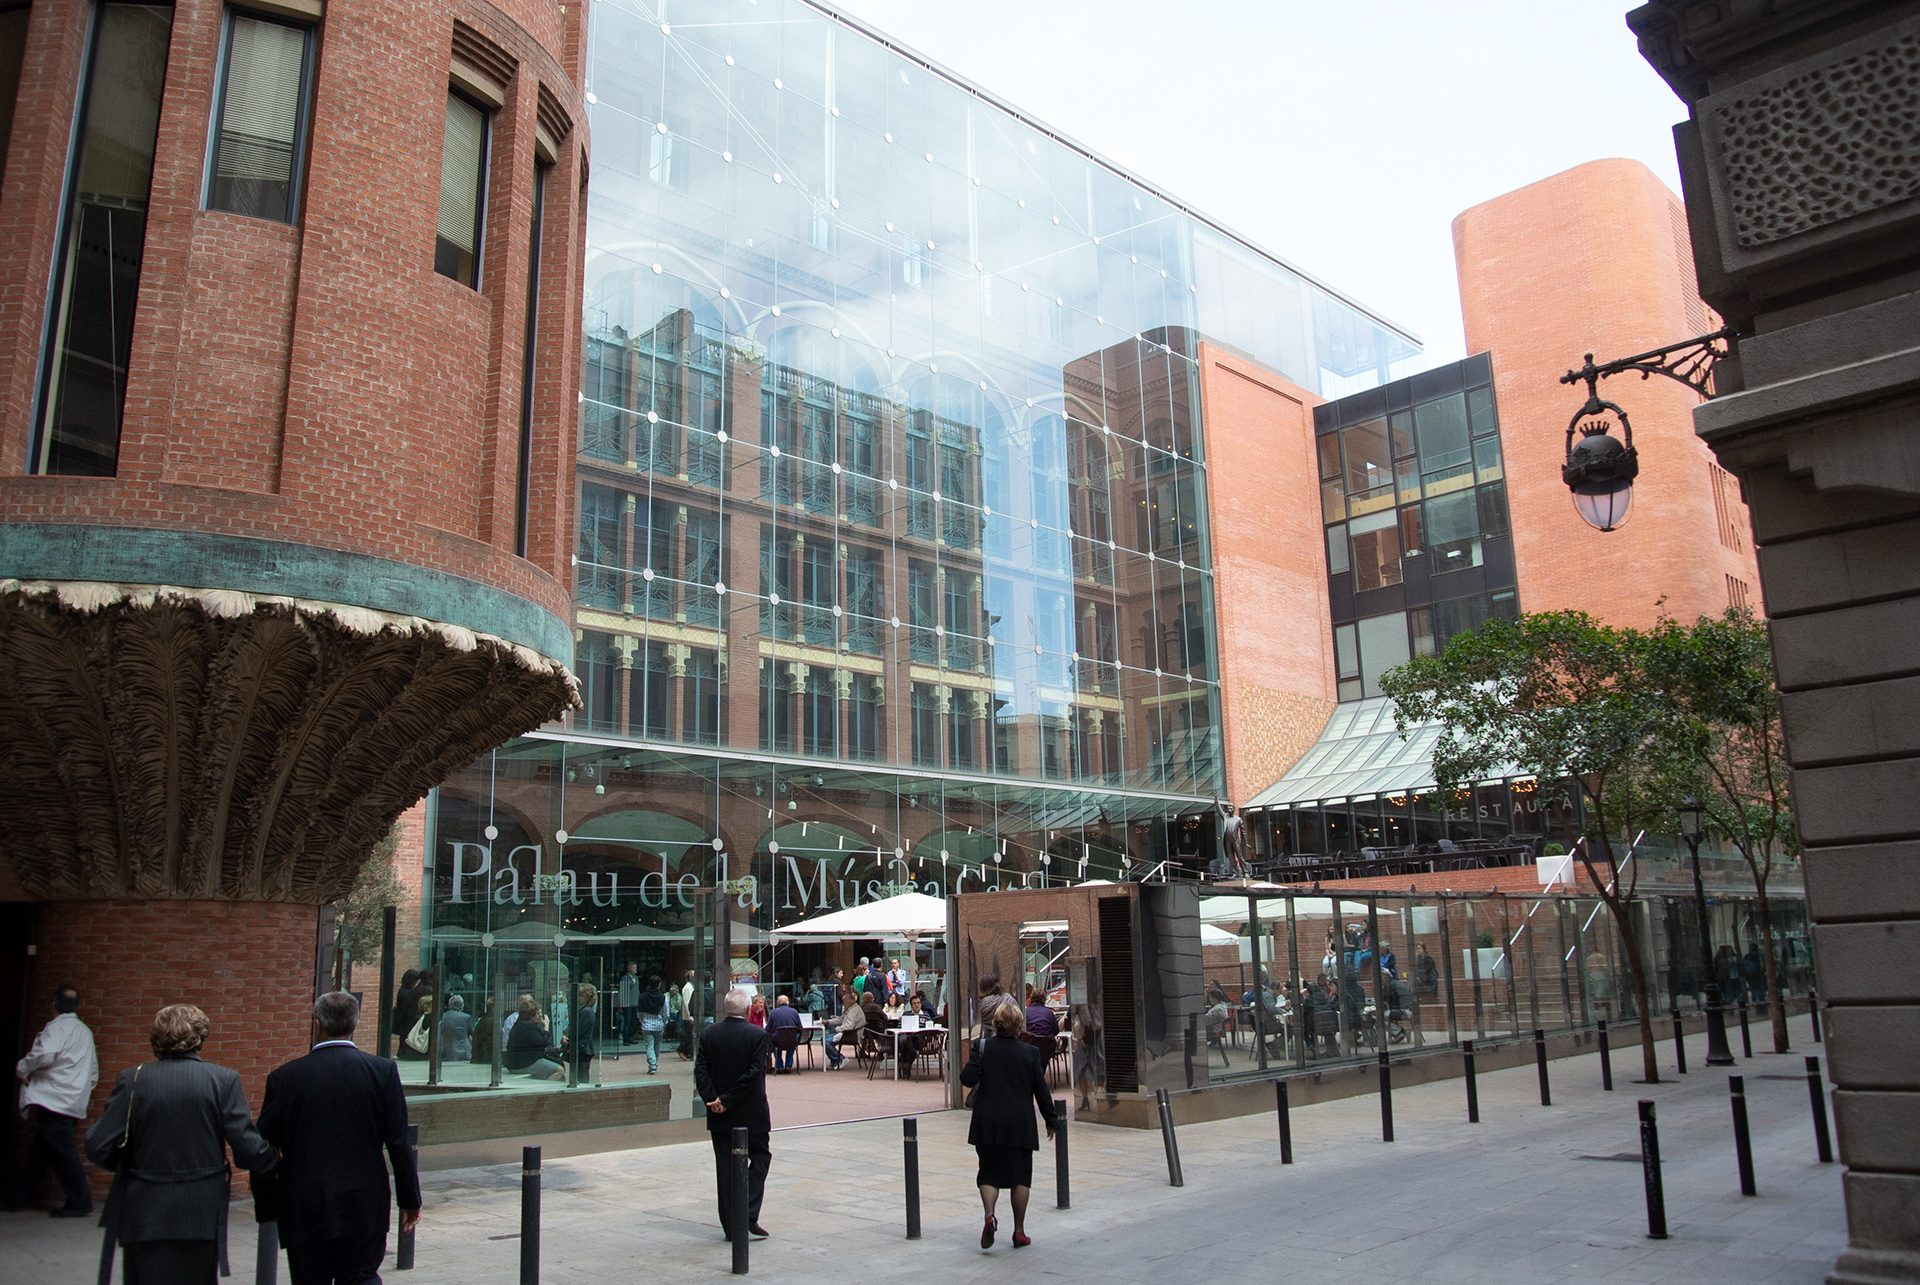
Nikon 1V1 Nikkor 10-30mm f3.5-5.6 @ 10mm (27mm equiv).


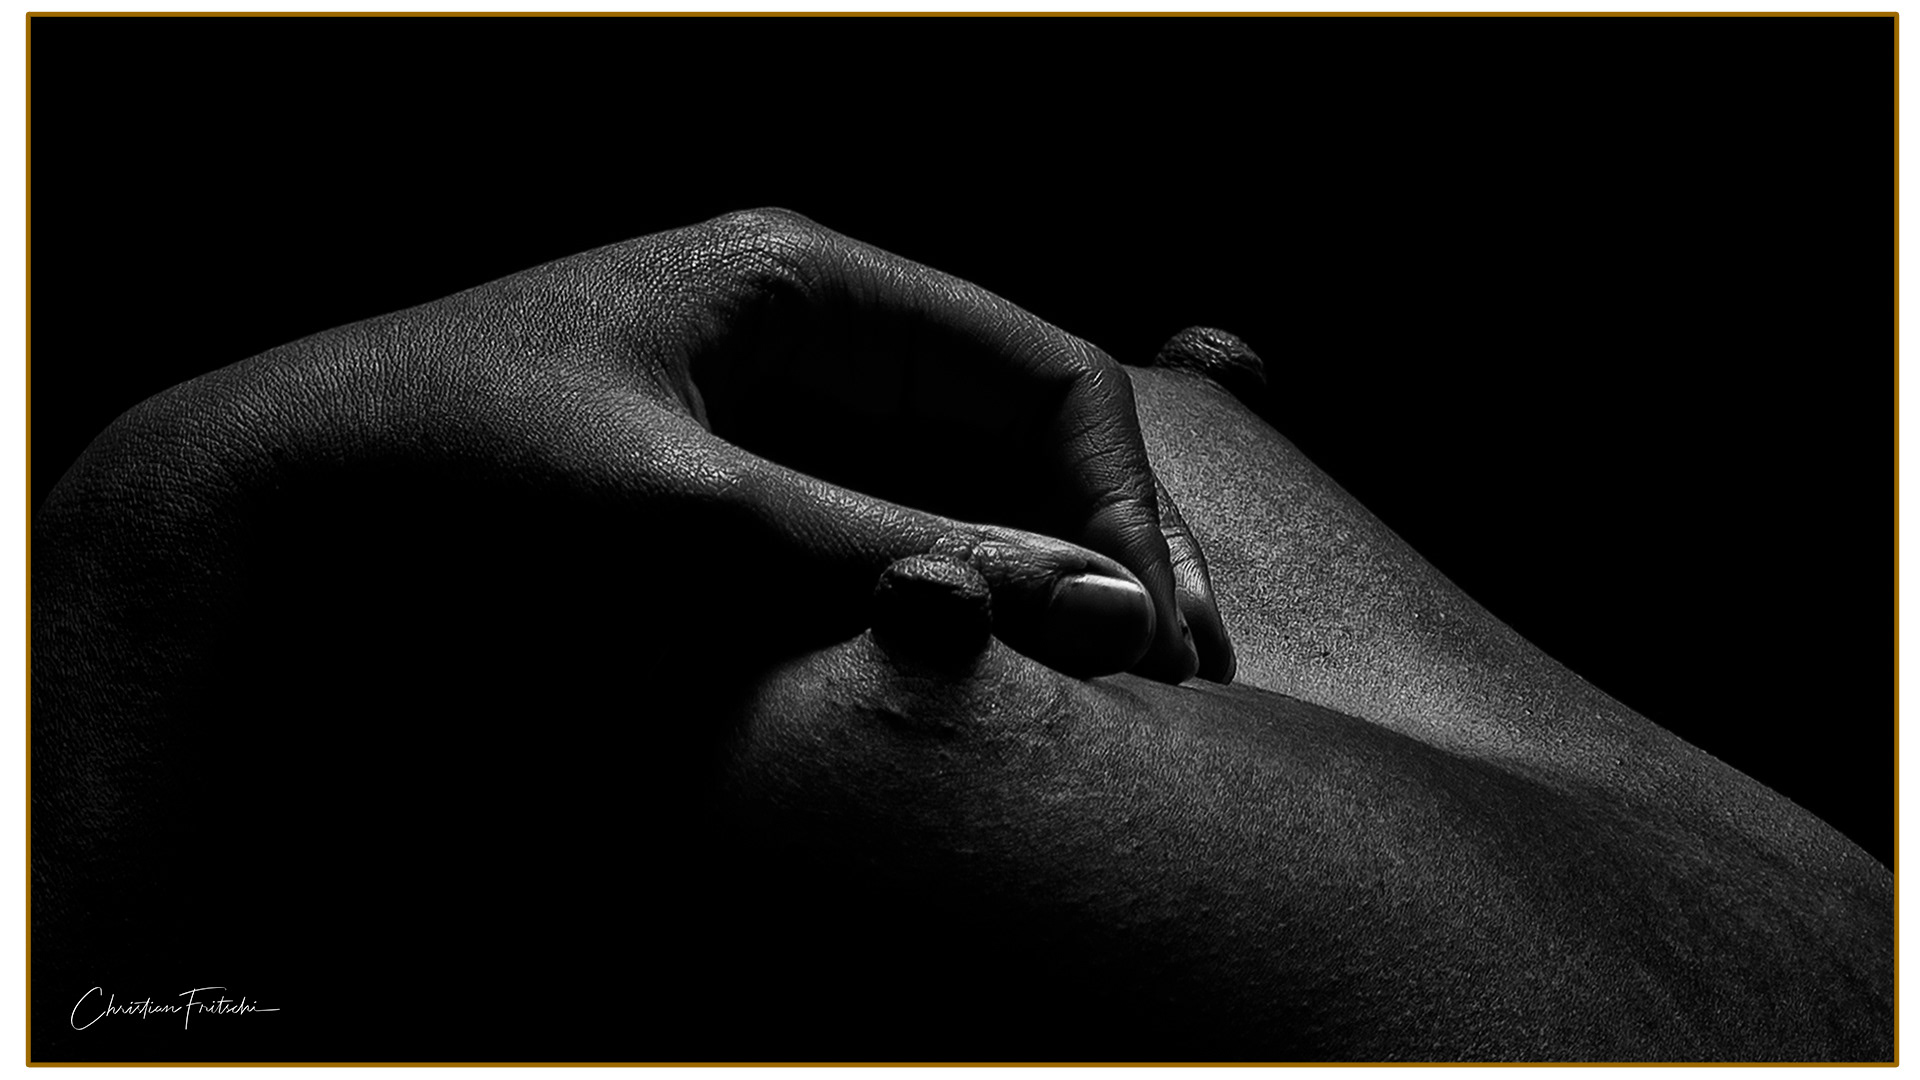
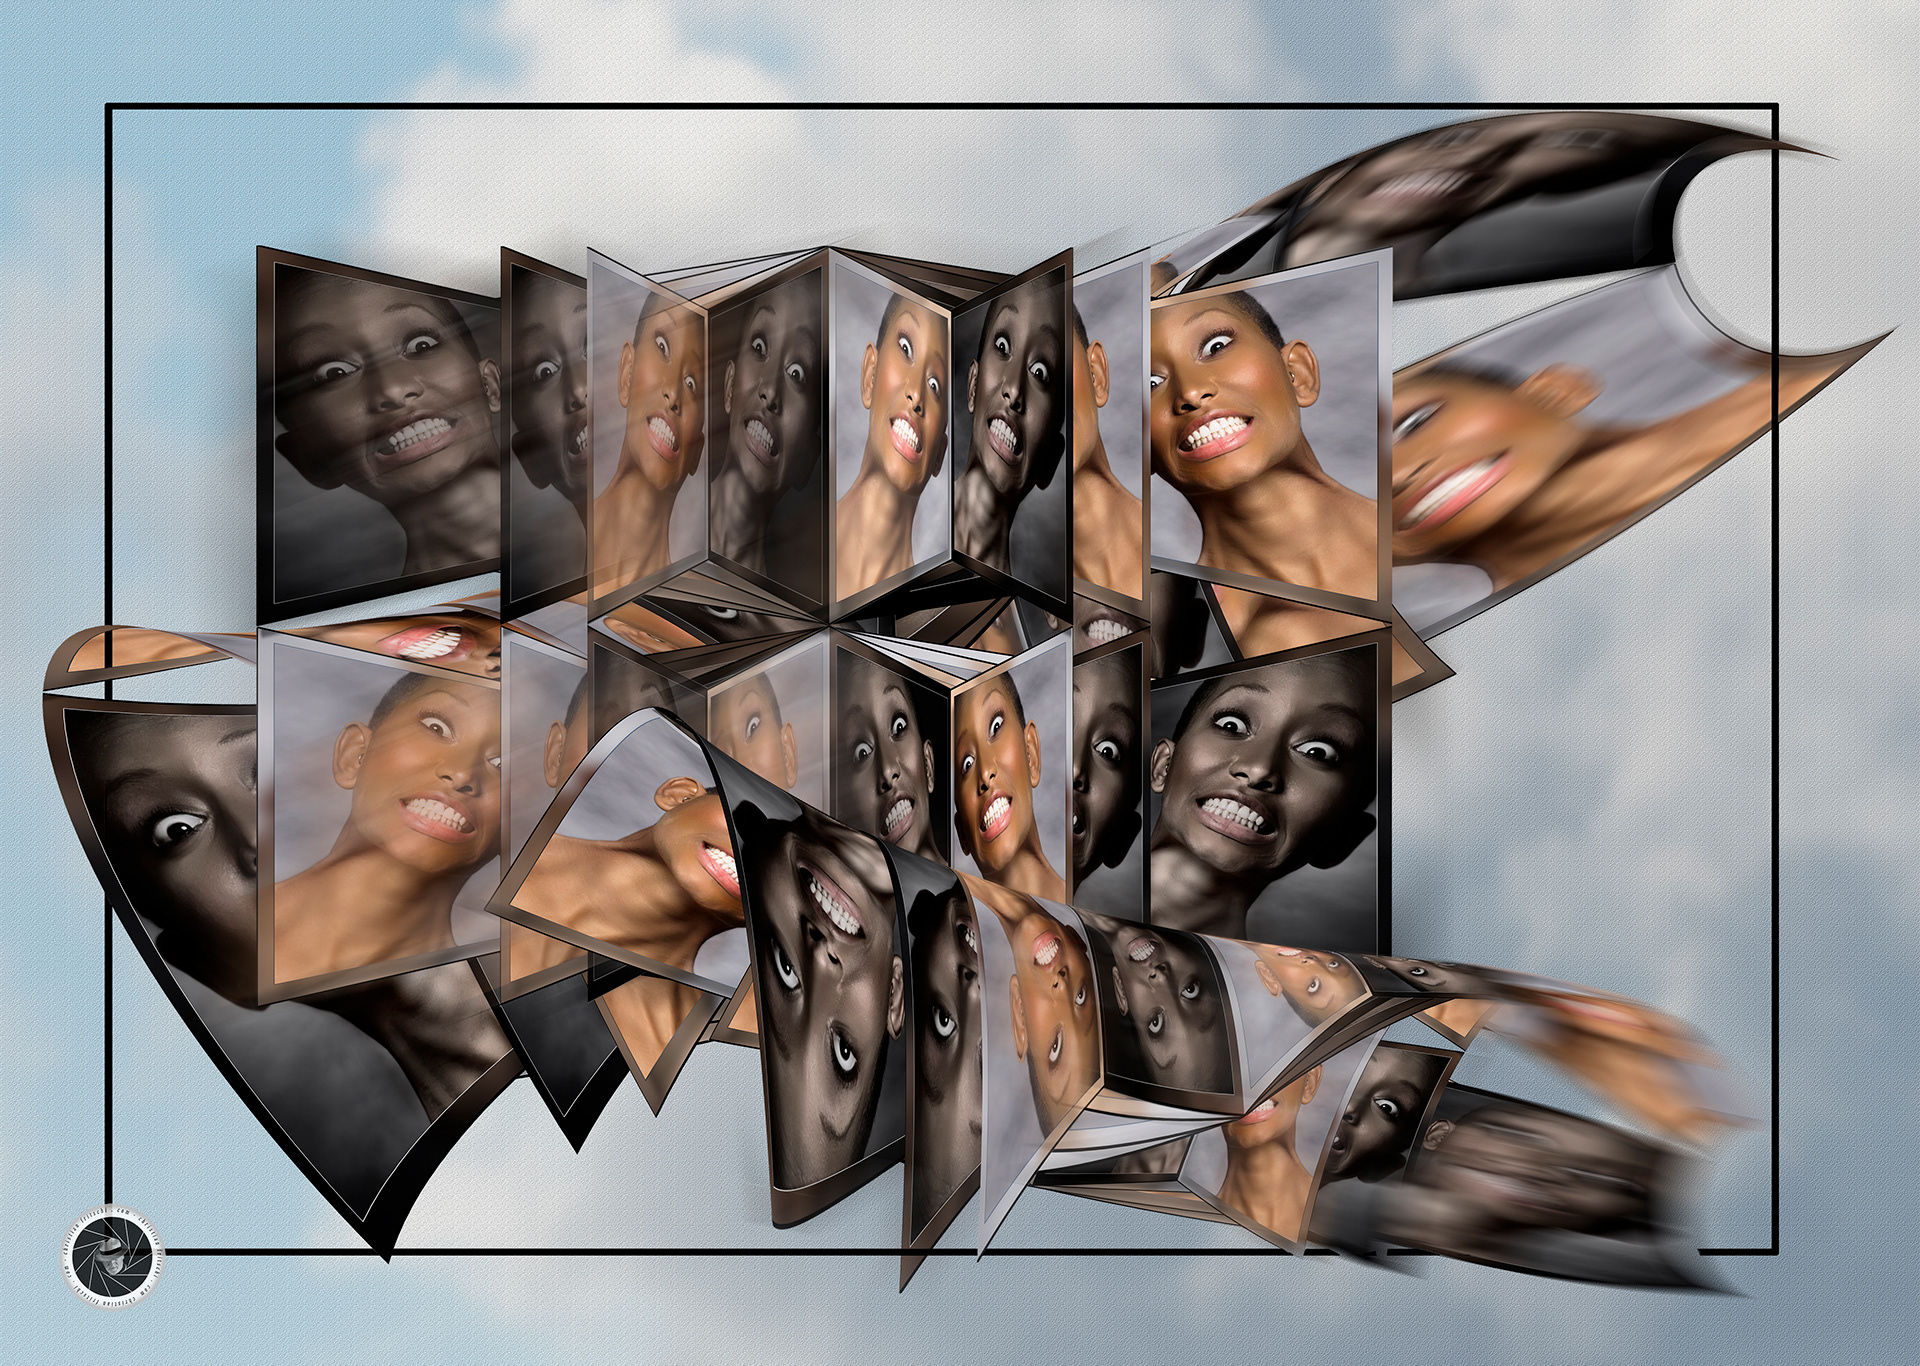
"Body Parts" project. PS CC 2021; Nik SilverEfexPro

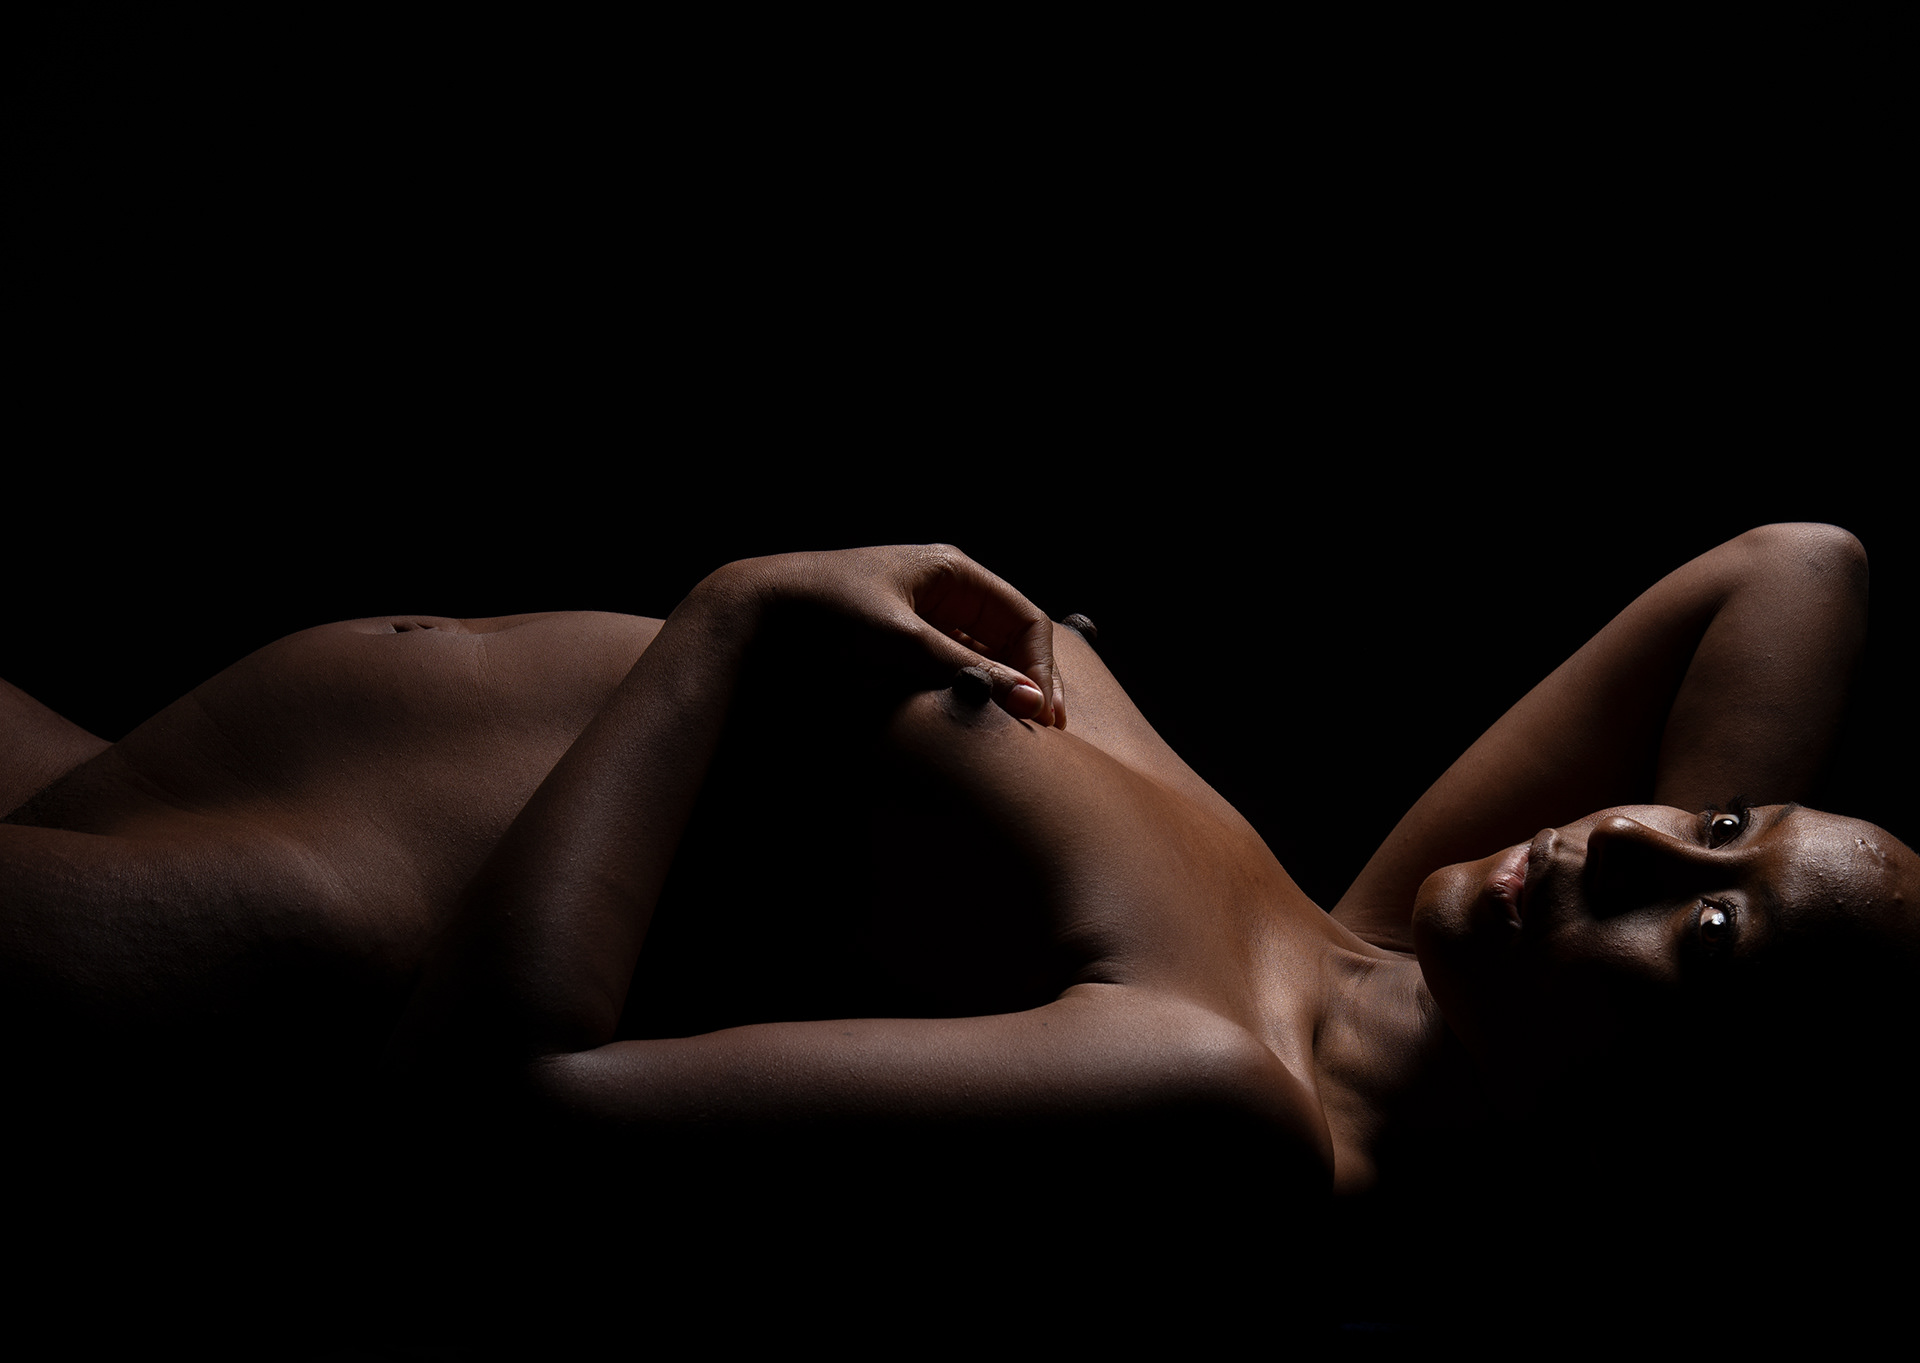
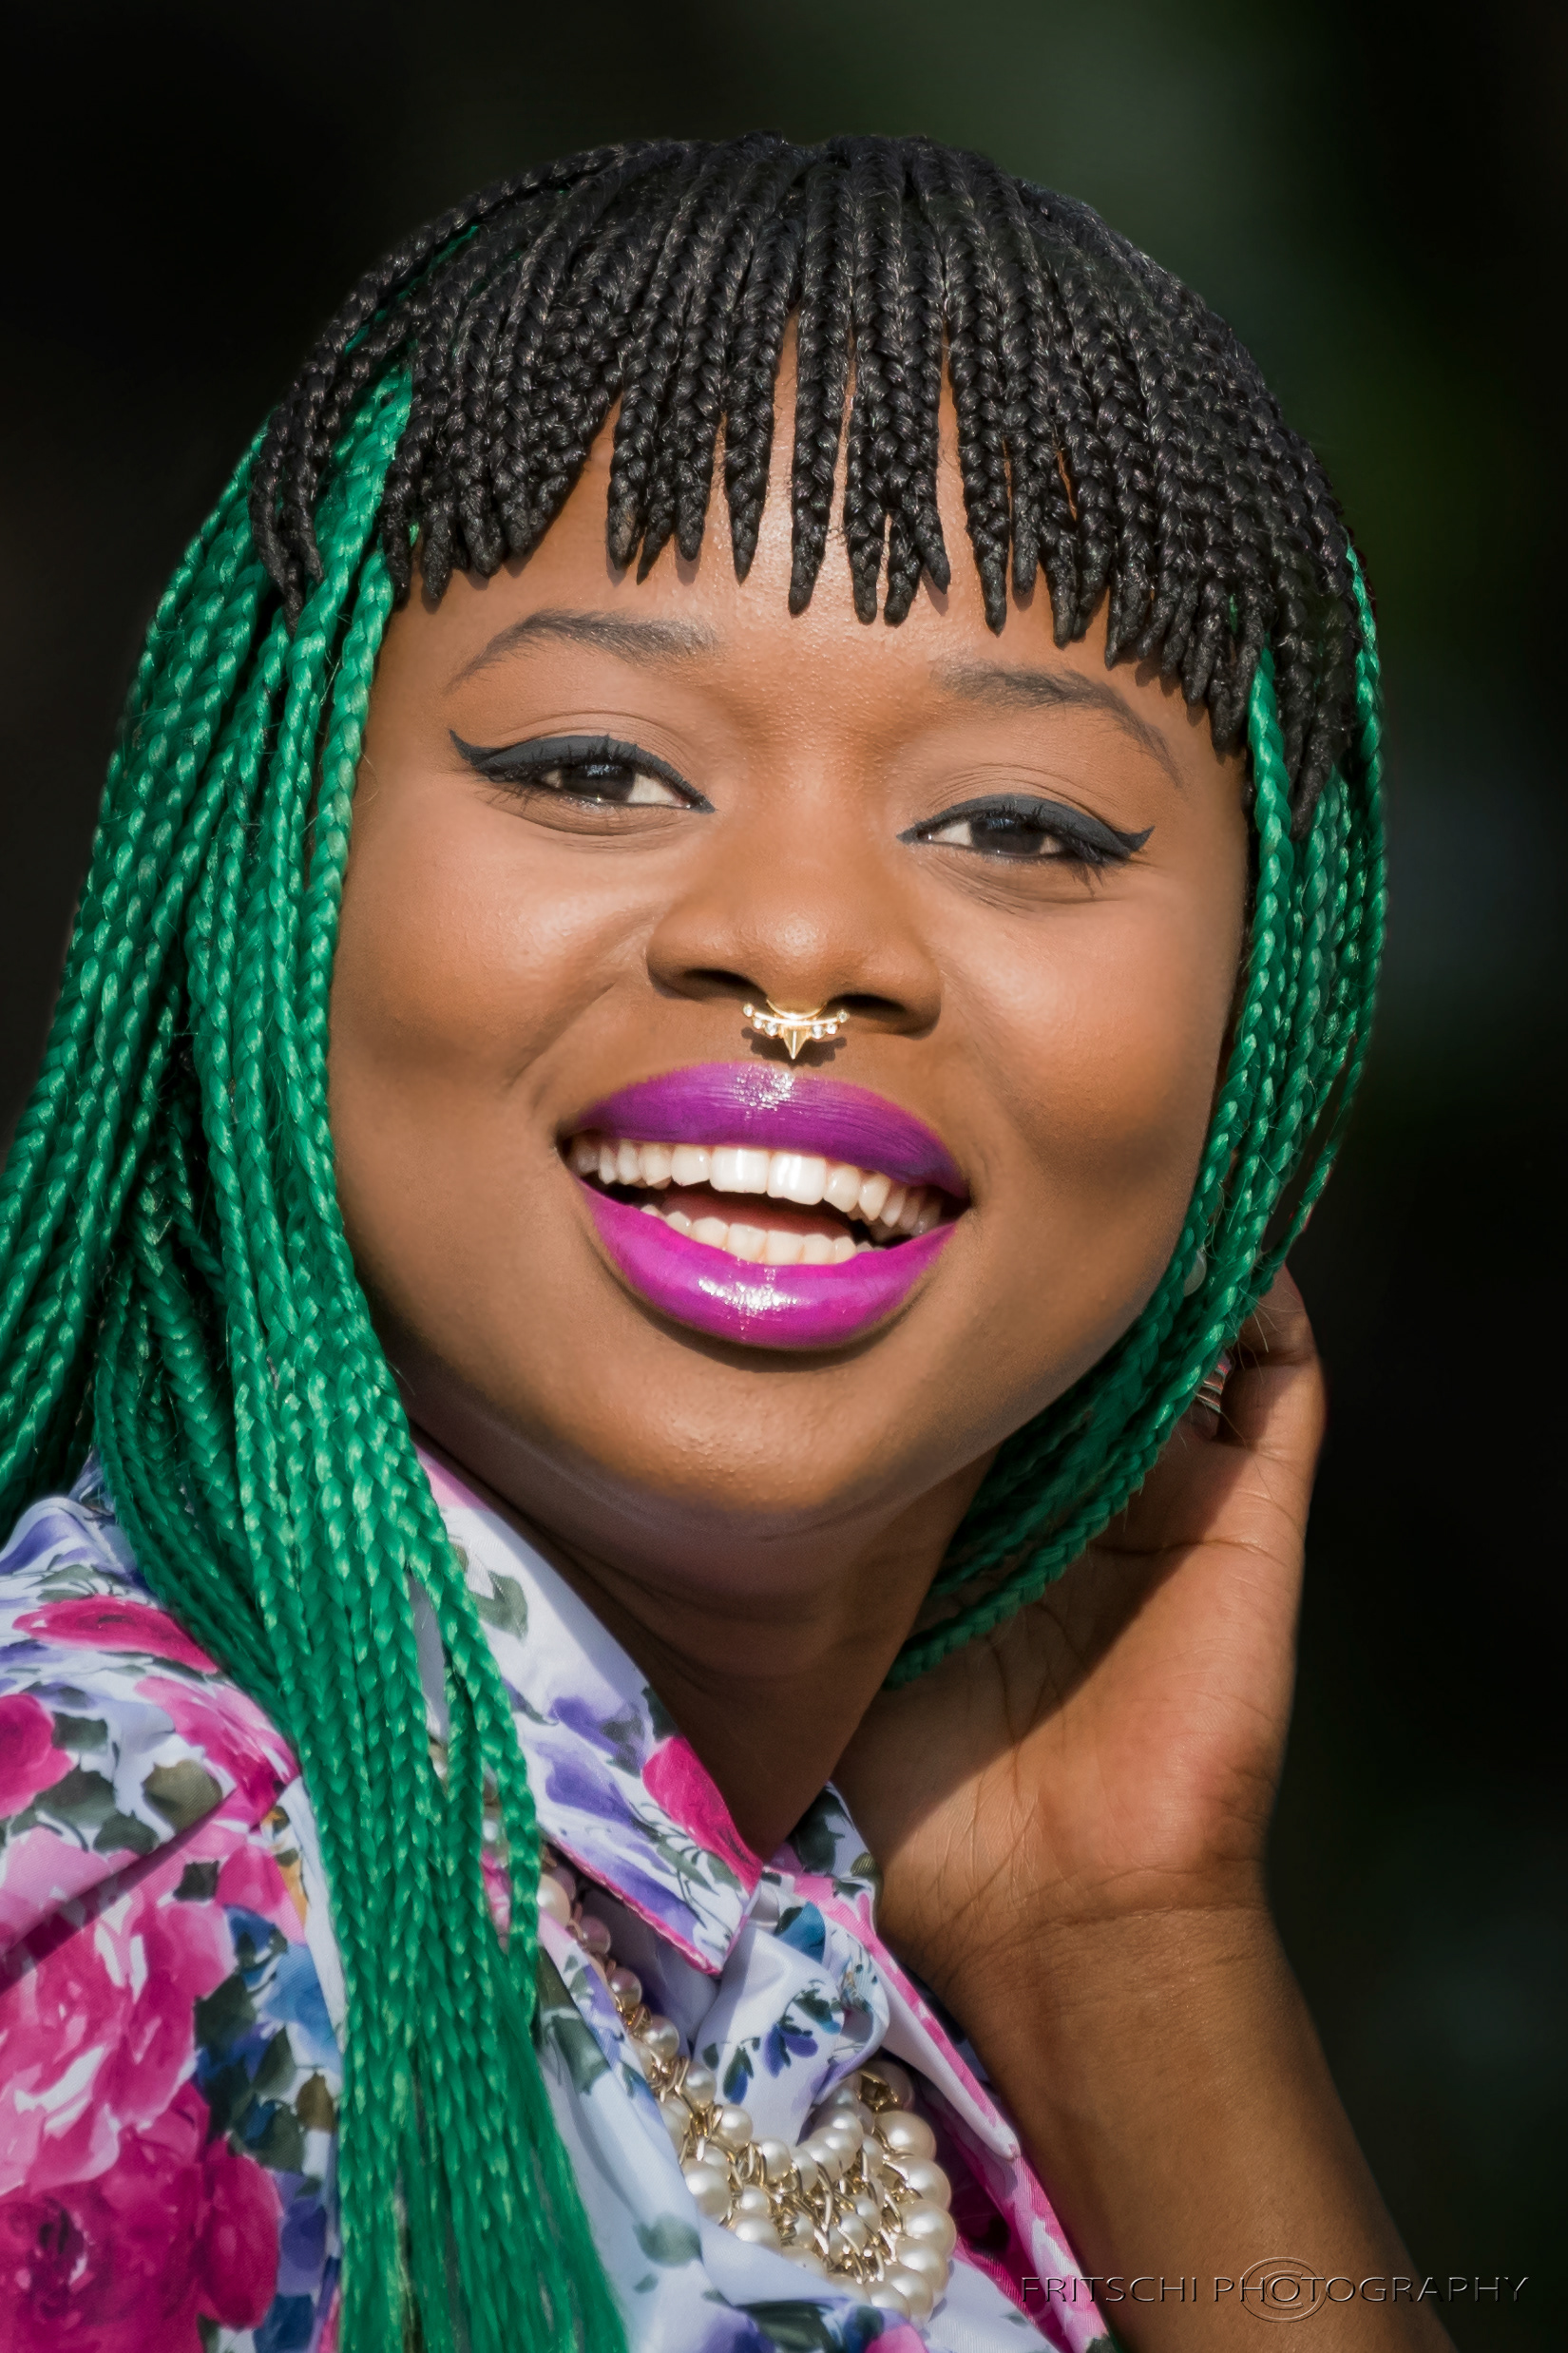
Nikon D600 Nikkor 70-200mm f2.8E FL ED @ 122mm f8 1/160s ISO 100 One Rectangular Softbox, SB800 flash

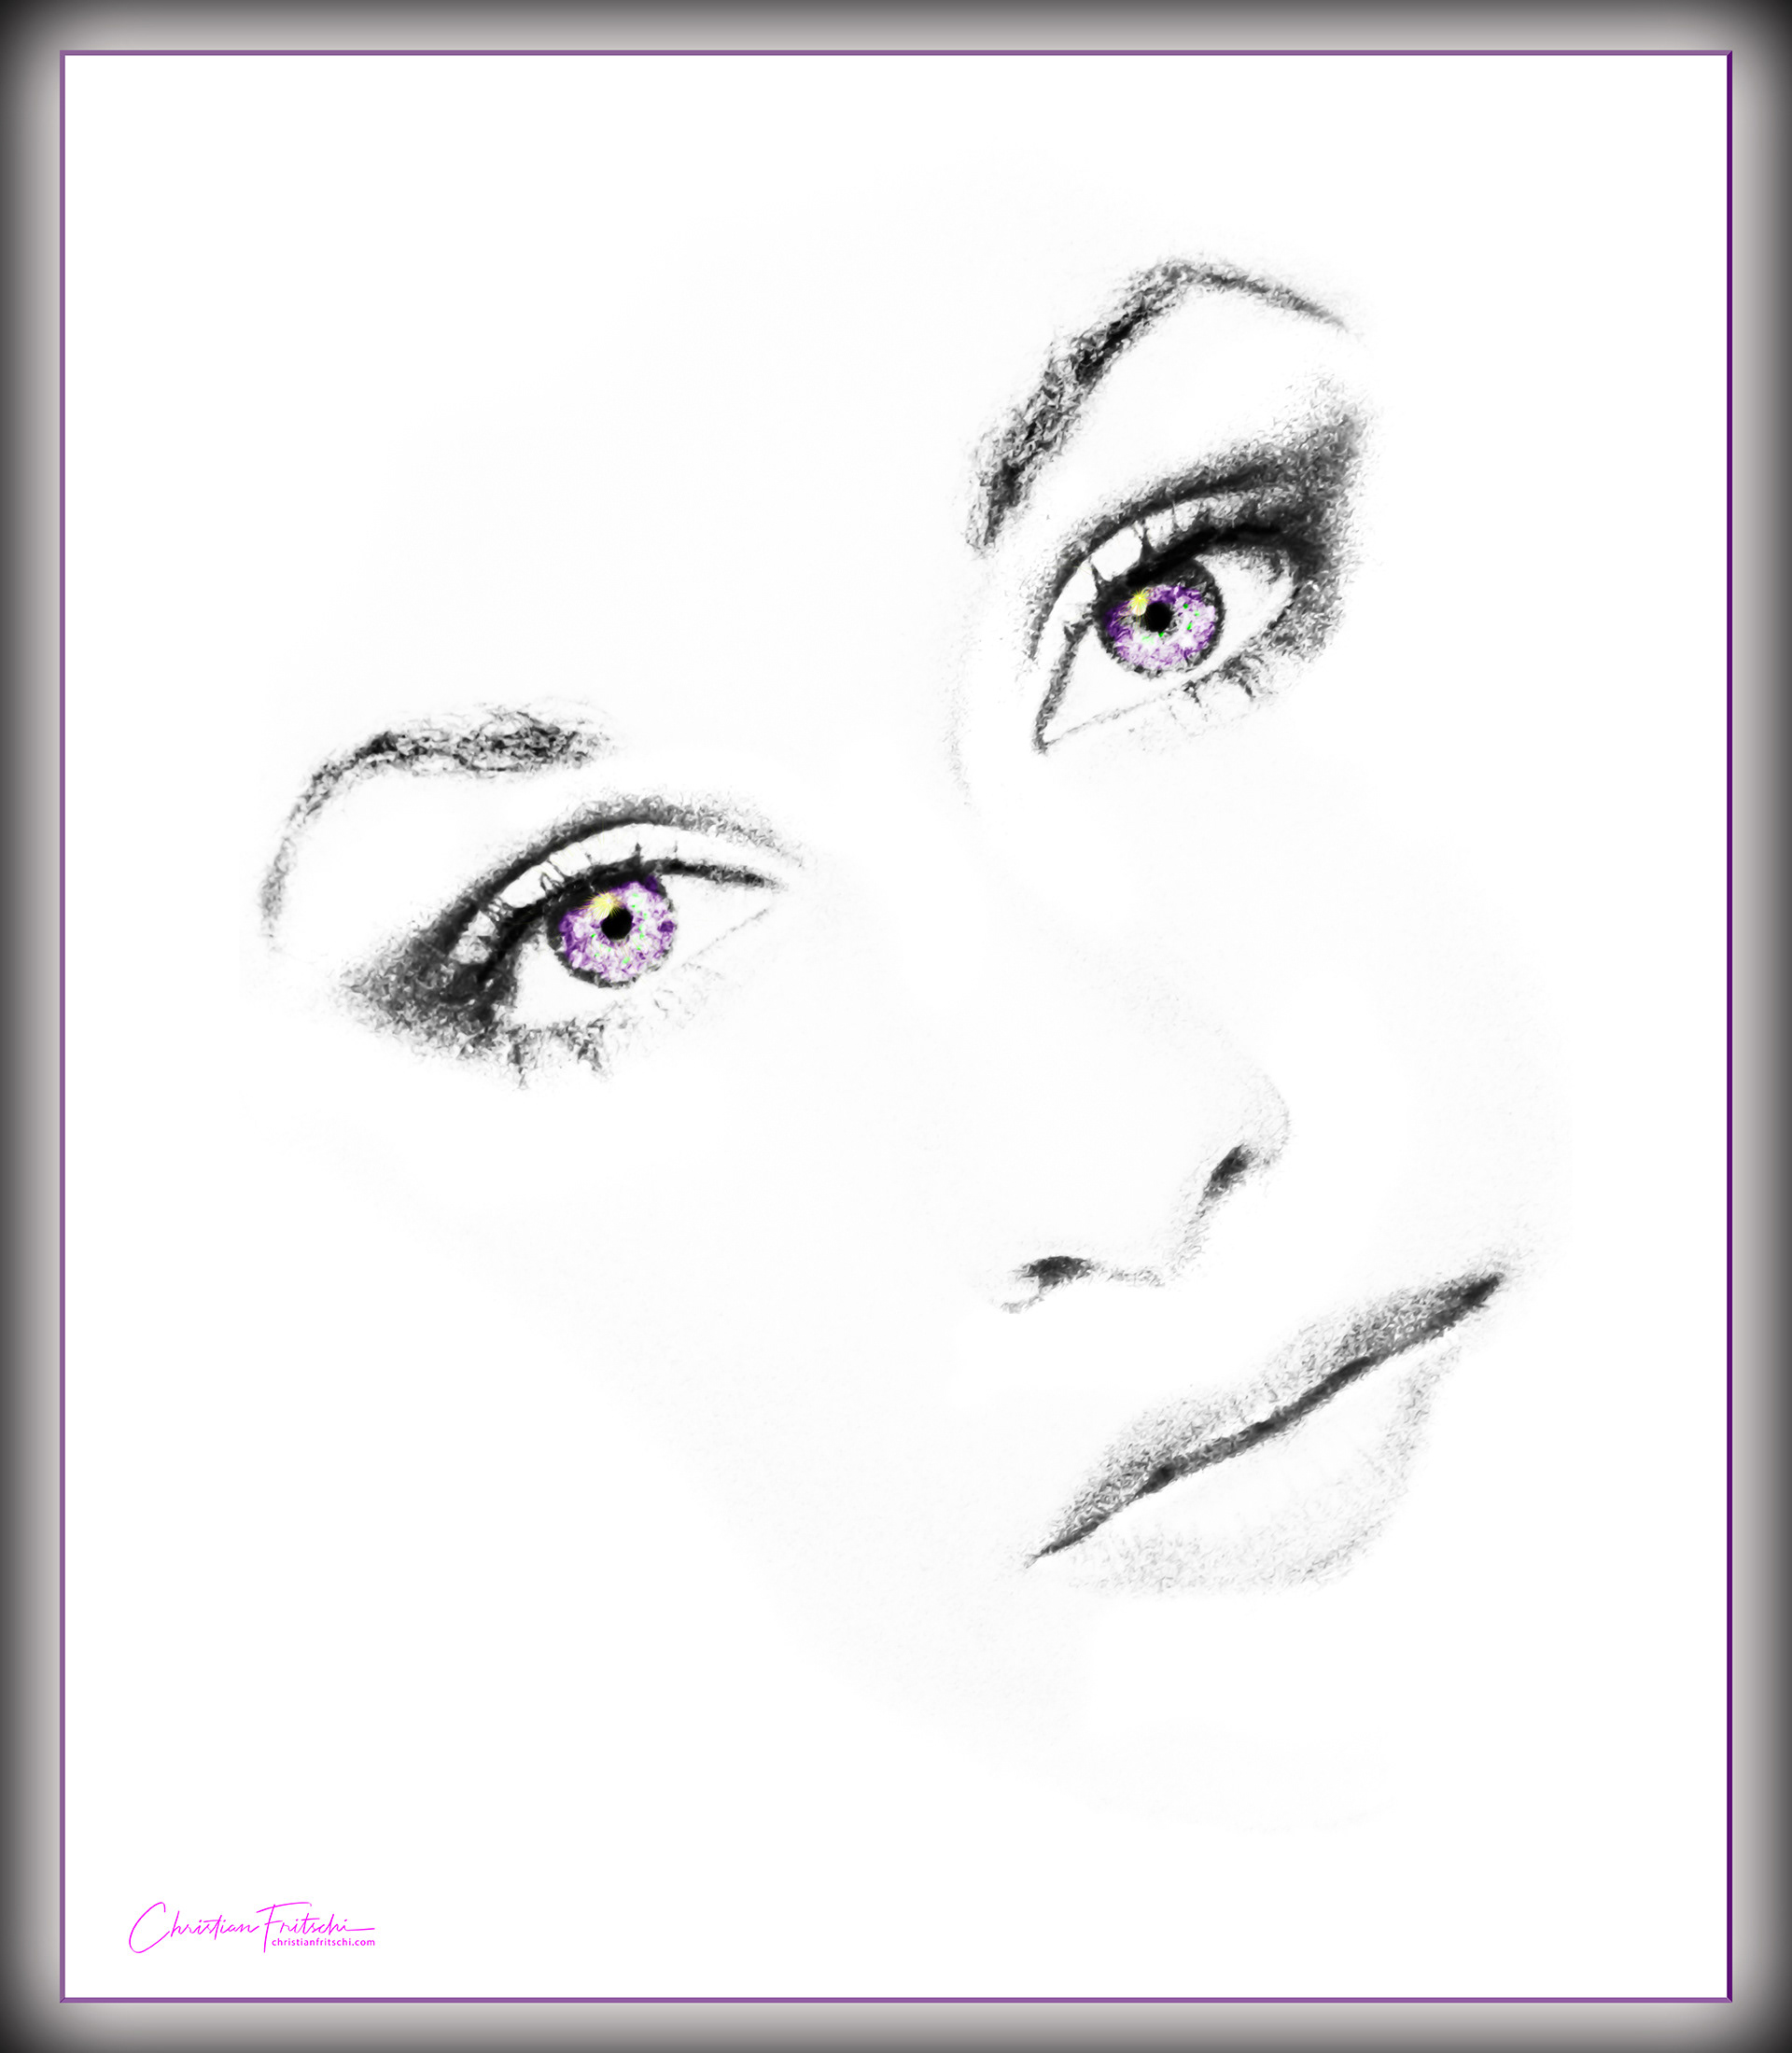
Post-prod in Photoshop CC 2021 and Nik Suite plugin. Eyes colorized with Color replacement brush. Color closely replicating true color as remebered.

Ilford HP 5 Printed on Ilford Ilfobrom mat paper. Scanned on Epson Perfection V300. Image taken in early '80's. Nikon FE; Zoom-Nikkor 35-105mm

Postprod in PS CC 2021: closer crop, skin smoothing, elimination of left hand & forearm

Nikon D500; Nikkor 200-500mm @ 500mm (750mm equiv) f5.6 1/1600s ISO 720

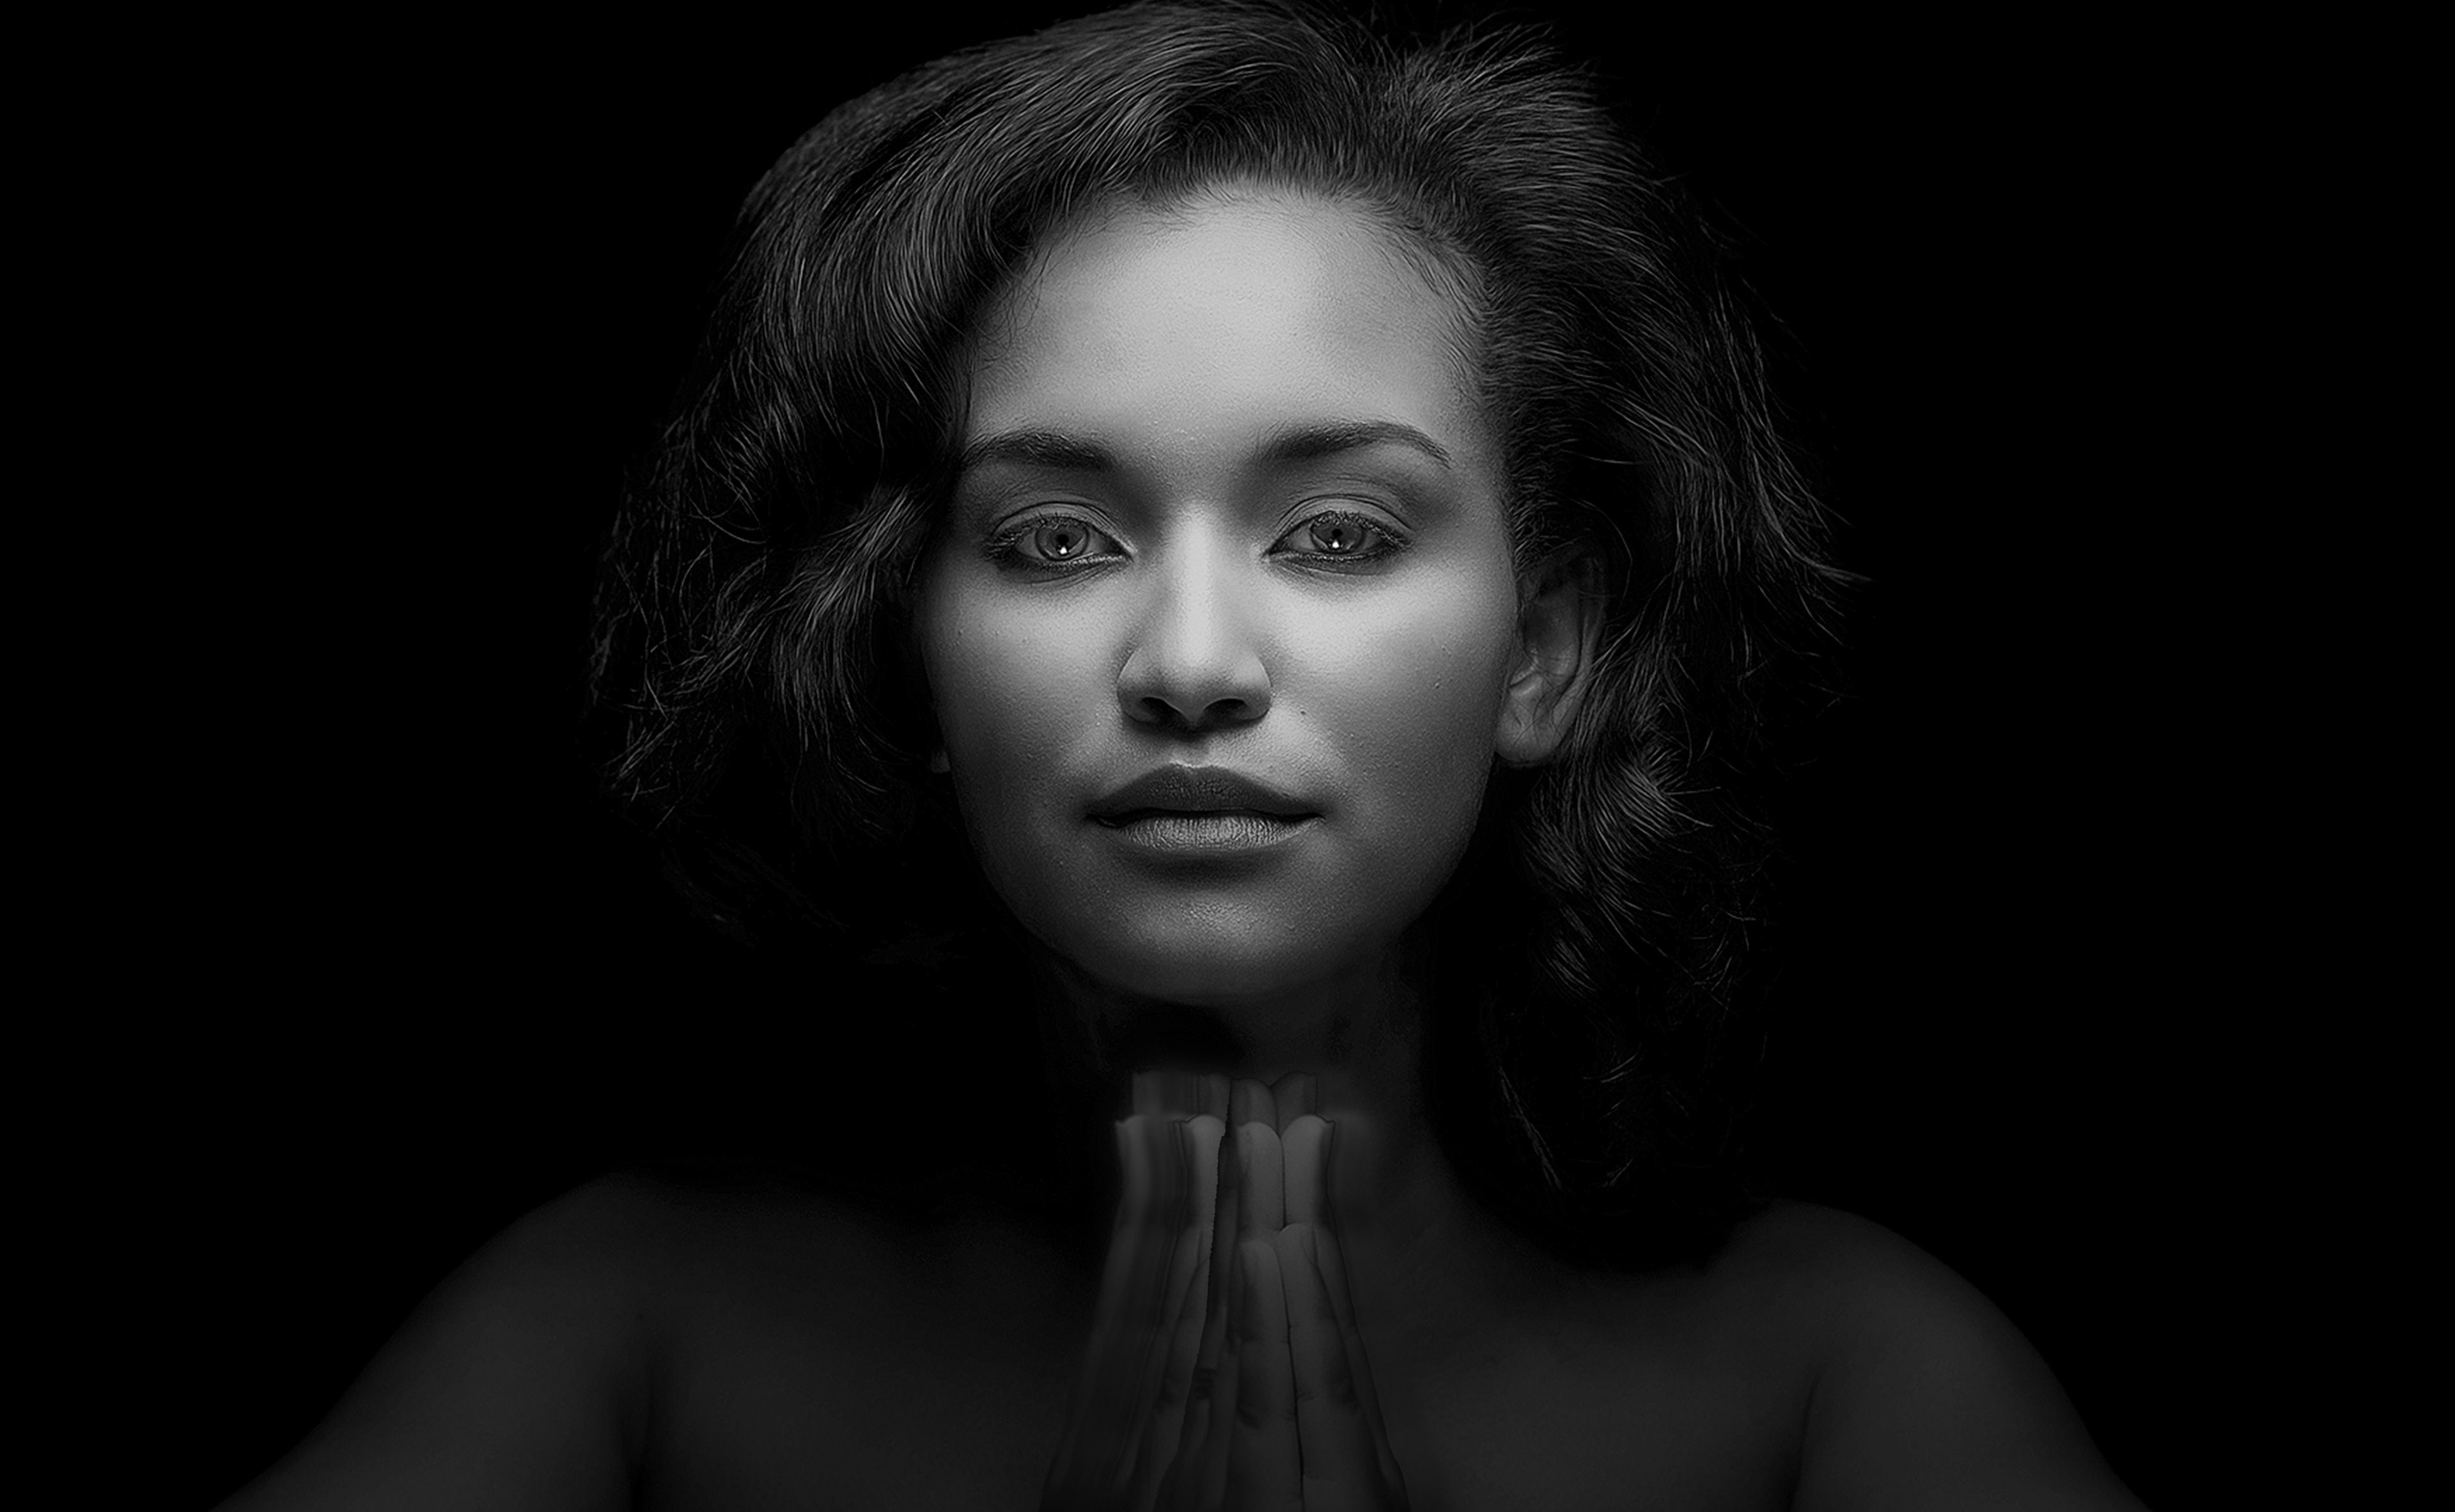
"The Elusive Portrait" PS CC 2020

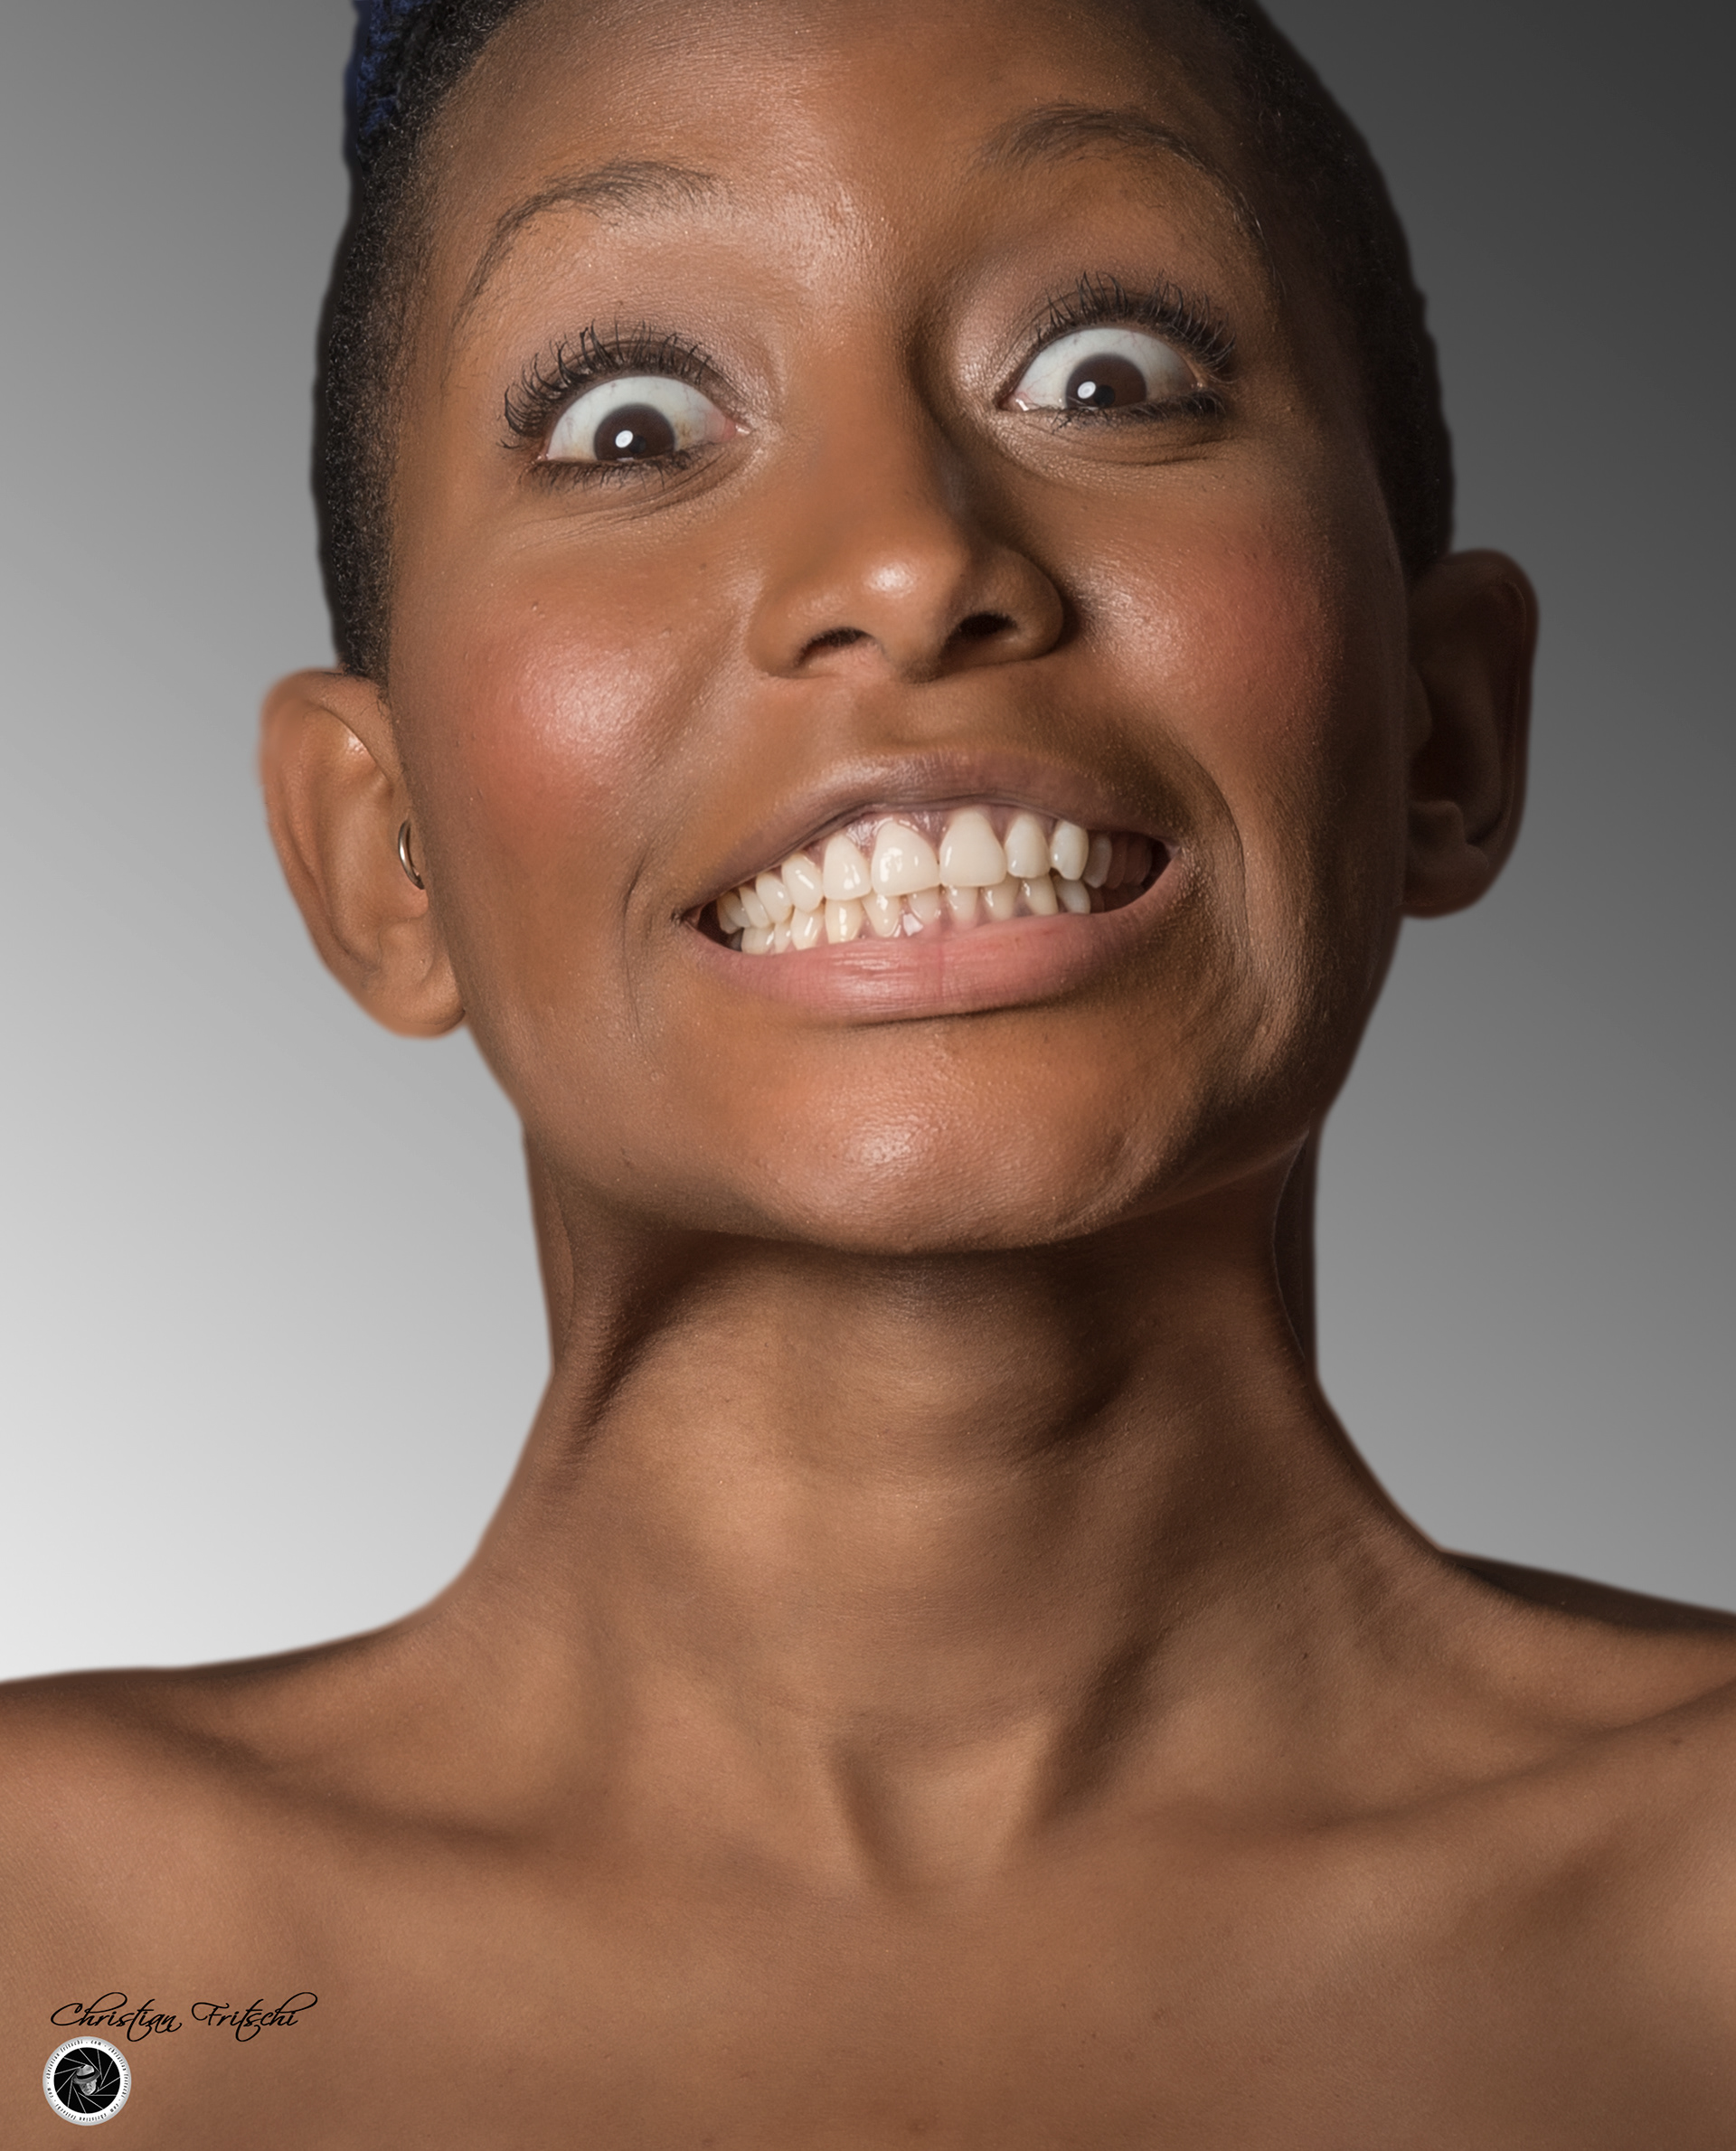
Nikon D600 Nikkor 70-200mm f2.8E FL ED @ 200mm f8 1/125s ISO 100

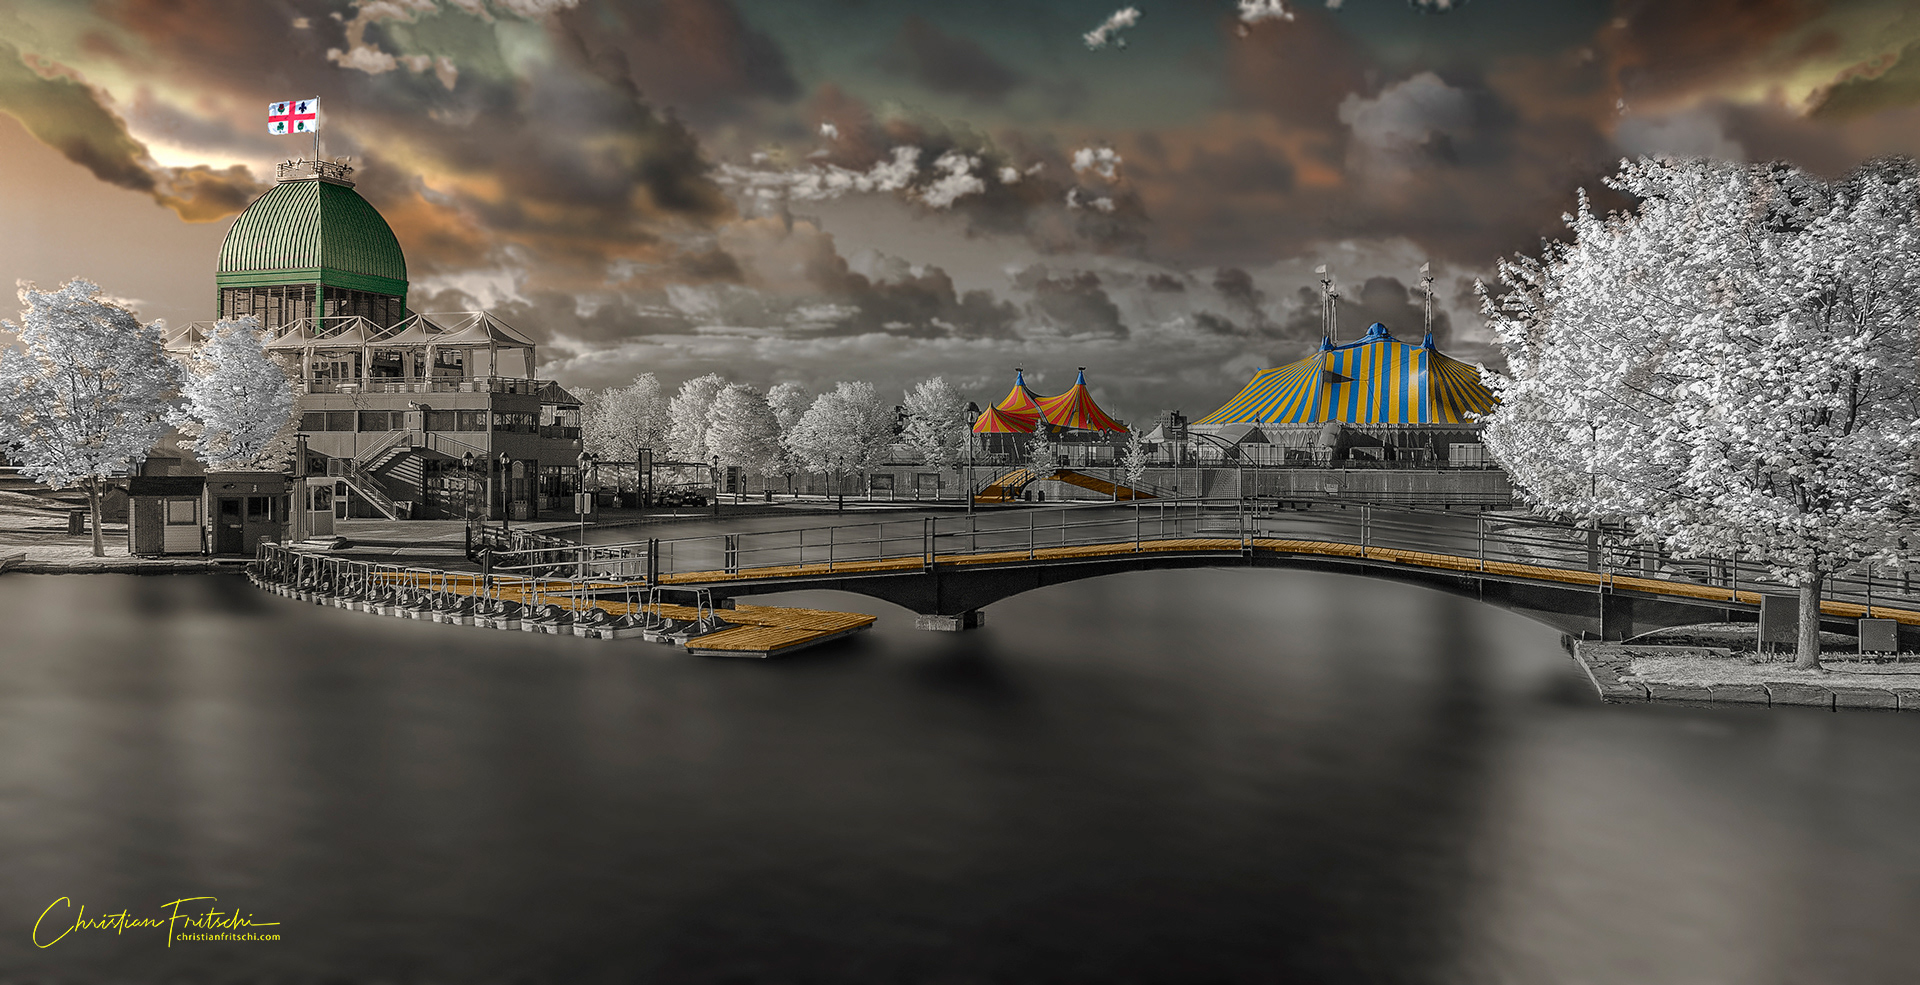
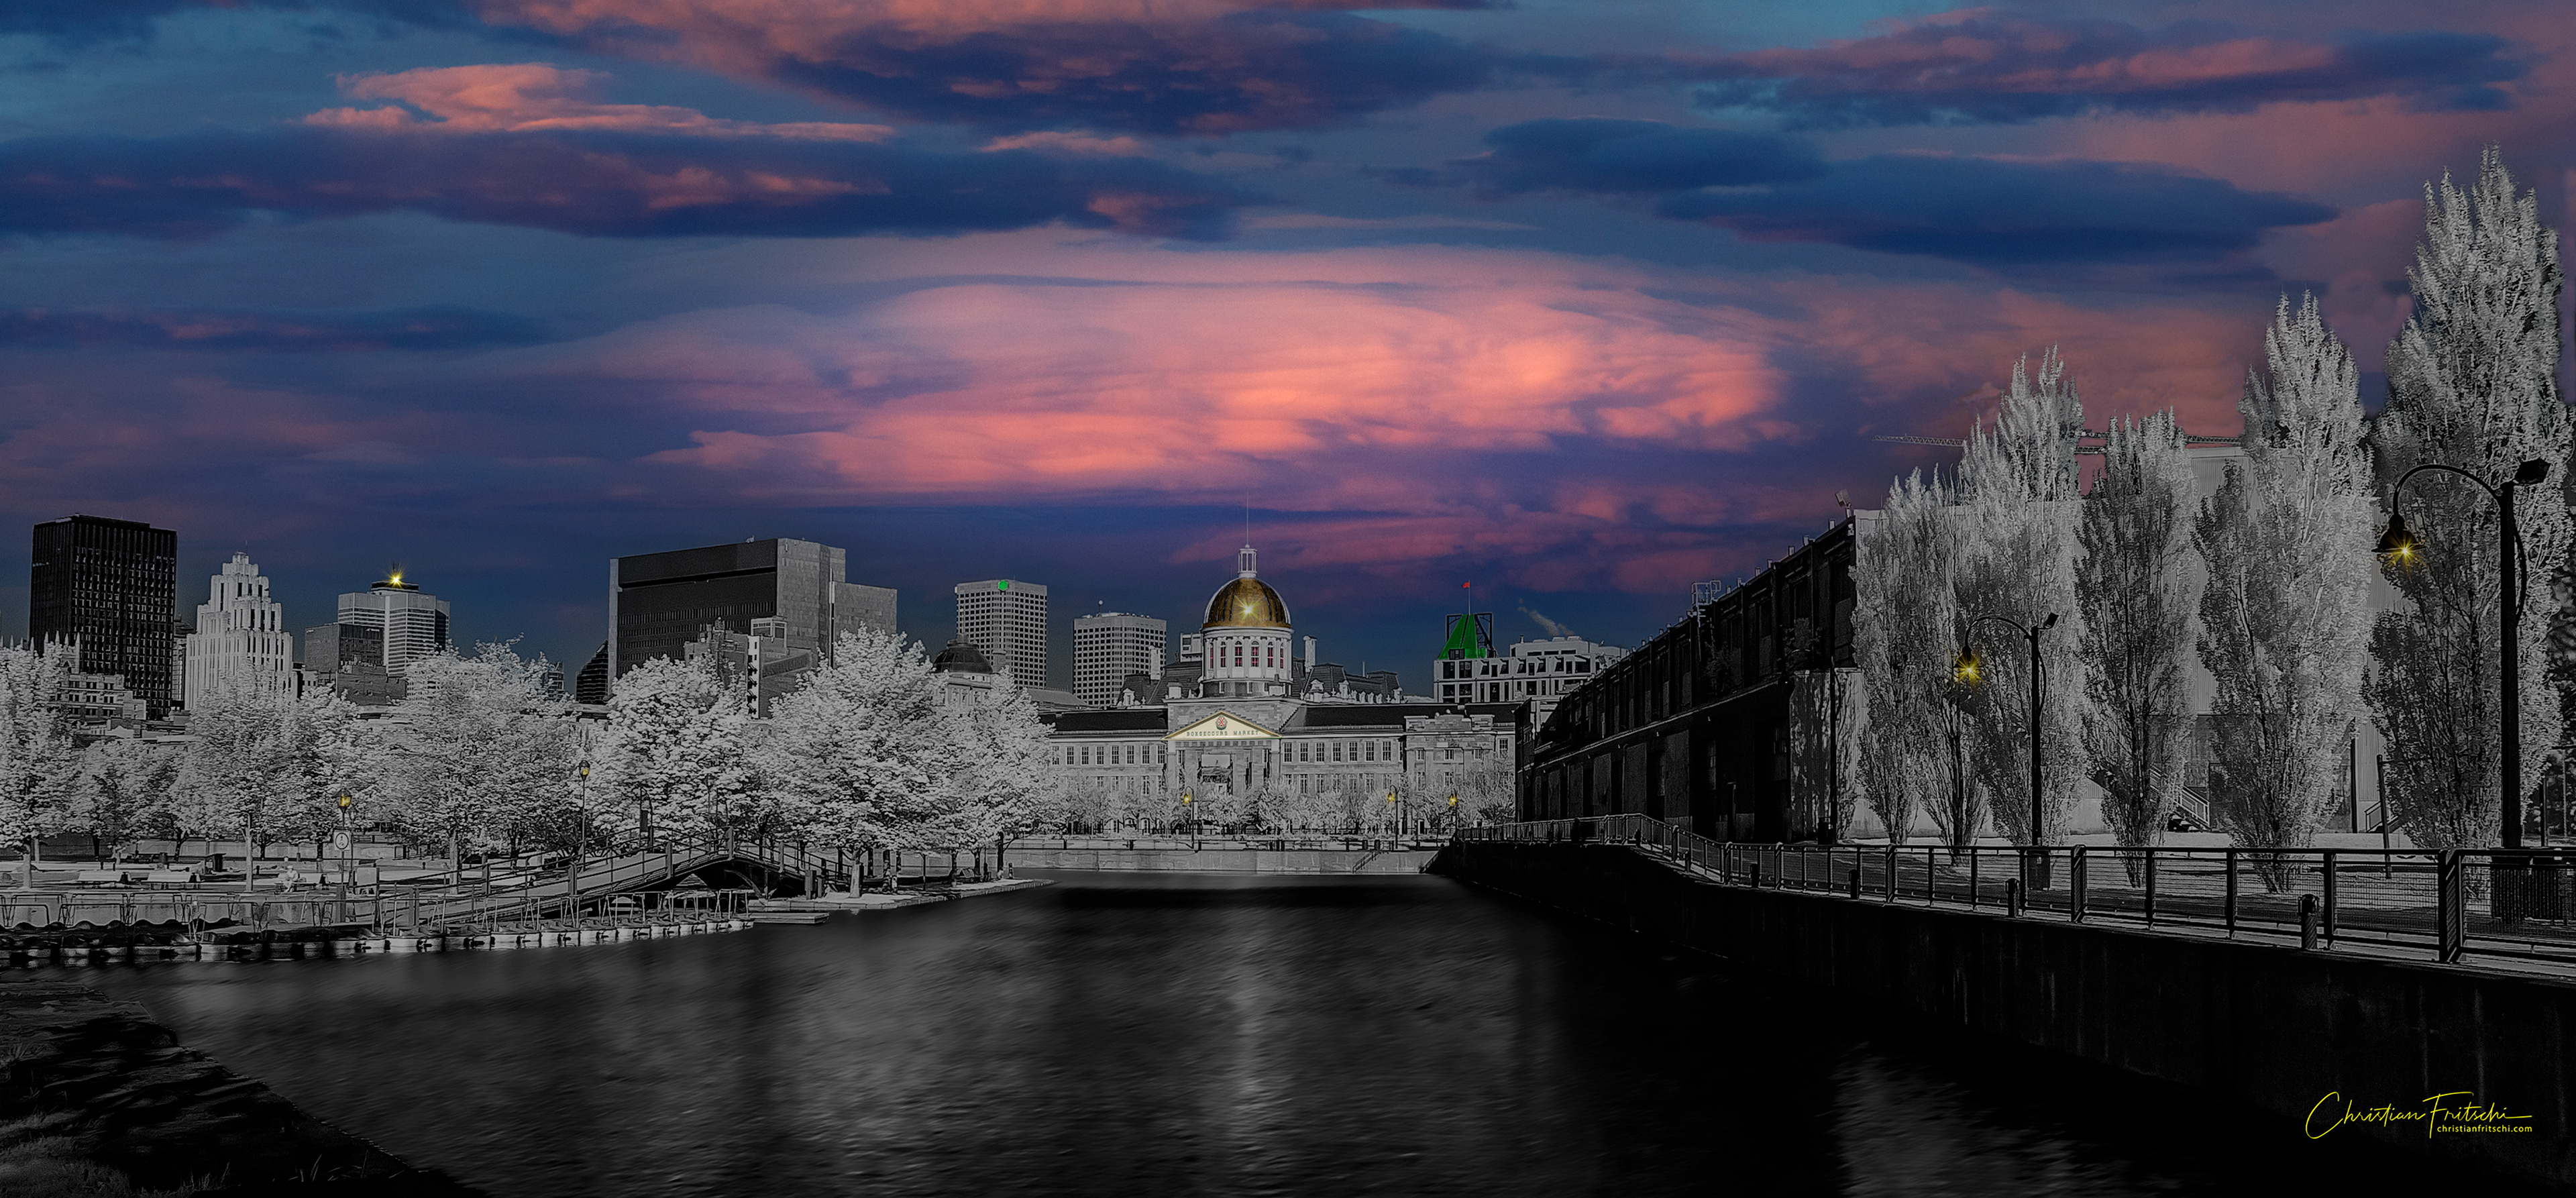
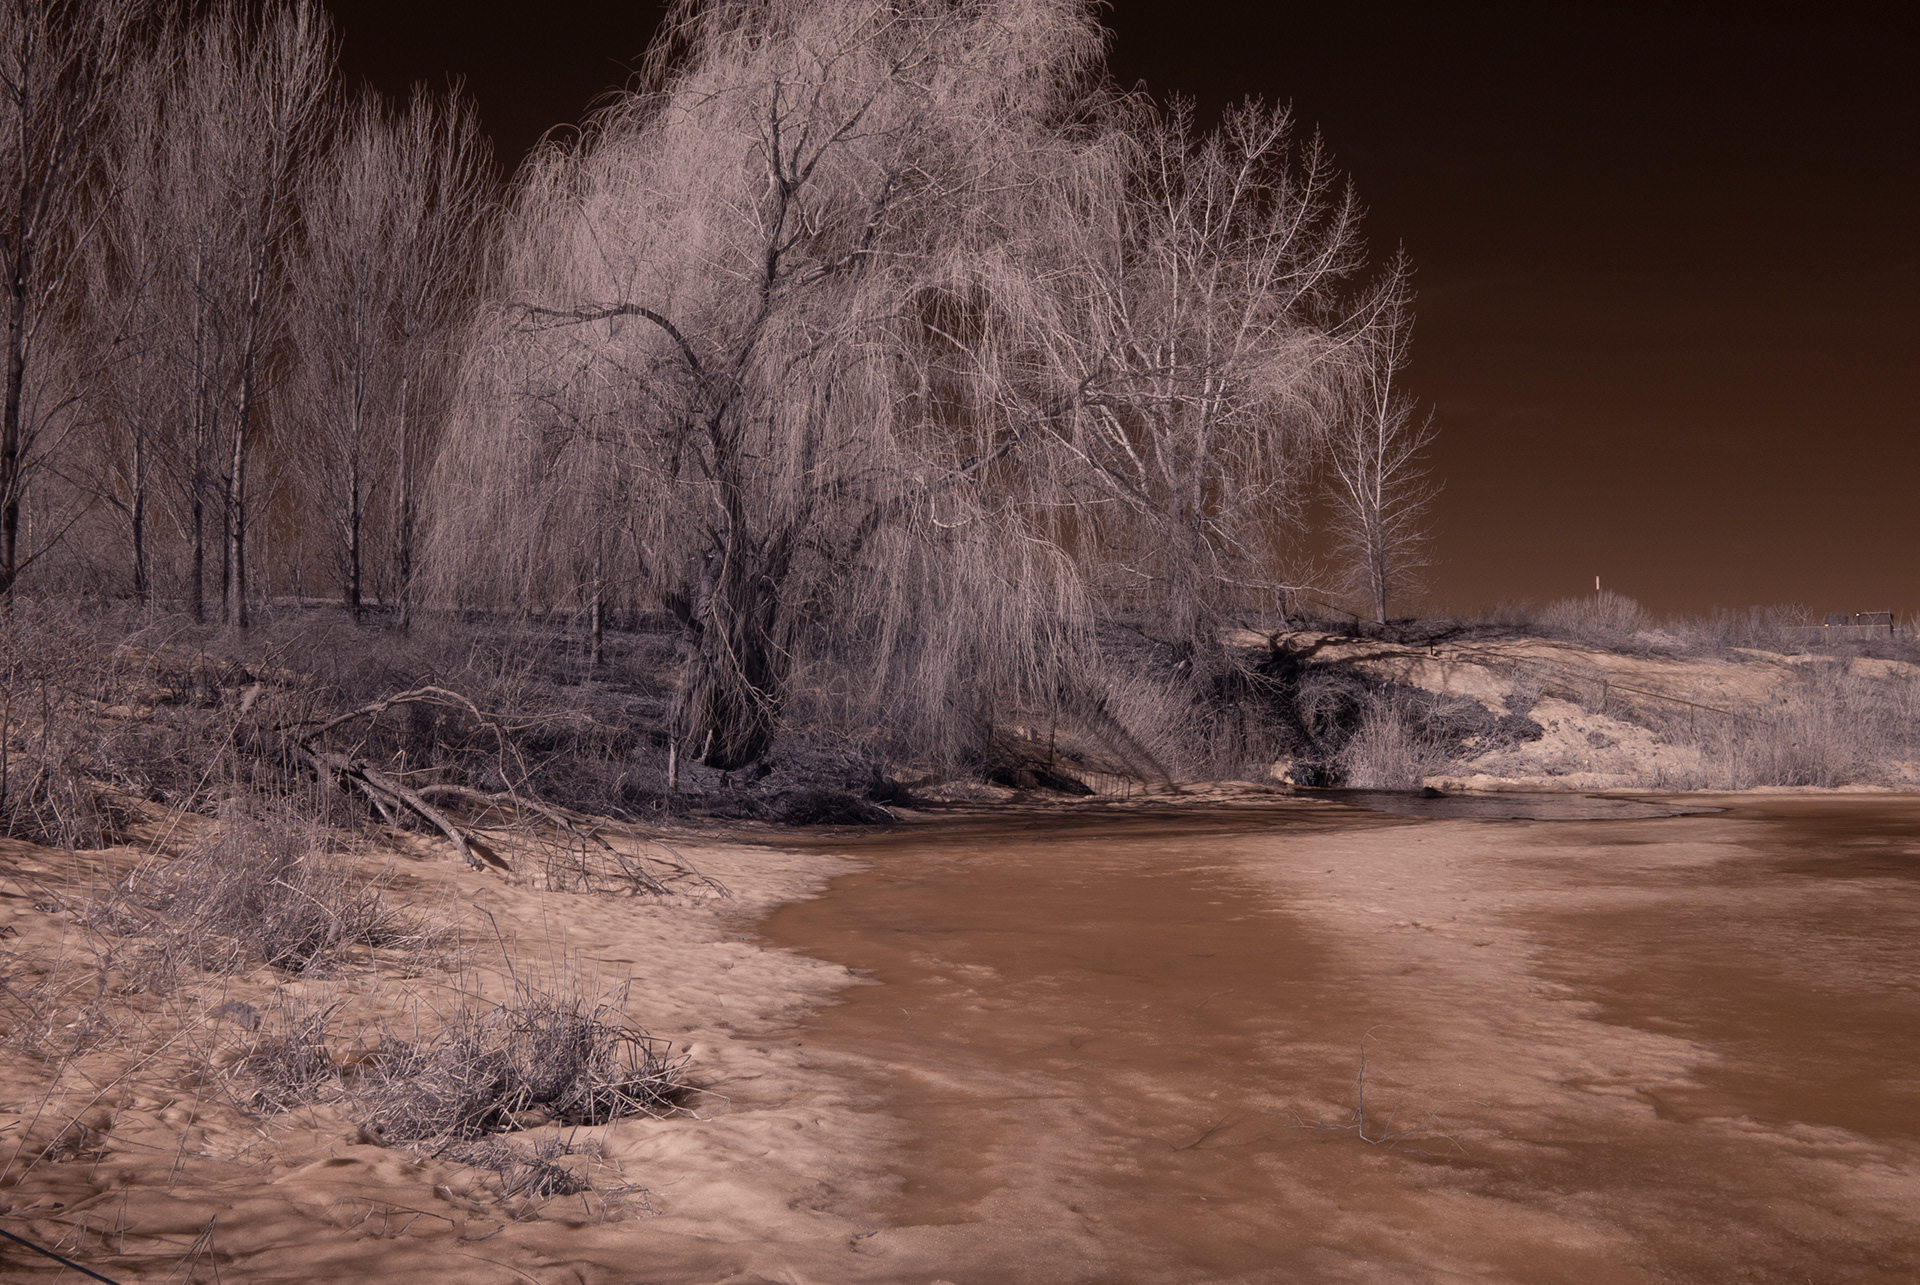
Ile Bonsecours, Montreal - IR landscape colorized in PS CC 2021. City of Mtl flag added to mast on green roof. Luminar replacement sky.

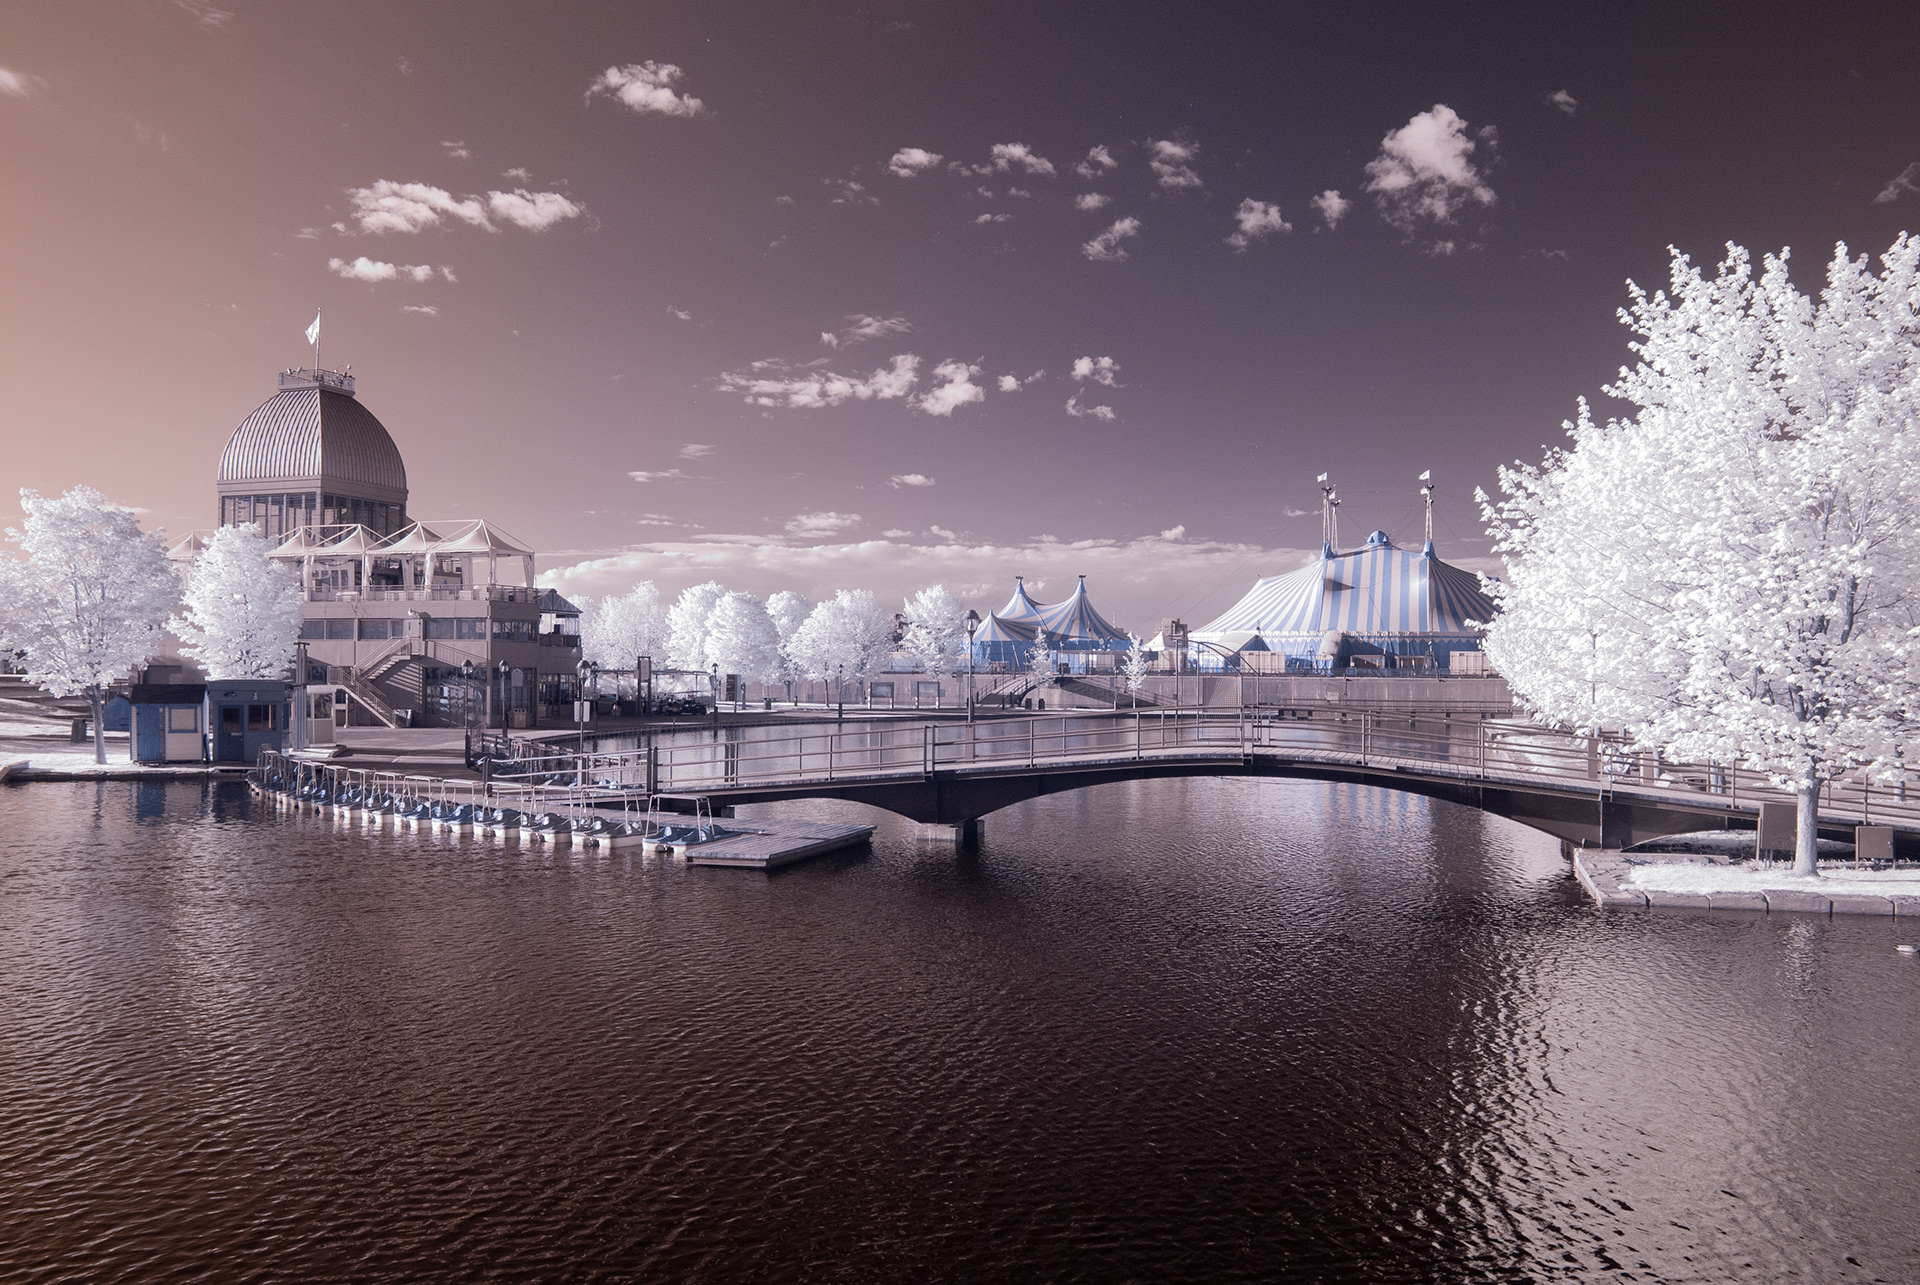
SOOC IR shot before channel swapping. Nikon D200 IR converted Dx Nikkor 18-35mm @18mm (27 equiv) f8 1/100s ISO 400

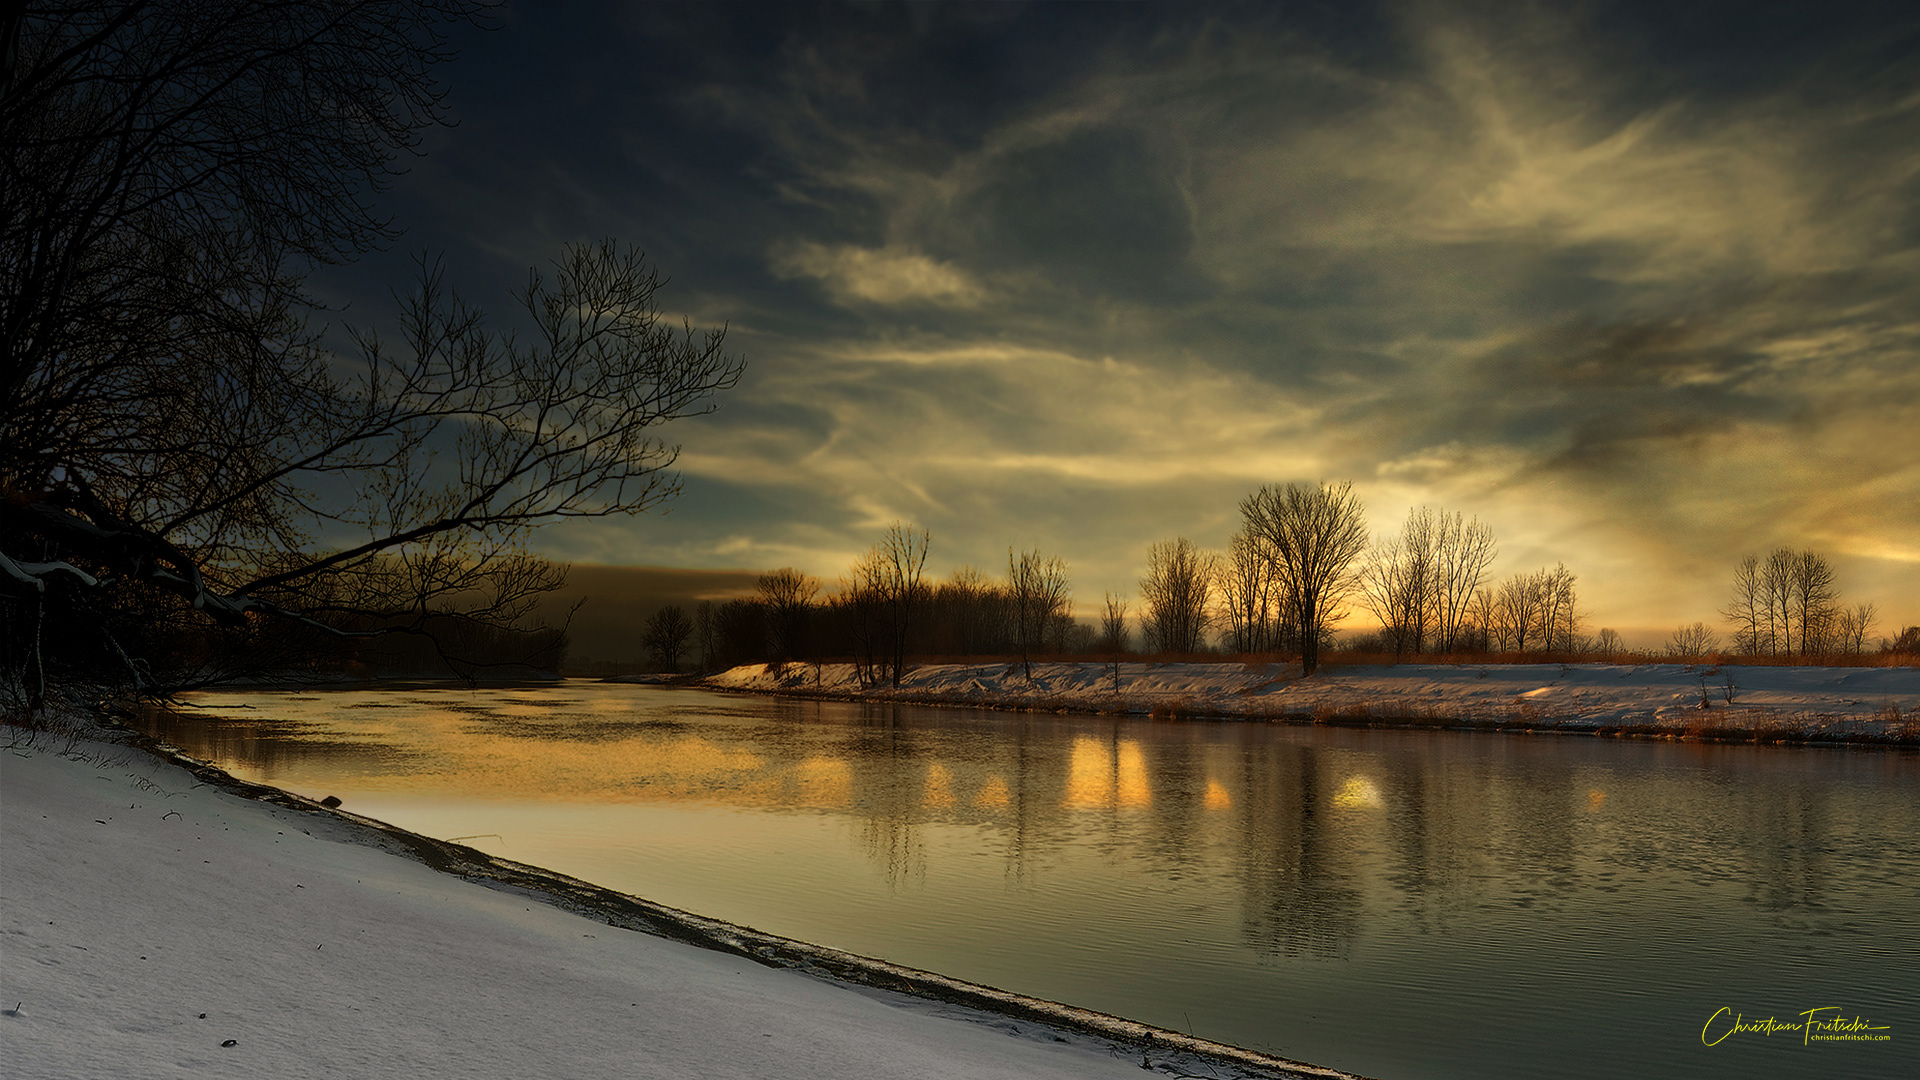
Reframing, Luminosity adjustments & Sky Replacement in PS CC 2021

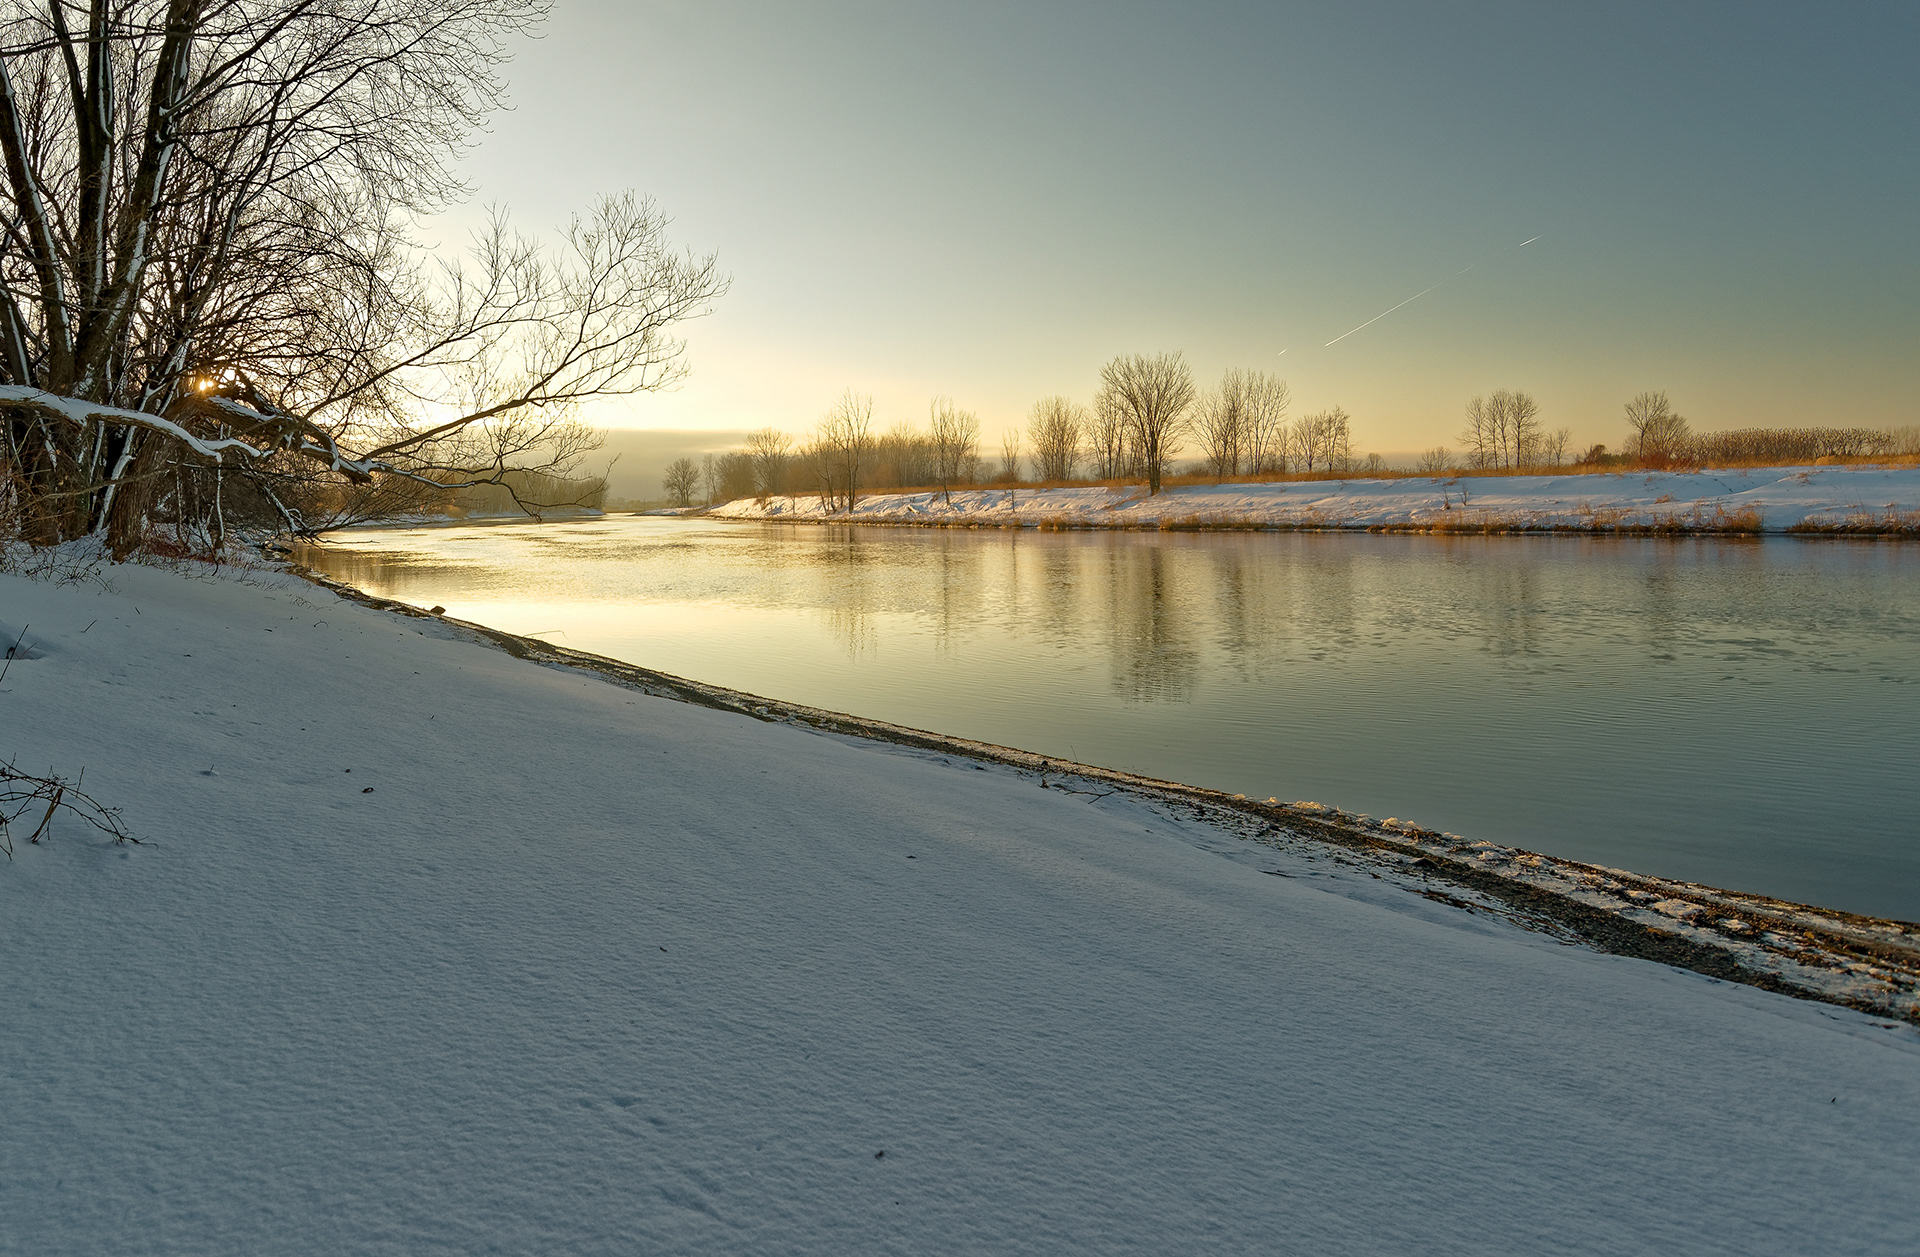
Iles de Boucherville Winter 2014, Nikon D600 Nikkor 18-35mm @18mm f8 1/250s ISO 400

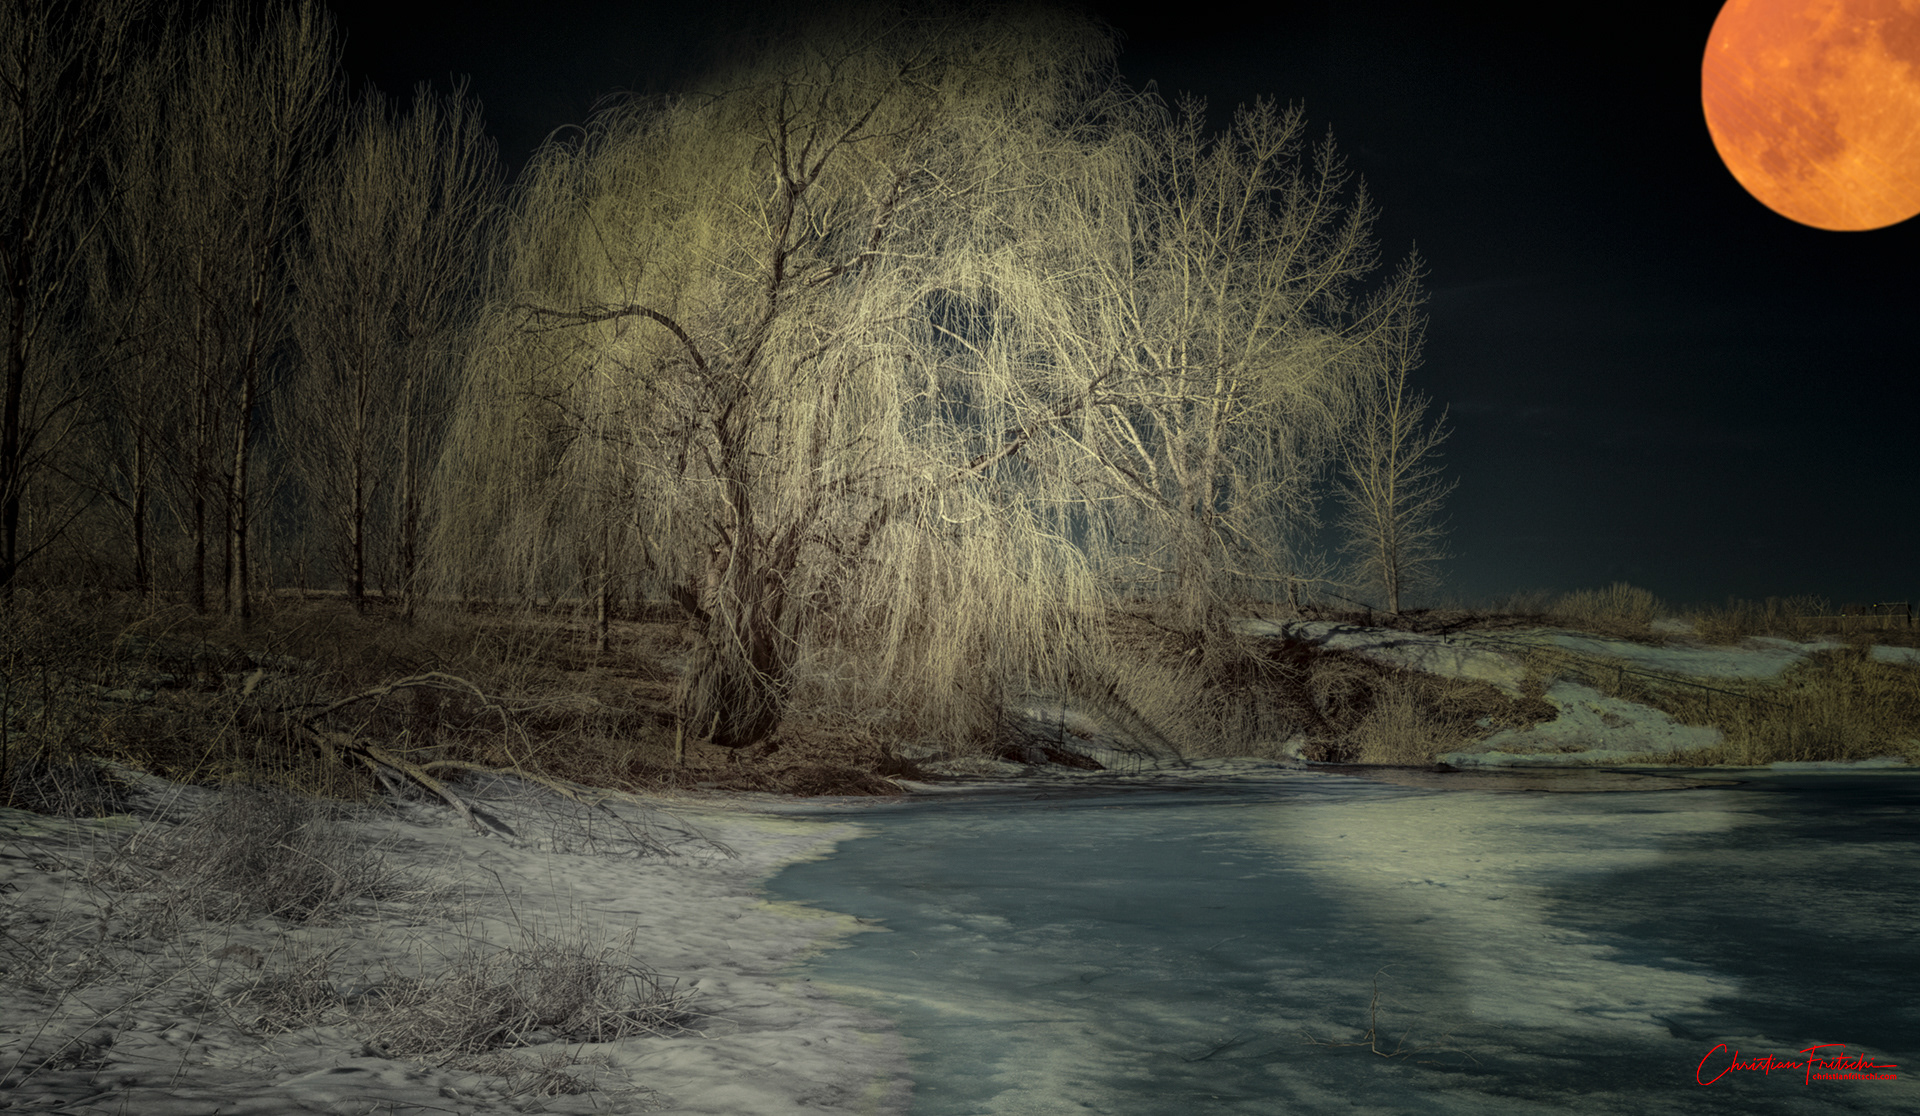
IR image, channel swapped & colorized in PS CC/Nik ColorEfex

IR converted D200 Nikkor 18-35mm @ 23mm (34mm equiv) f16 1/100s ISO 100

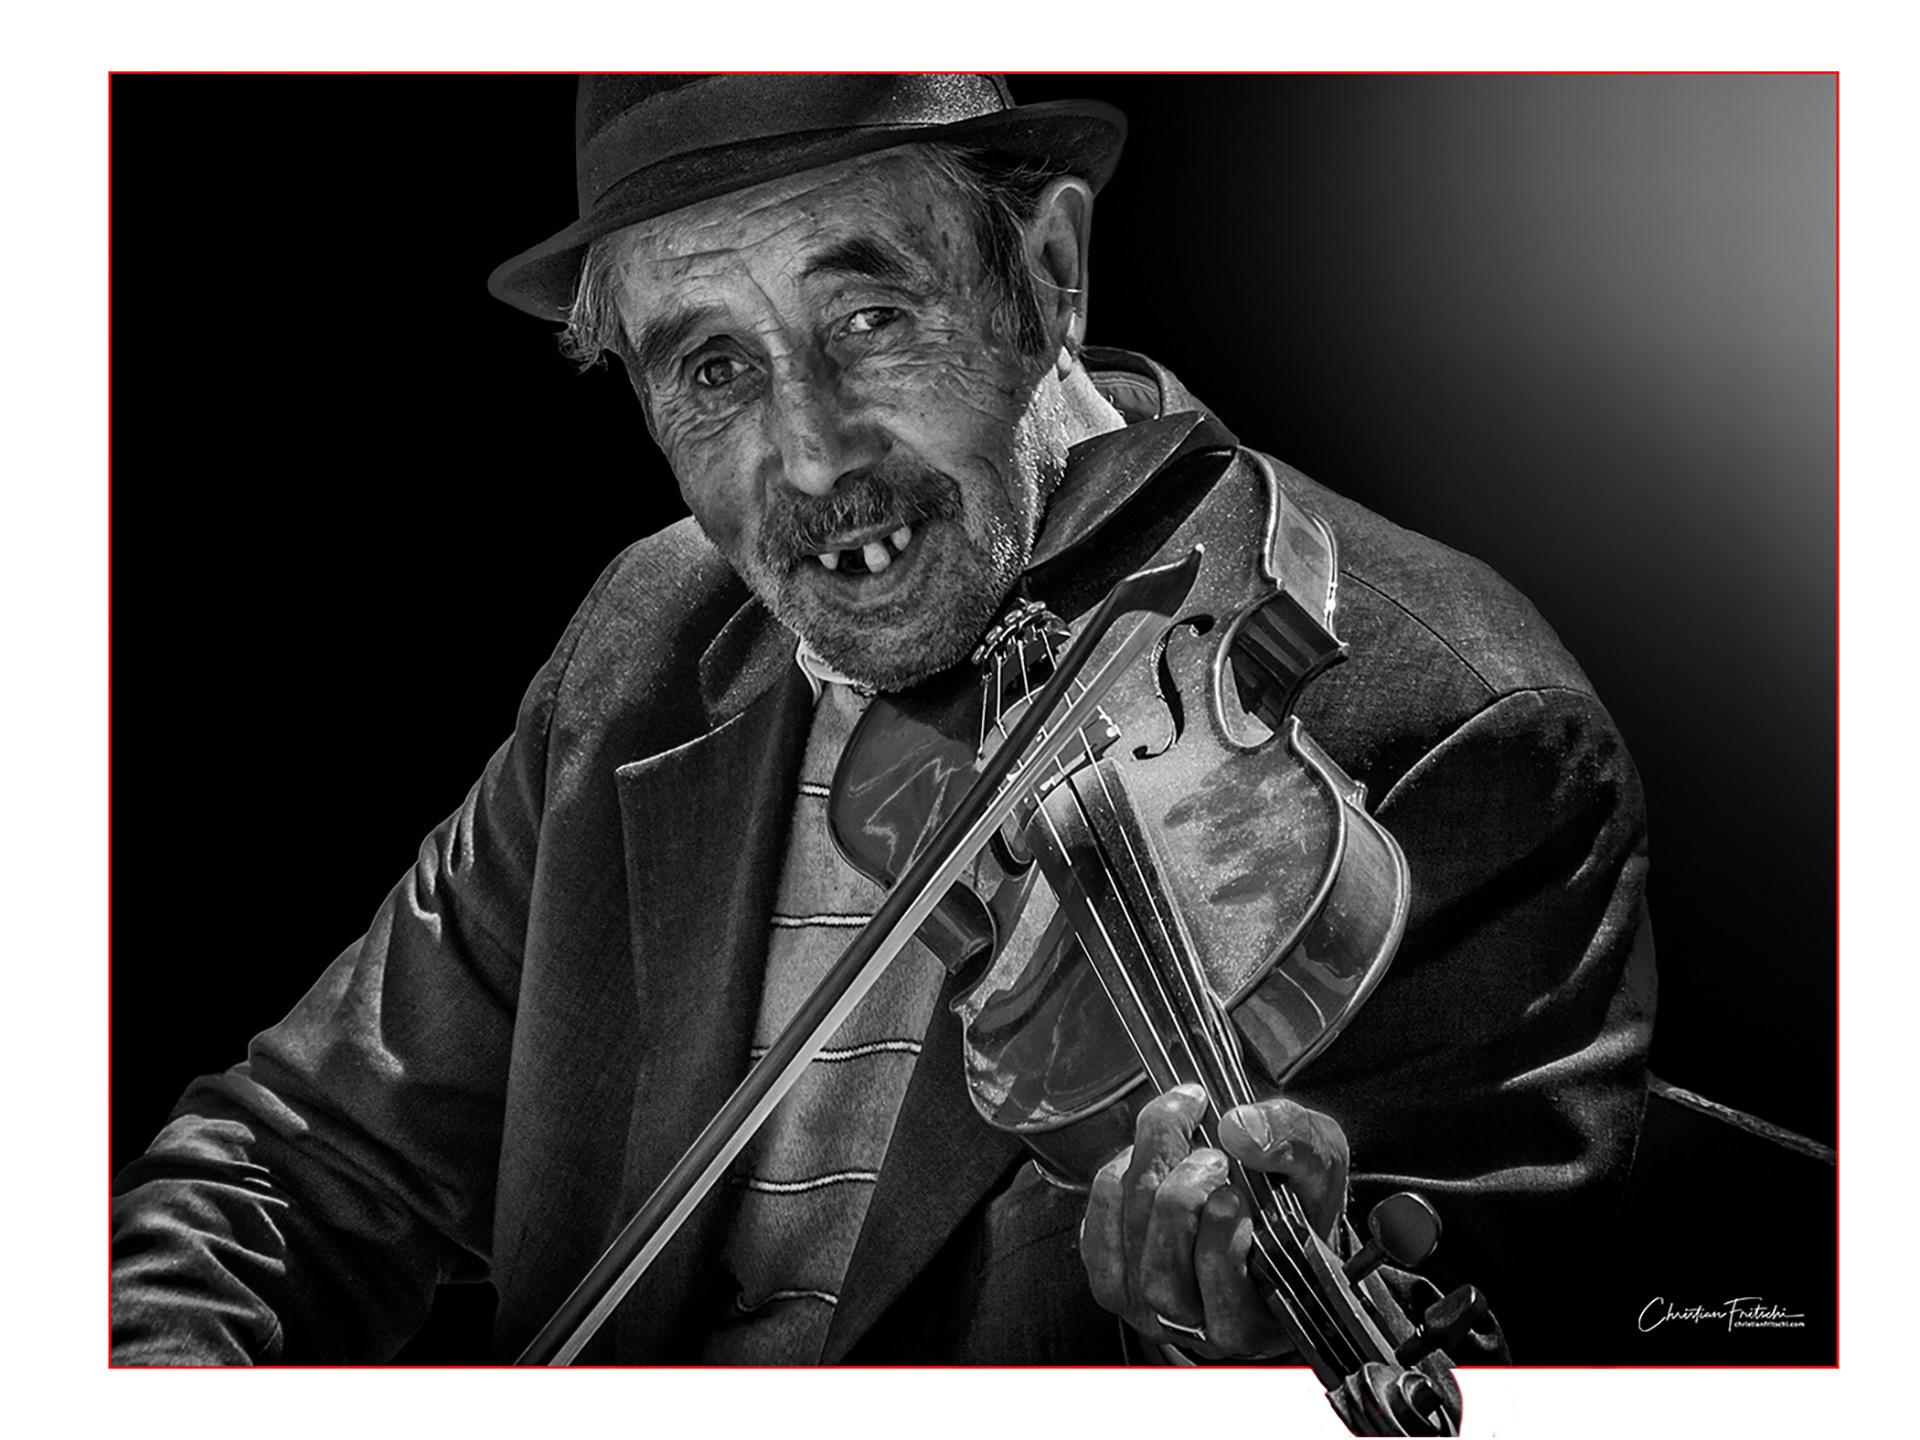
Barcelona Fiddler 2013, PS CC Nik SiverEfex 2

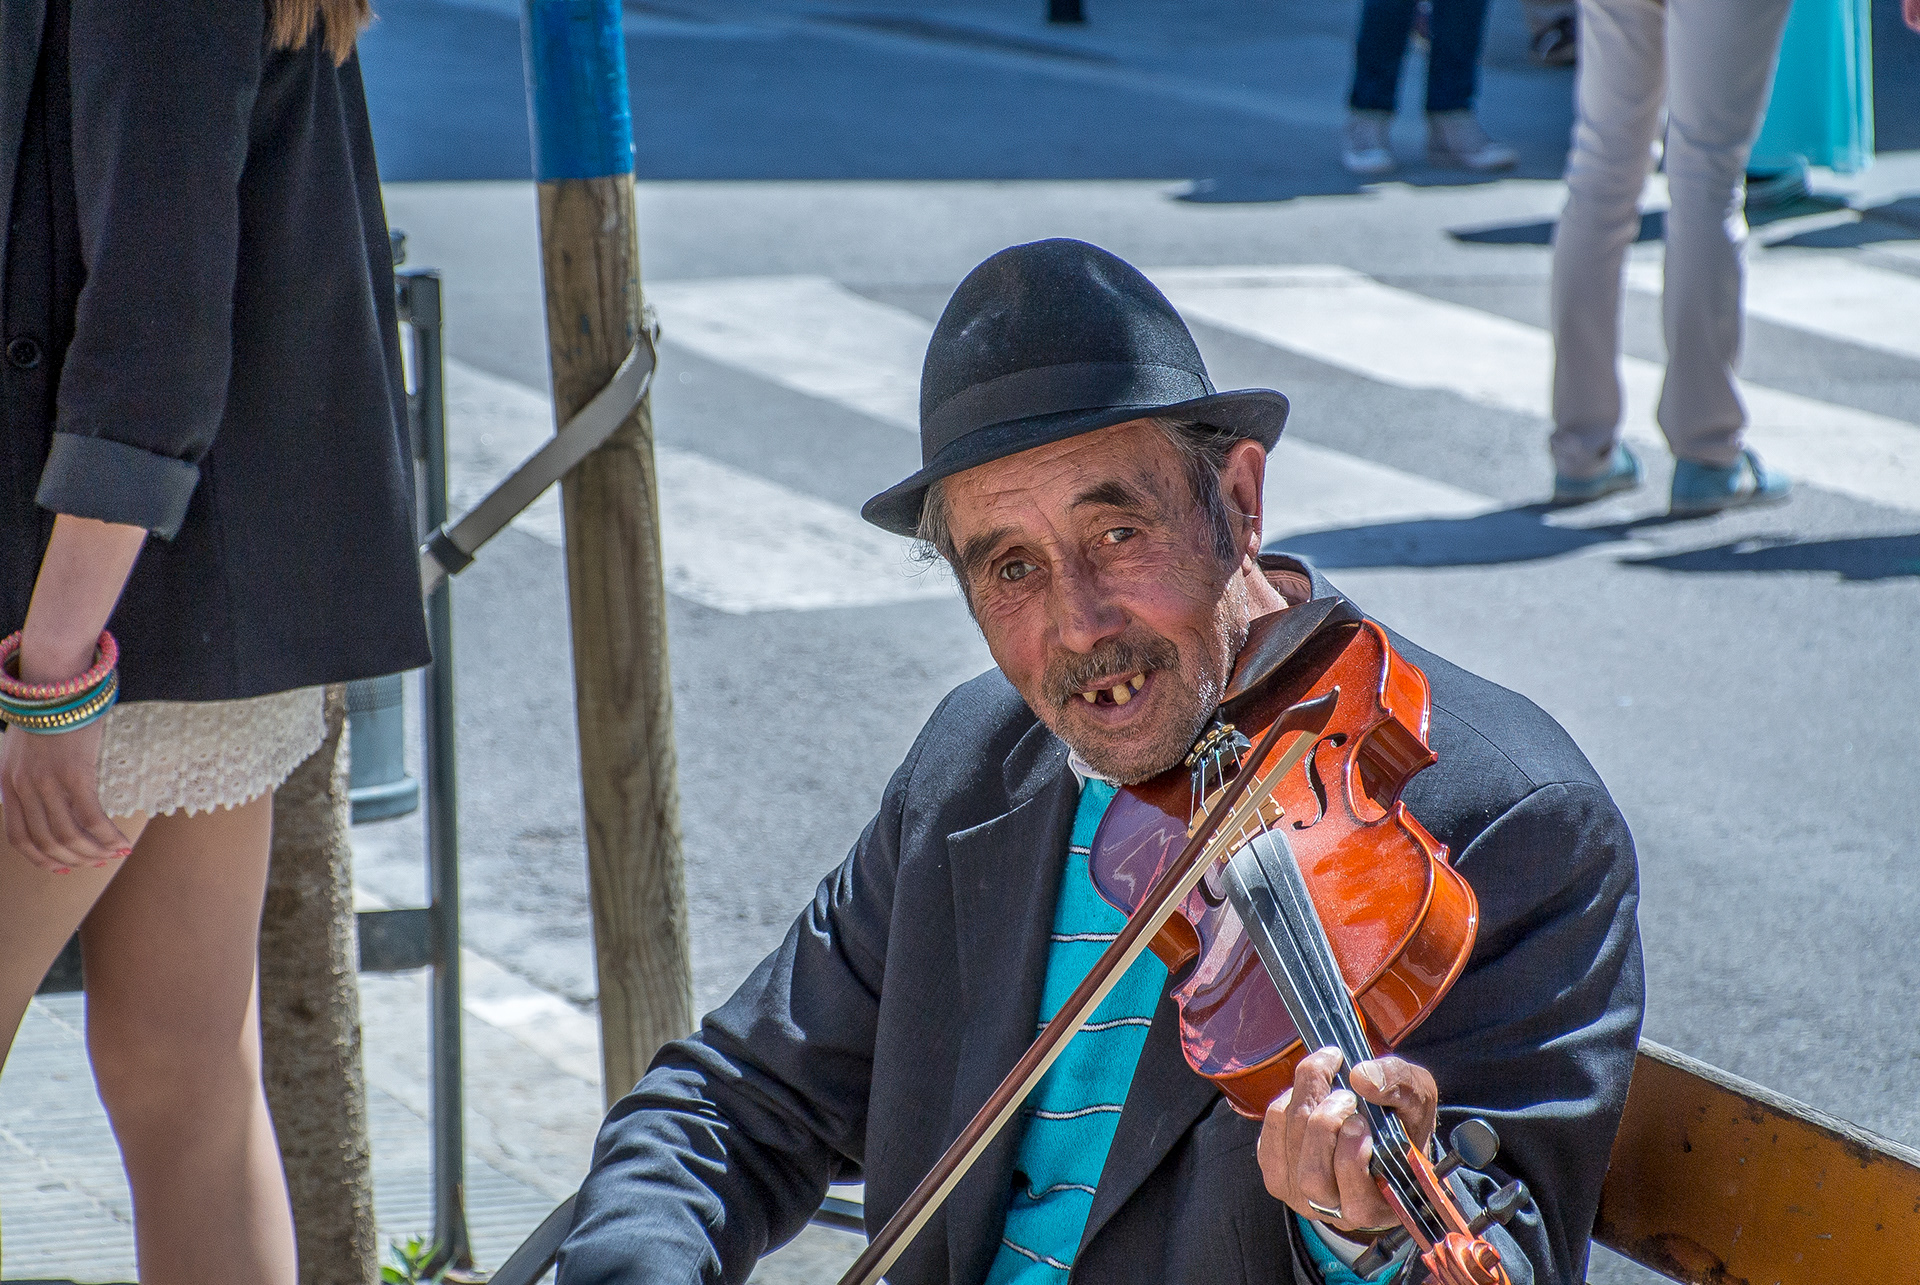
Nikon 1 V1 NIkkor 10-100mmPD @ 58mm (157mm equiv) f5.6 1/320s ISO 110

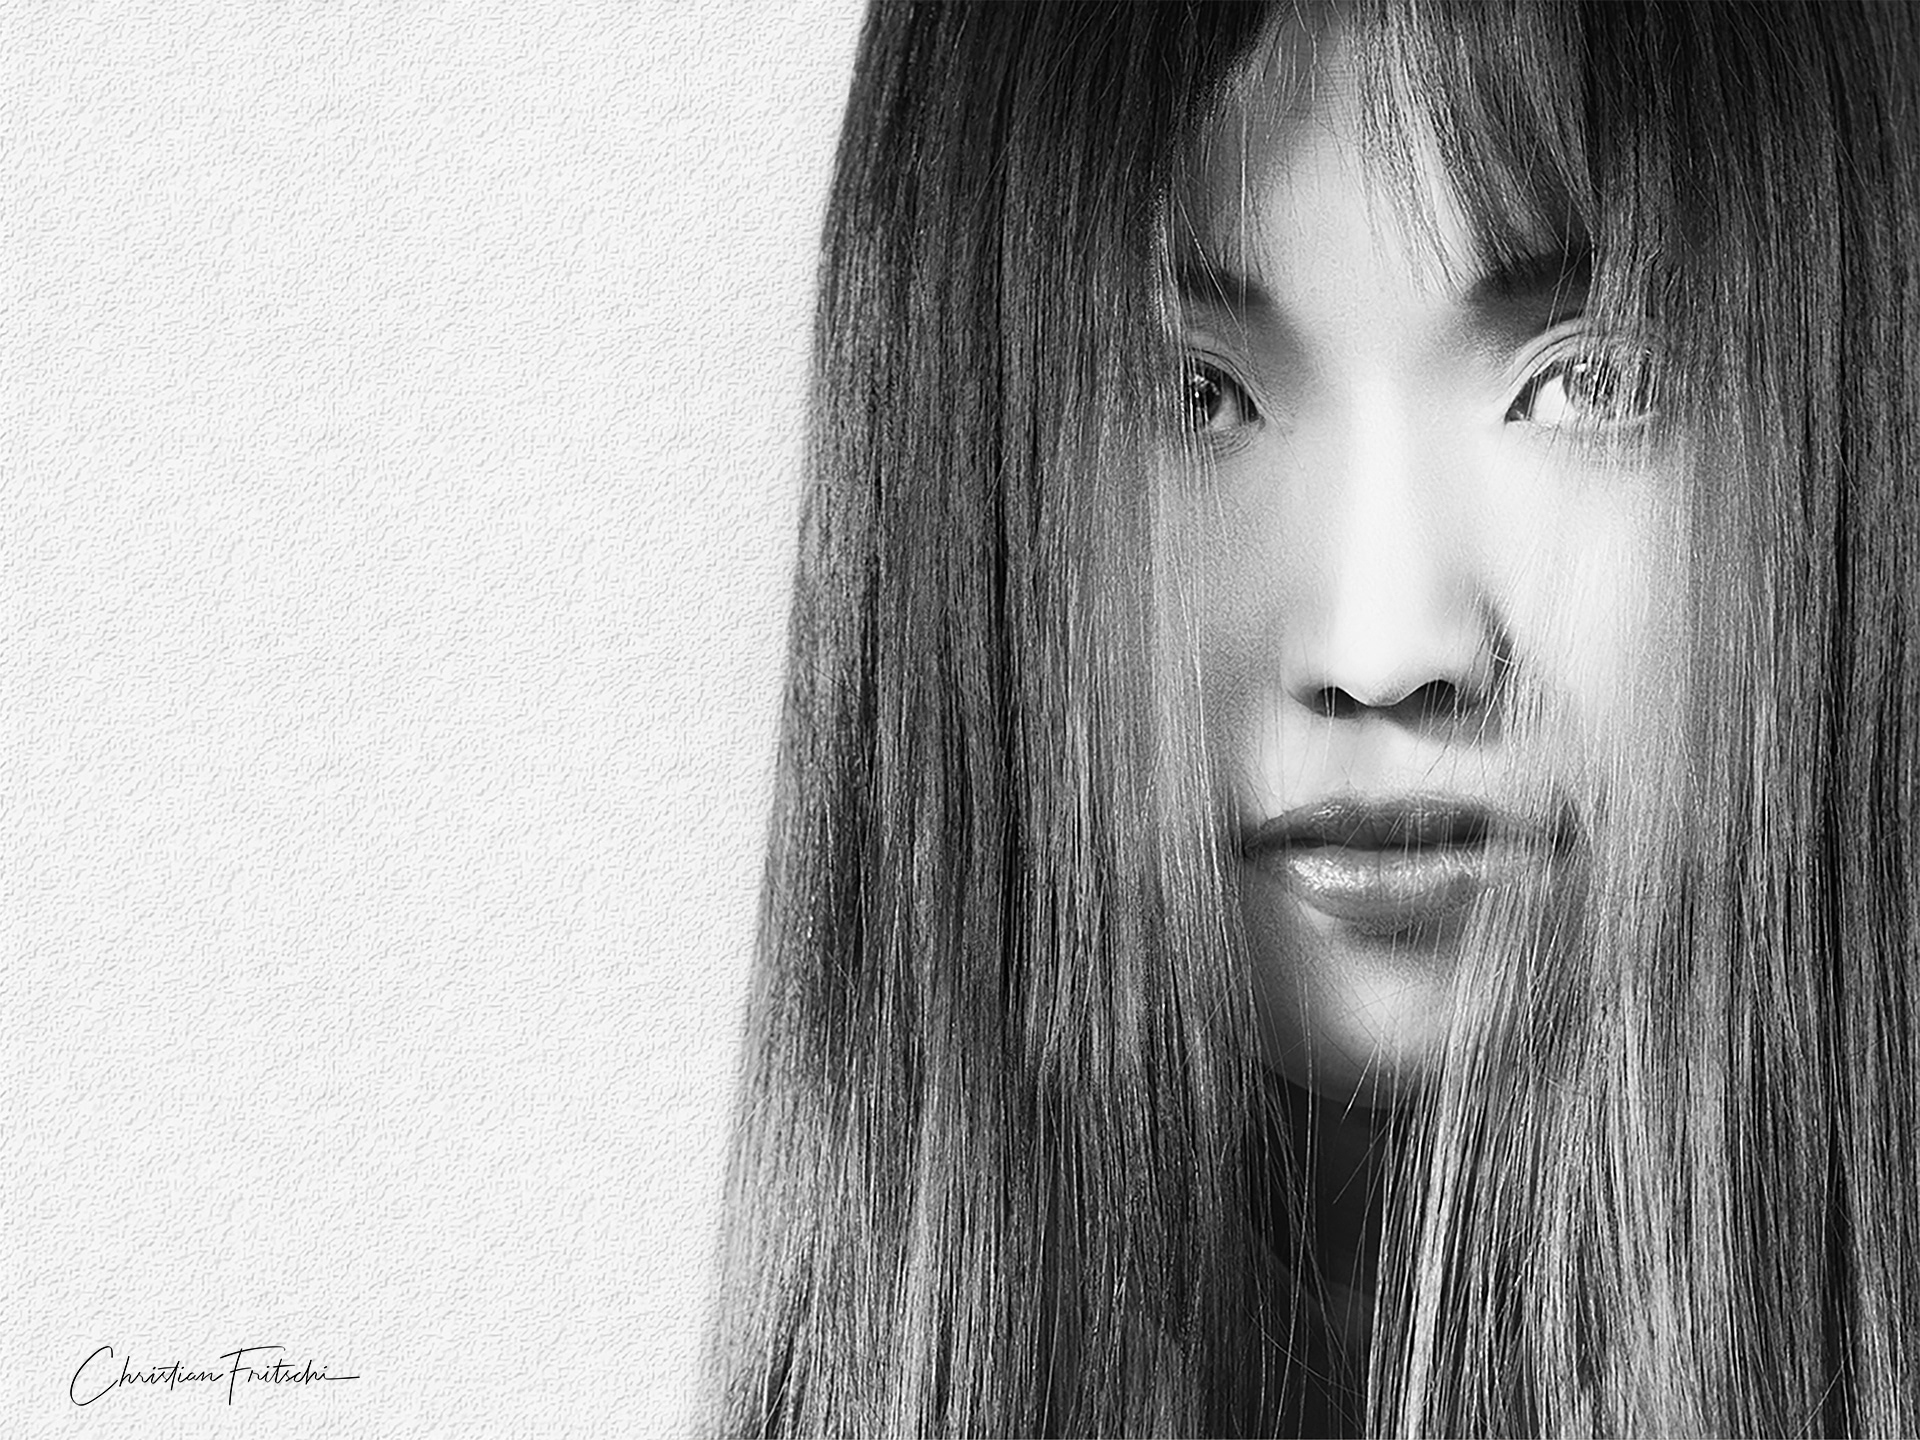
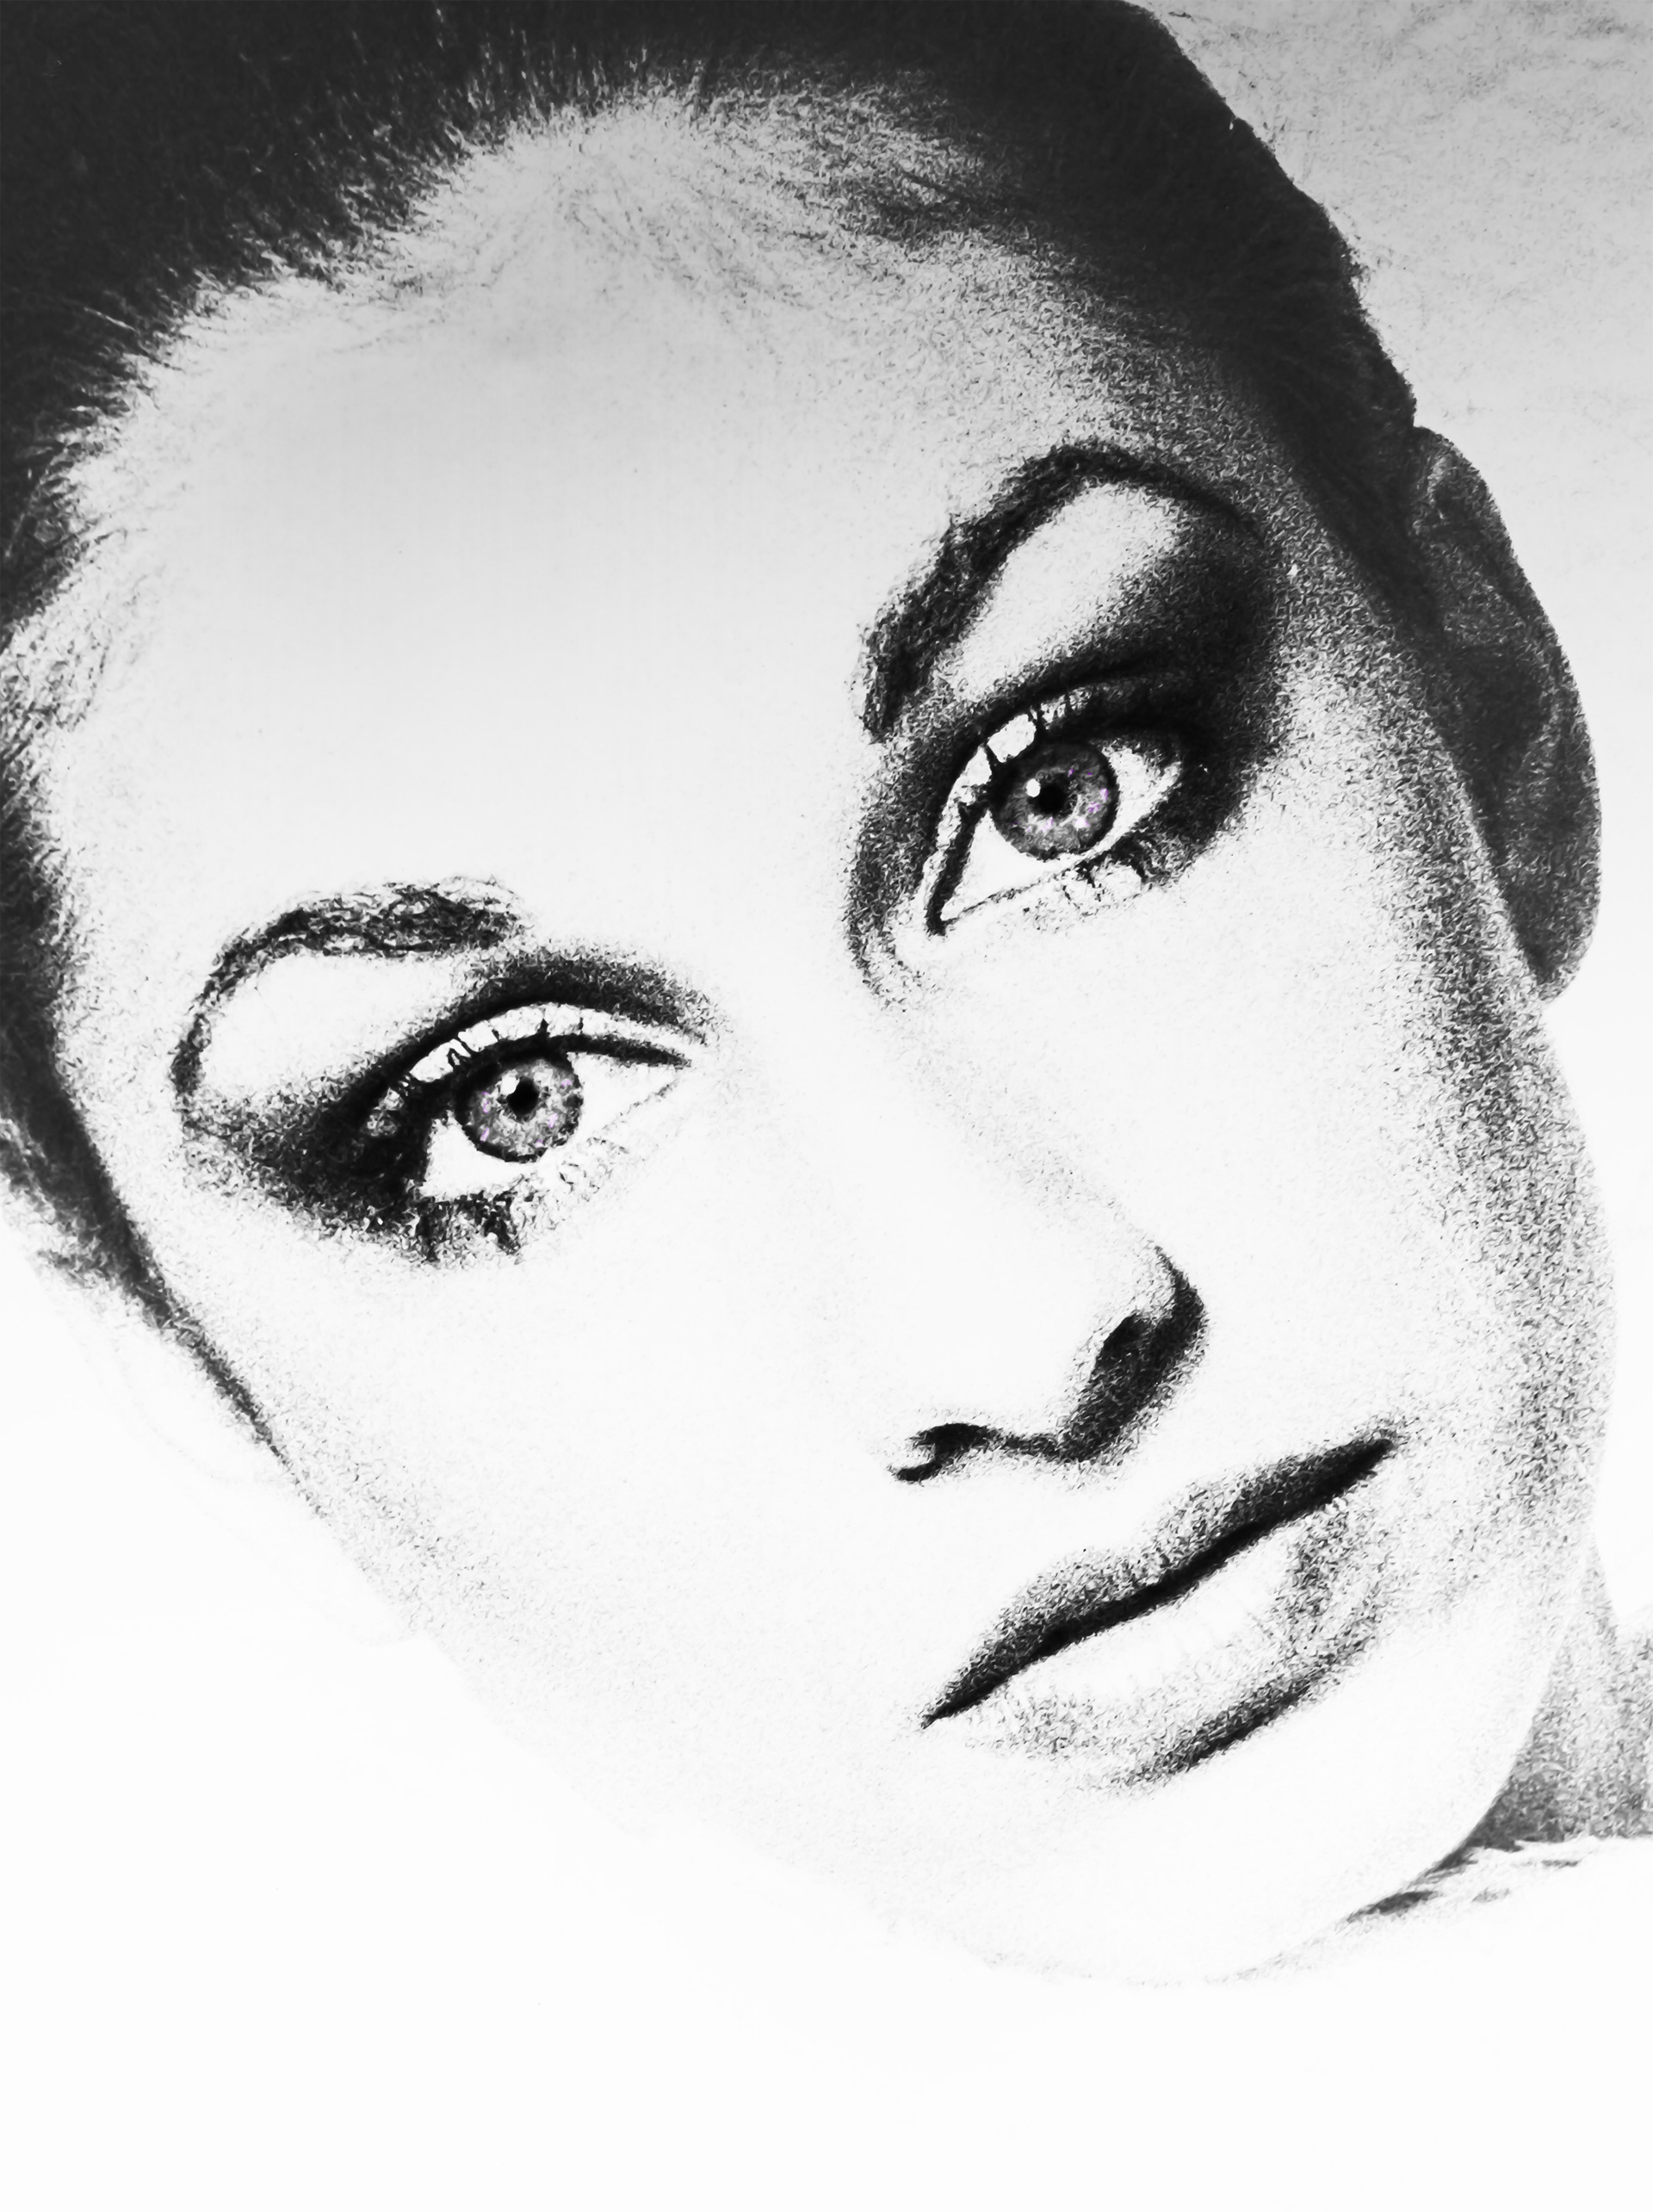
Japanese model after tighter crop to focus on features, dodge & burn to improve lighting on face & eyes. PS CC, Nik SiverEfex 2

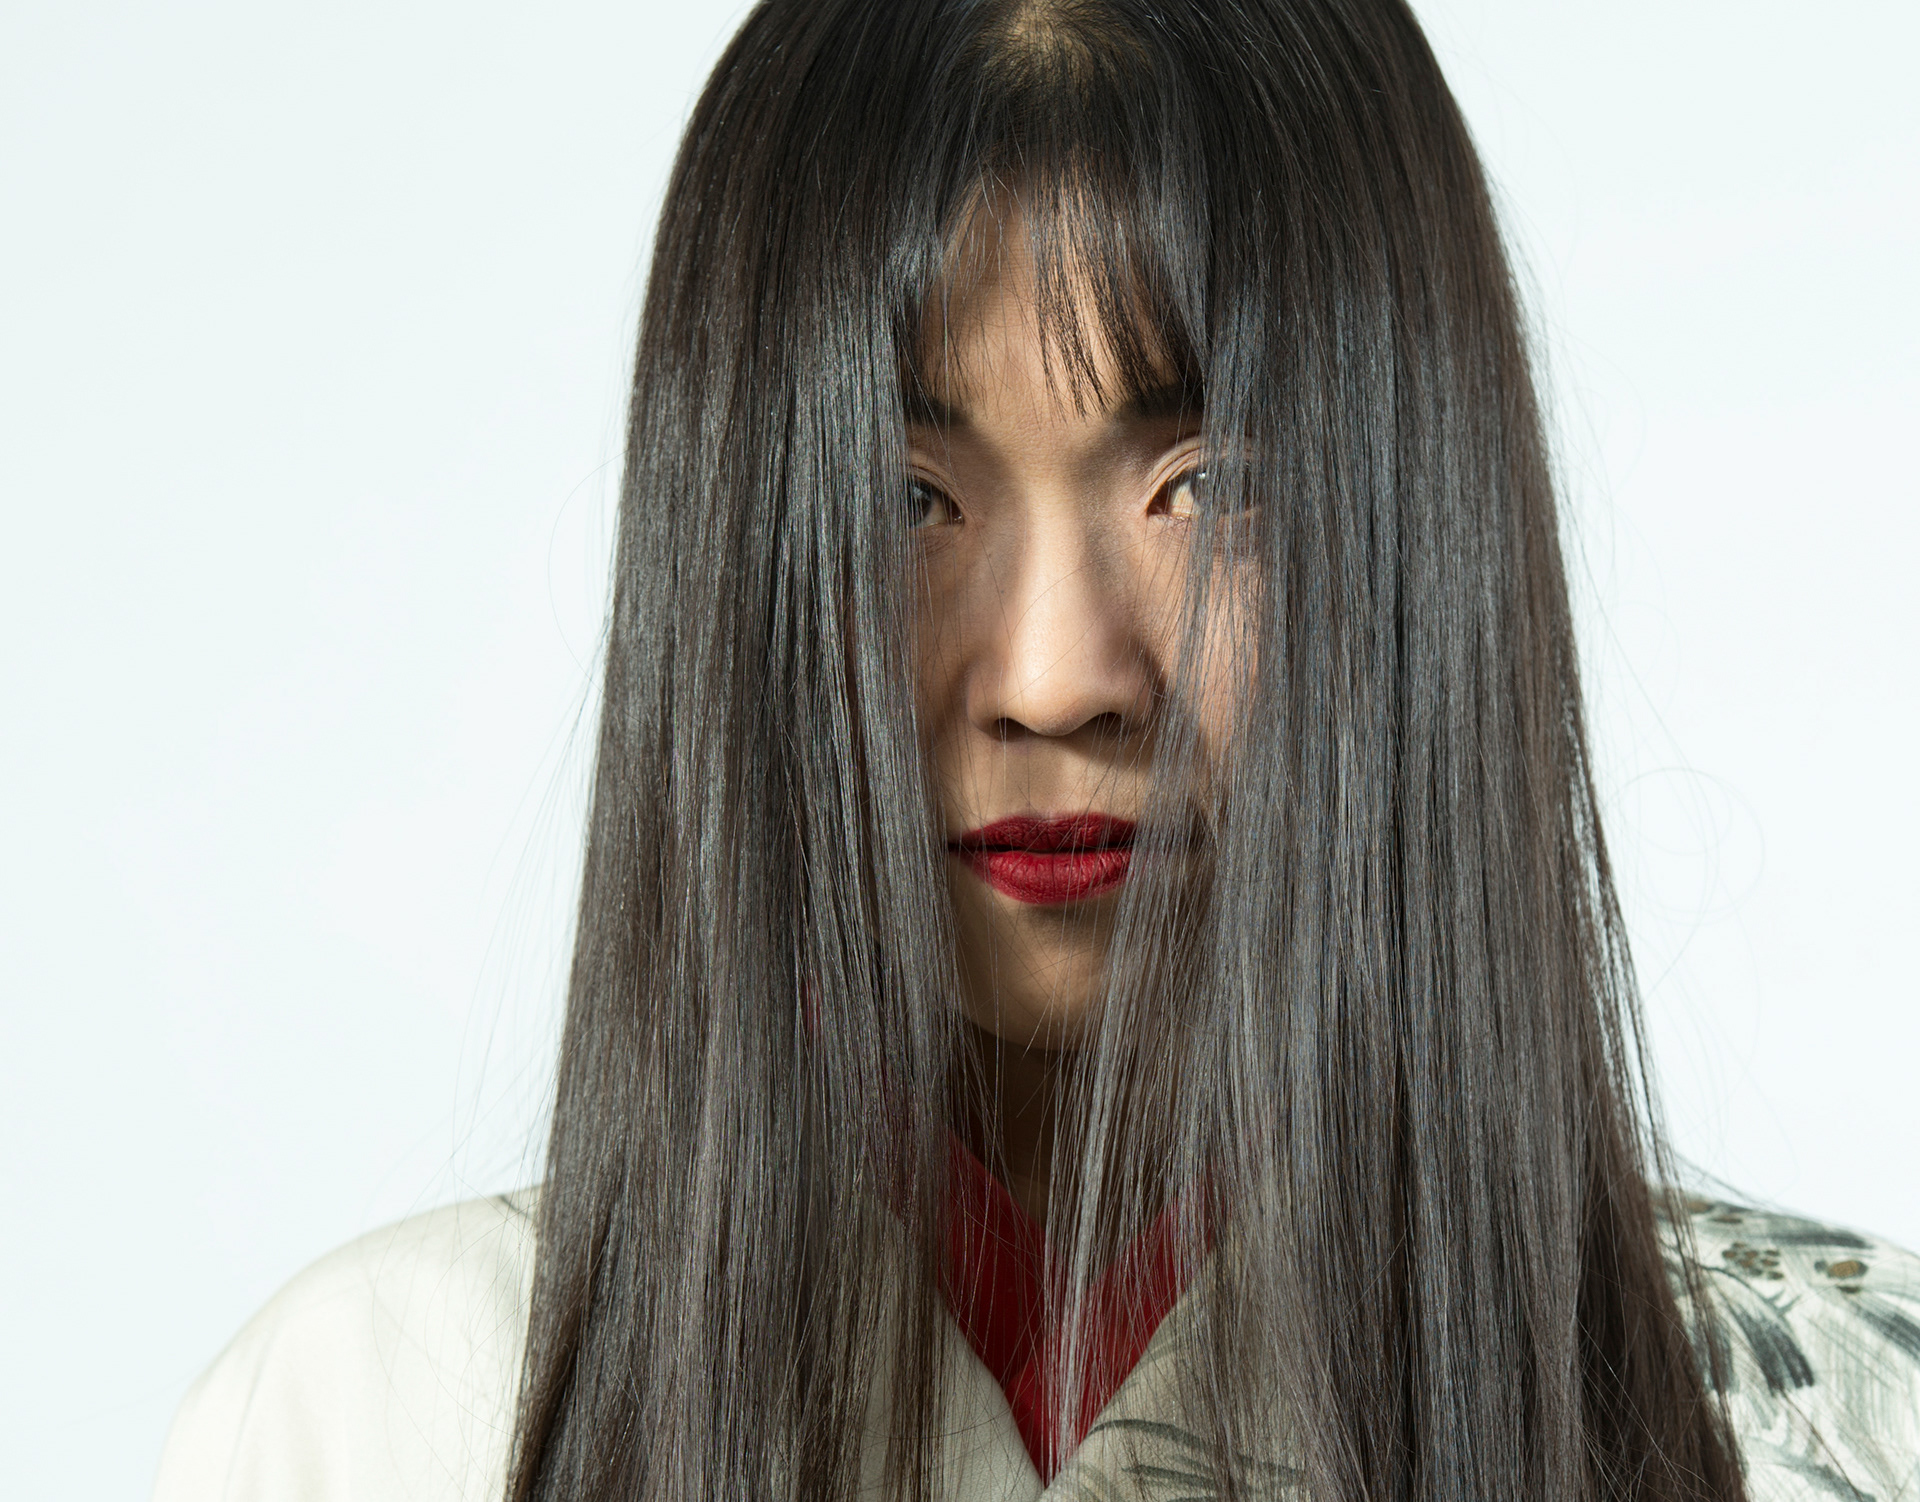
Nikon D600 Nikkor 70-200mm f2.8E FL ED @ 122mm f5.6 1/160s ISO 200 SB800 in Softbox

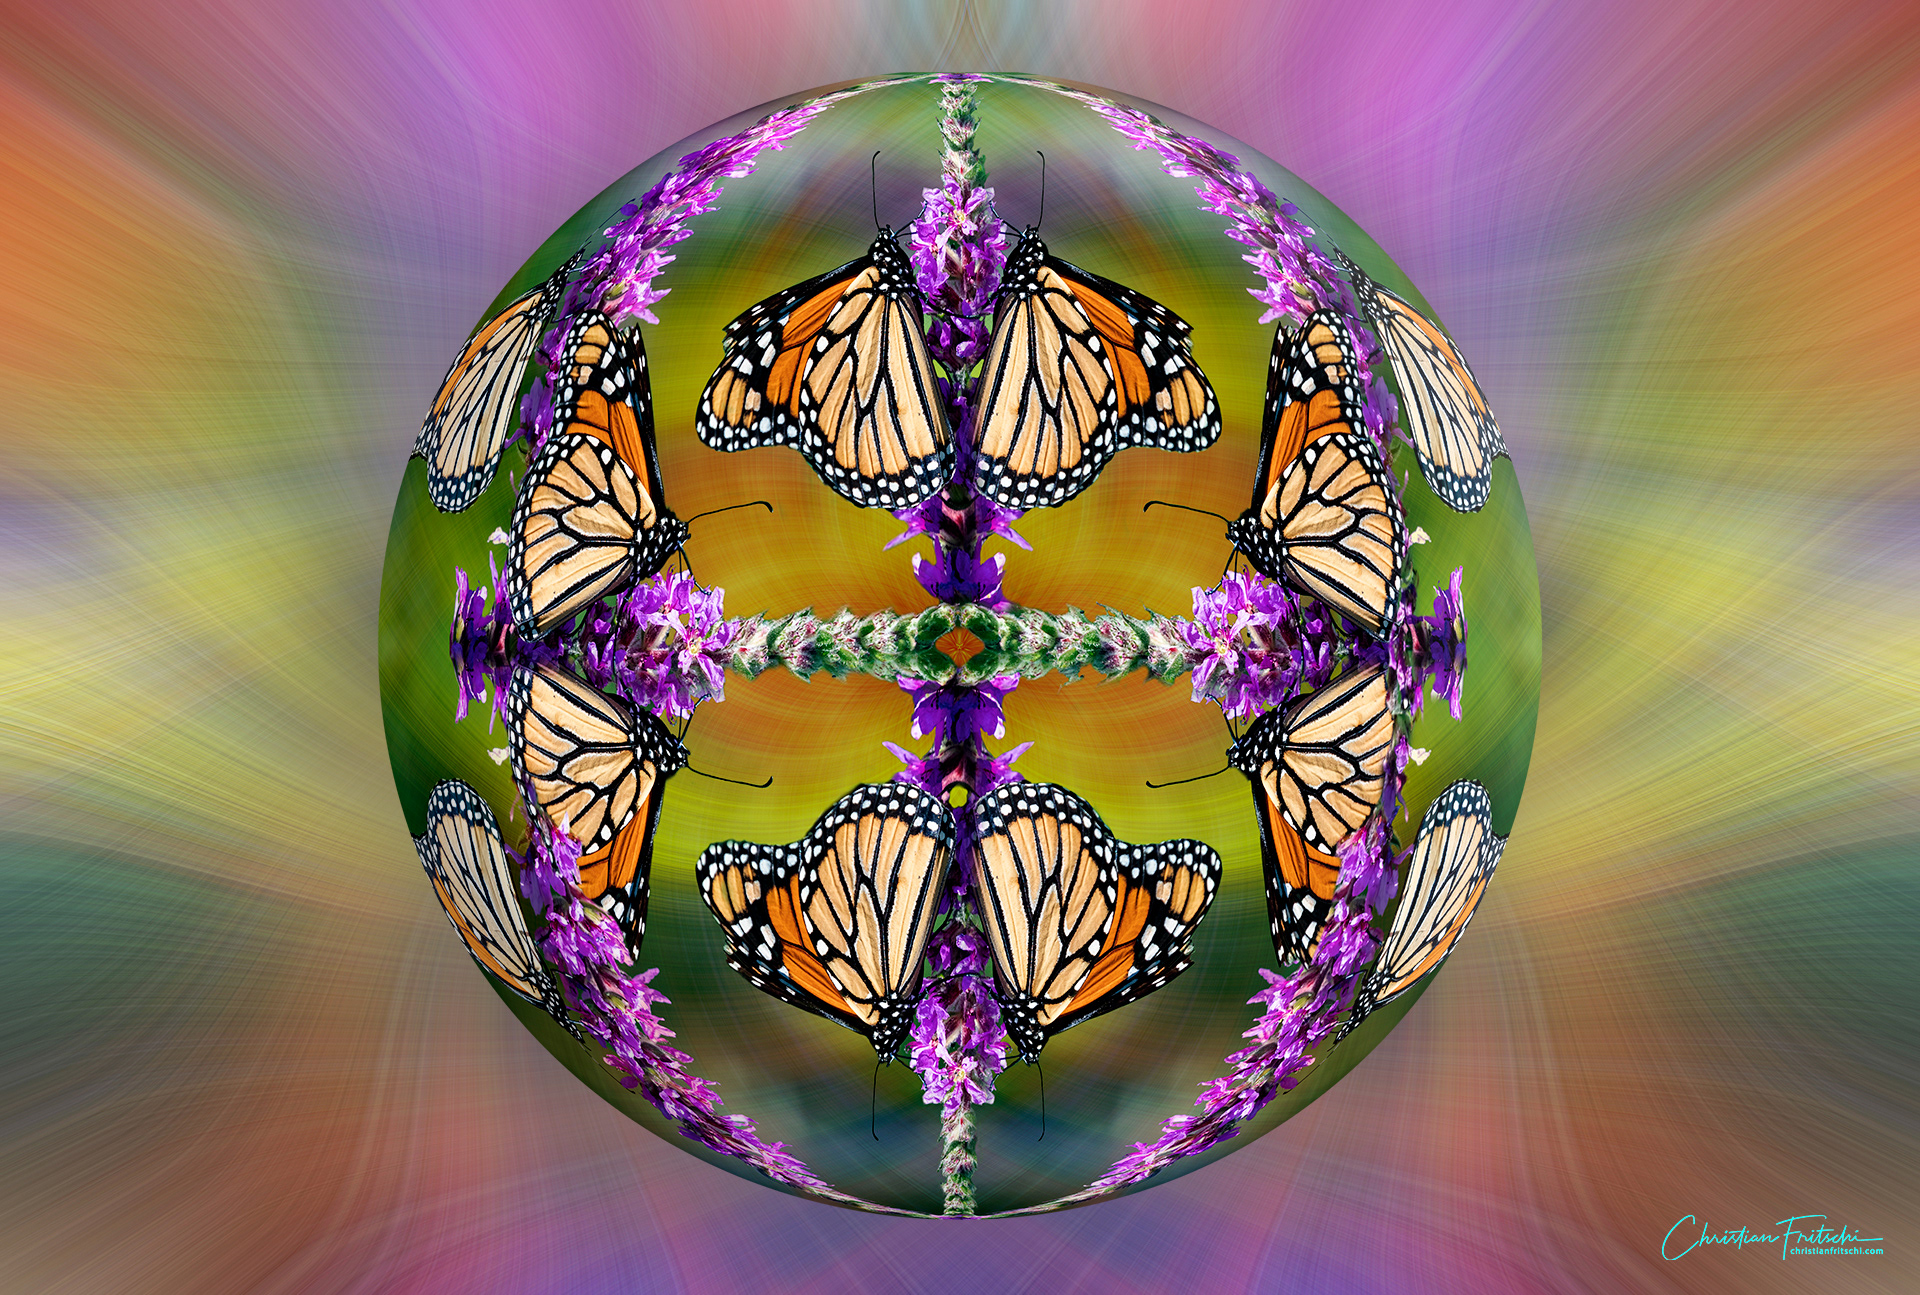
Original image twirled to provide bg. Spherized multi image. PS CC

Nikon D500 Sigma 100-400mm @ 320mm f6.3 1/2000s ISO 1100

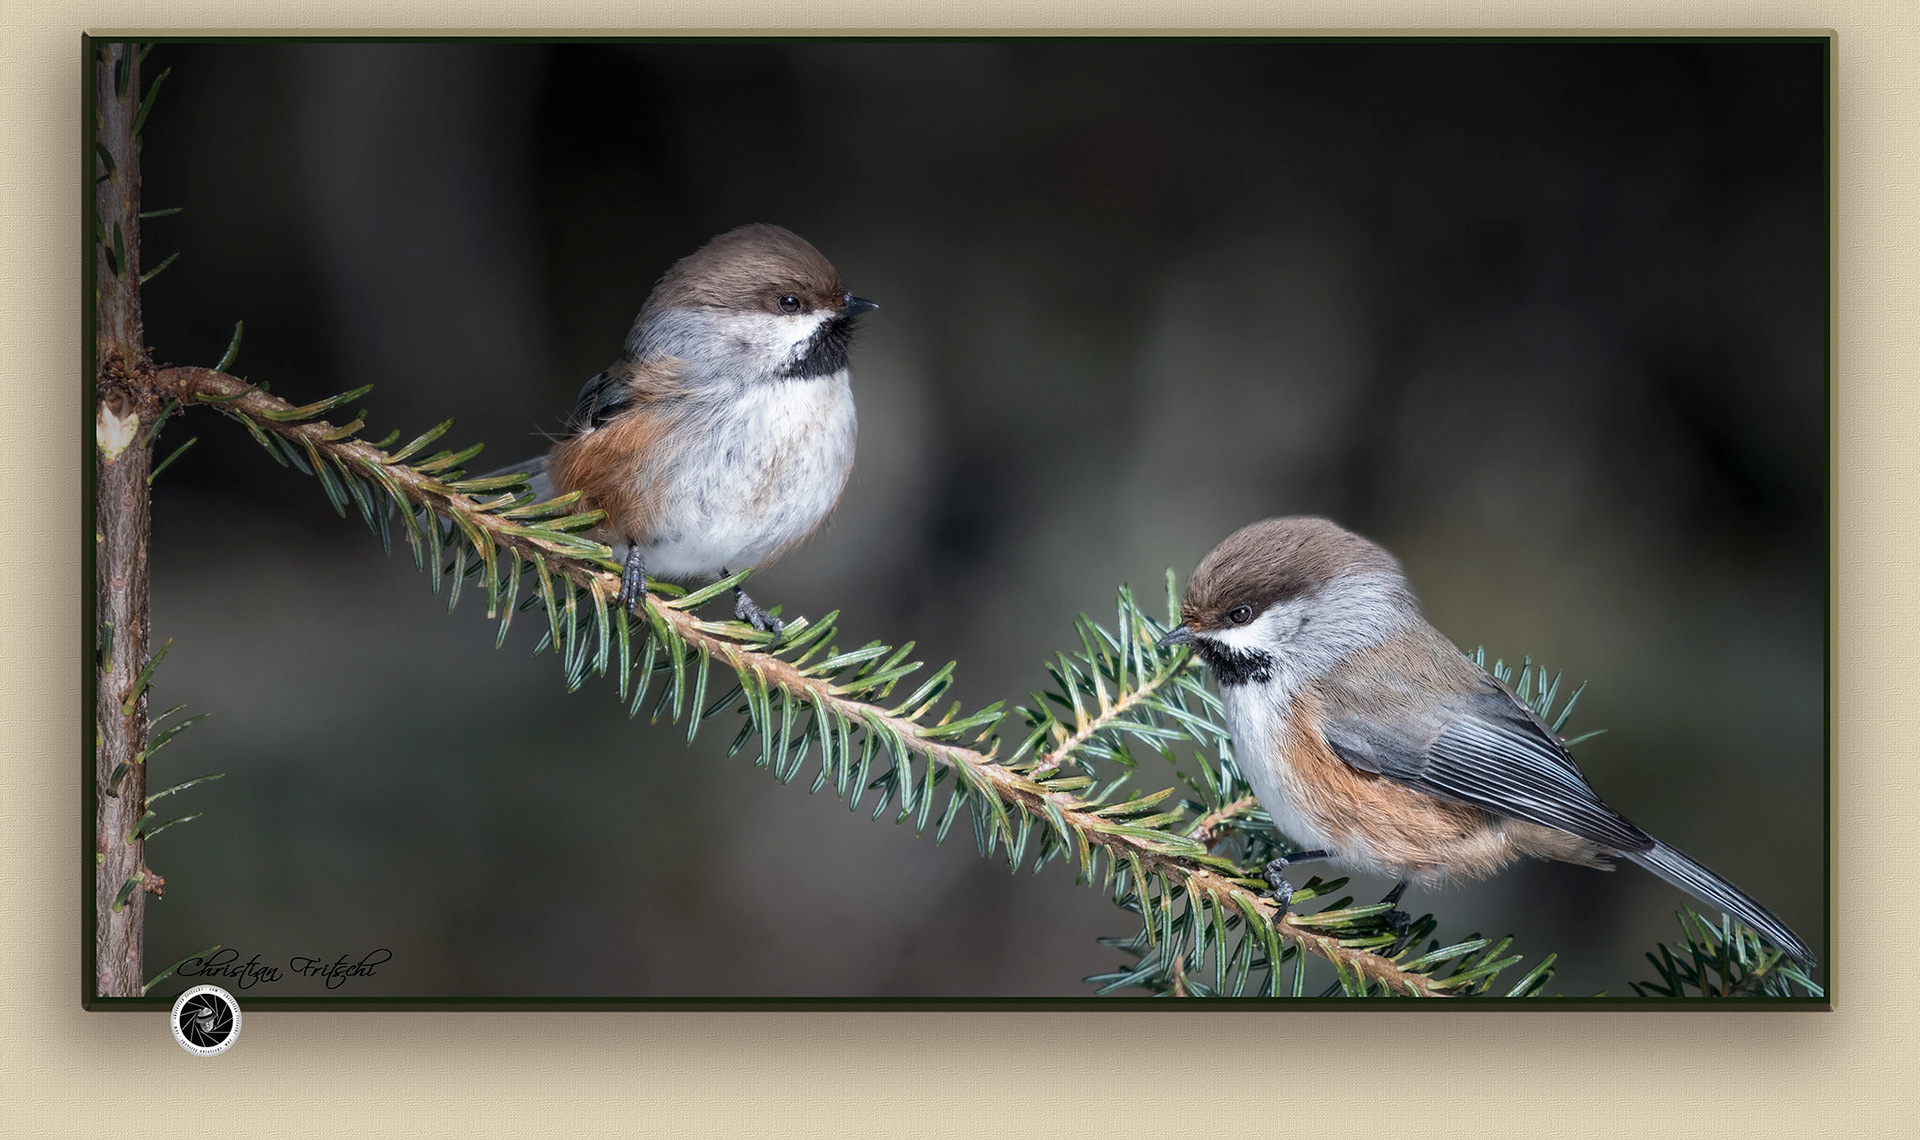
Extended barn roof to provide sufficient space for multi bird poses. Replaced bg, PS CC

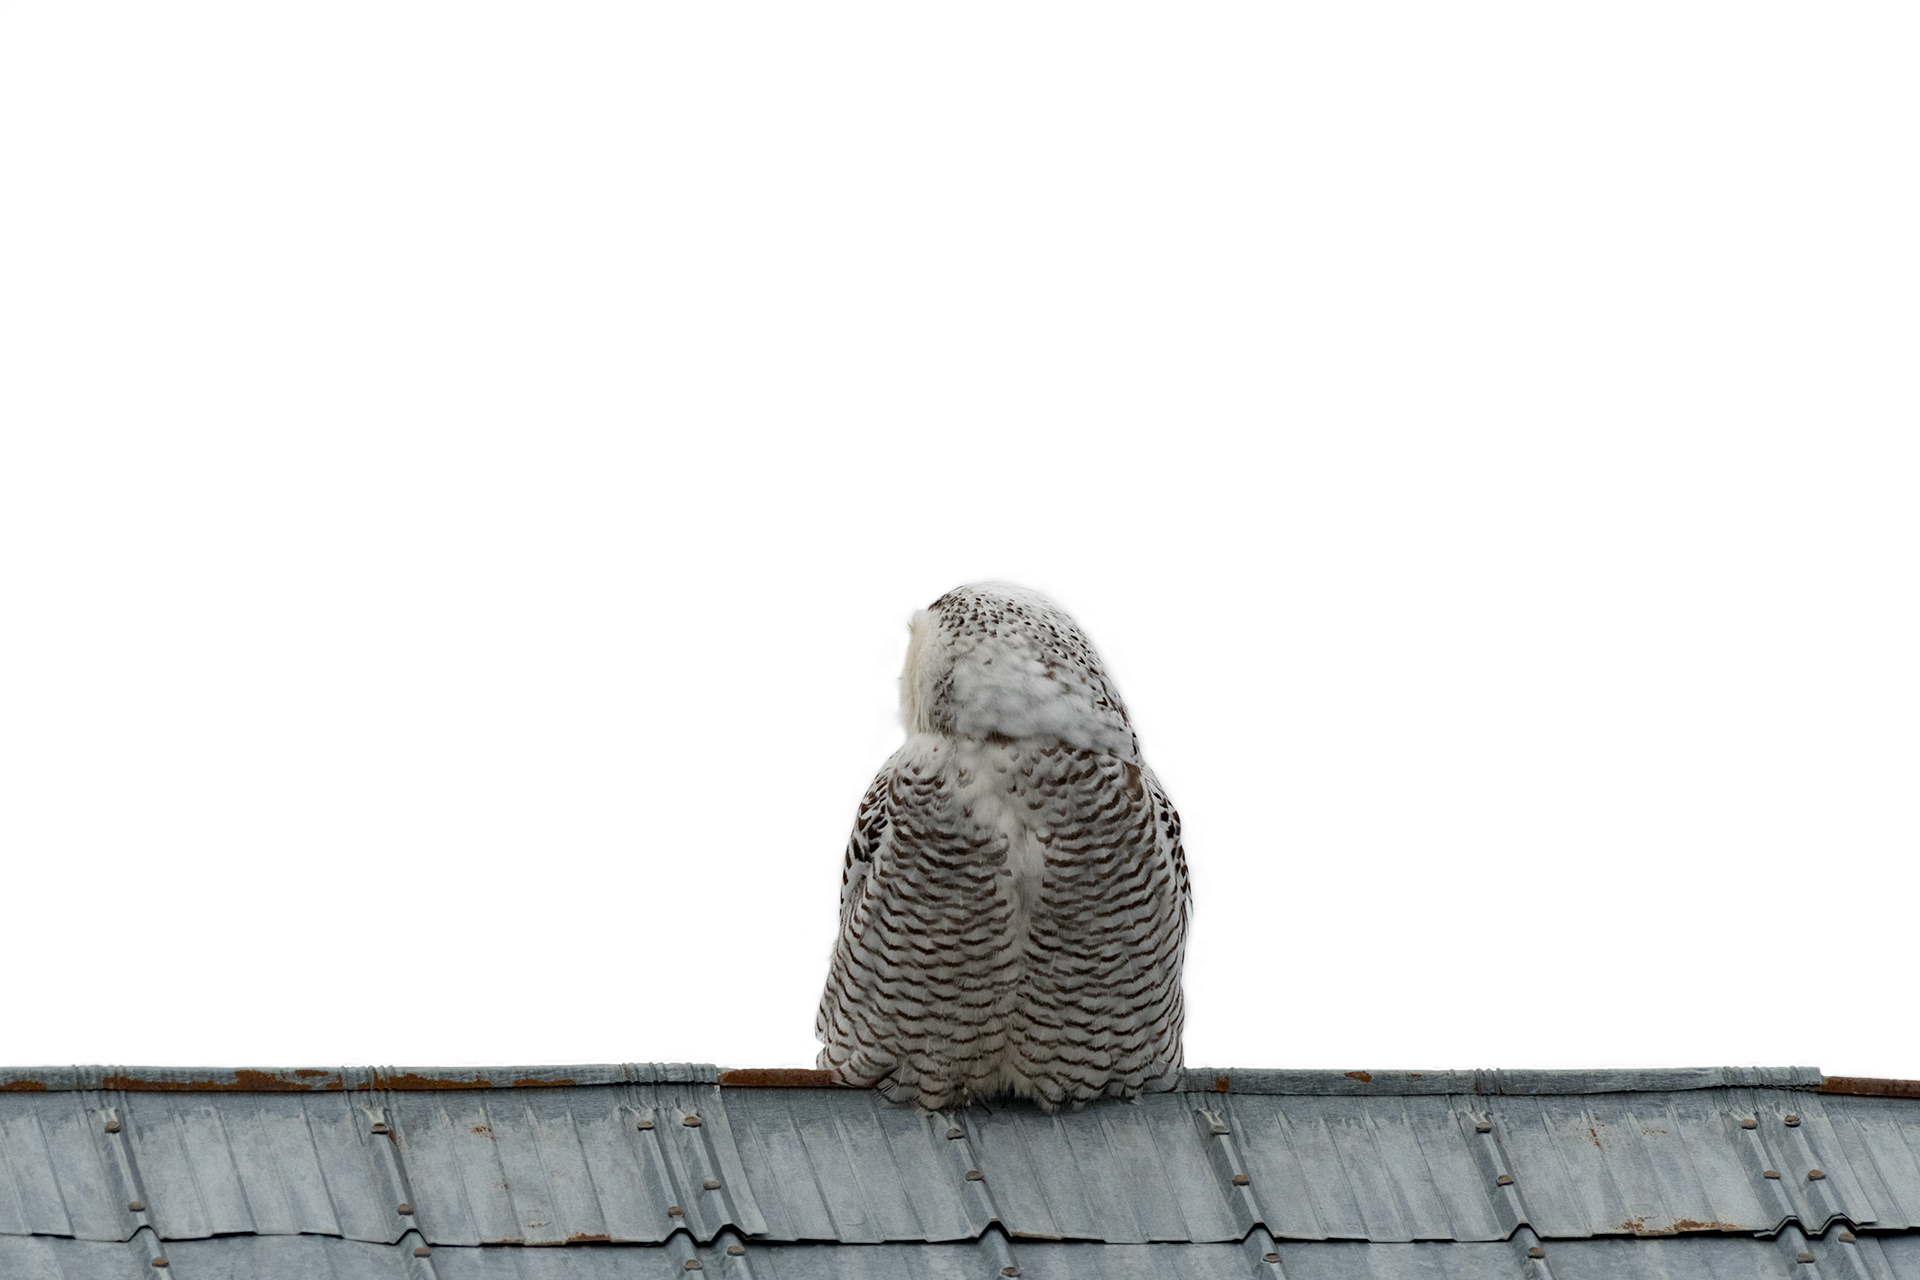
Nikon D500 Nikkor 200-500mm f5.6 @ 500mm (750mm equiv) f8 1/1250s ISO 1000

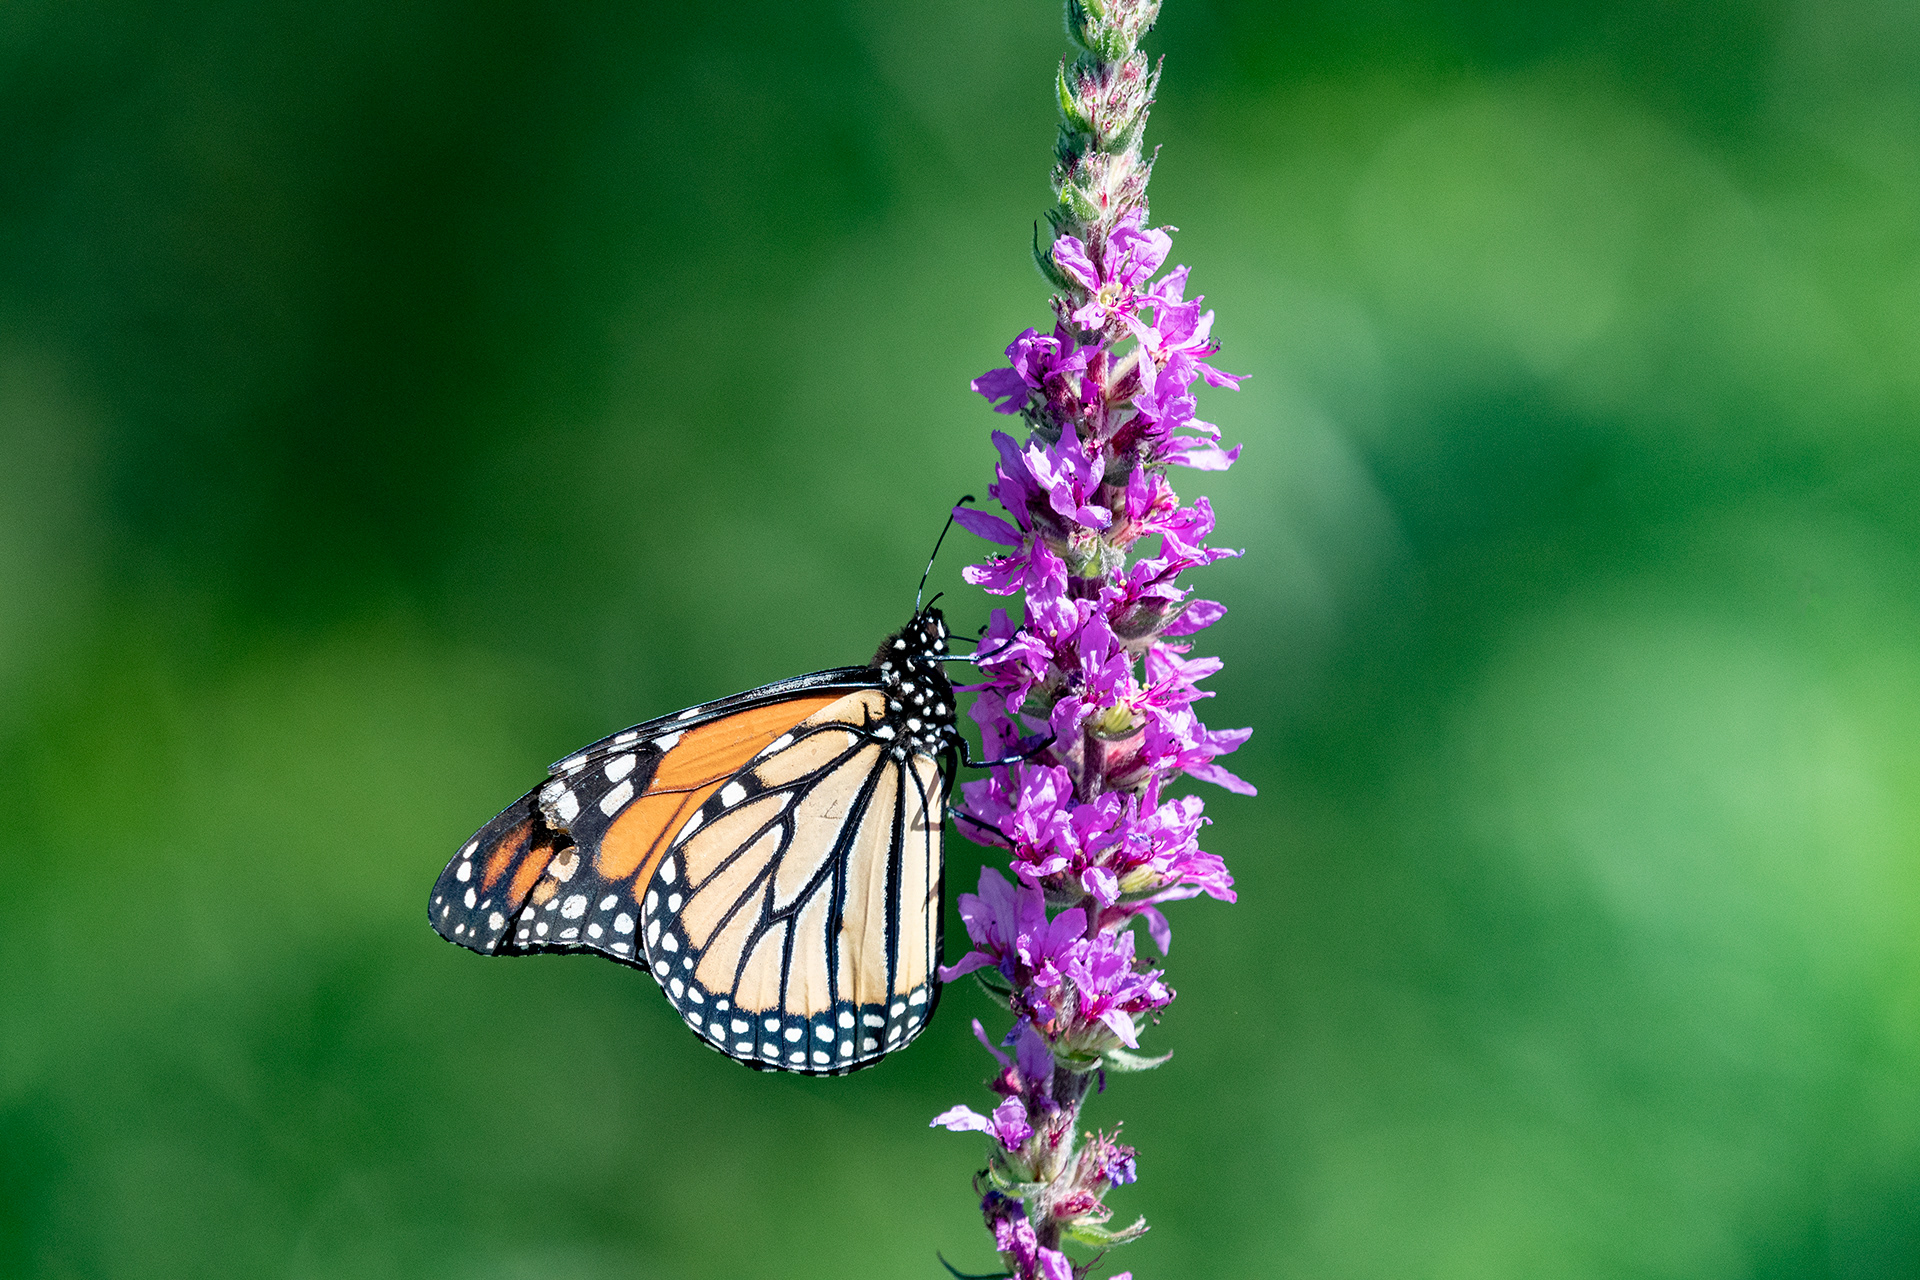
Added second individual, cleared branches & replaced bg. PS CC

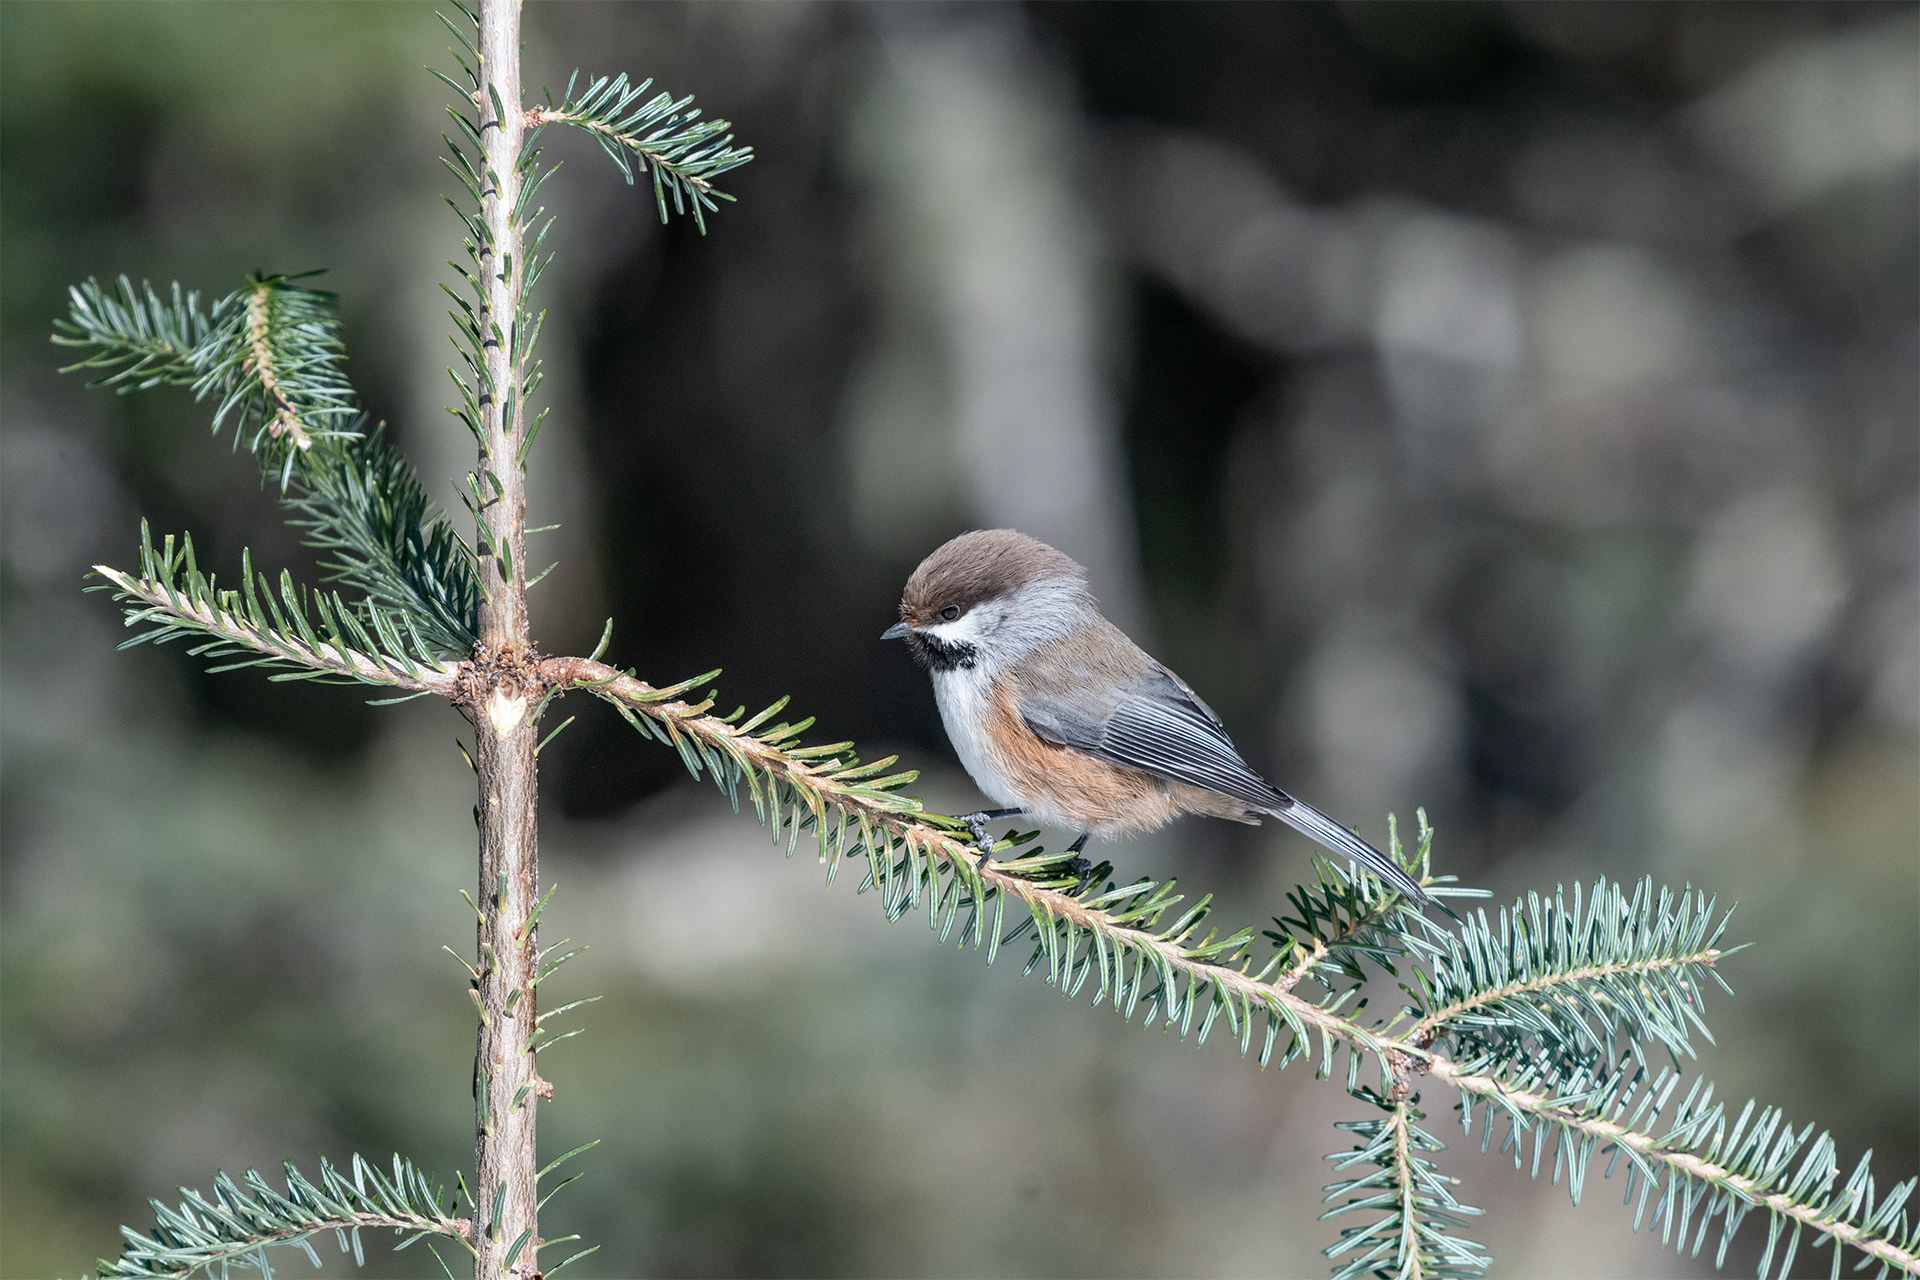
Nikon D500 Nikkor 300mm f4 PF +Tc 1.4x III @420mm (630mm equiv) f7.1 1/1600s ISO 560

A challenge: illustrate RGB and its complementary colors in one image. The original macro shot of a daisy was resized, rotated & colorized (petals and pistil separately) using a number of layers & masks in PS CC 2021, Nik Color Efex 2 for color pop.

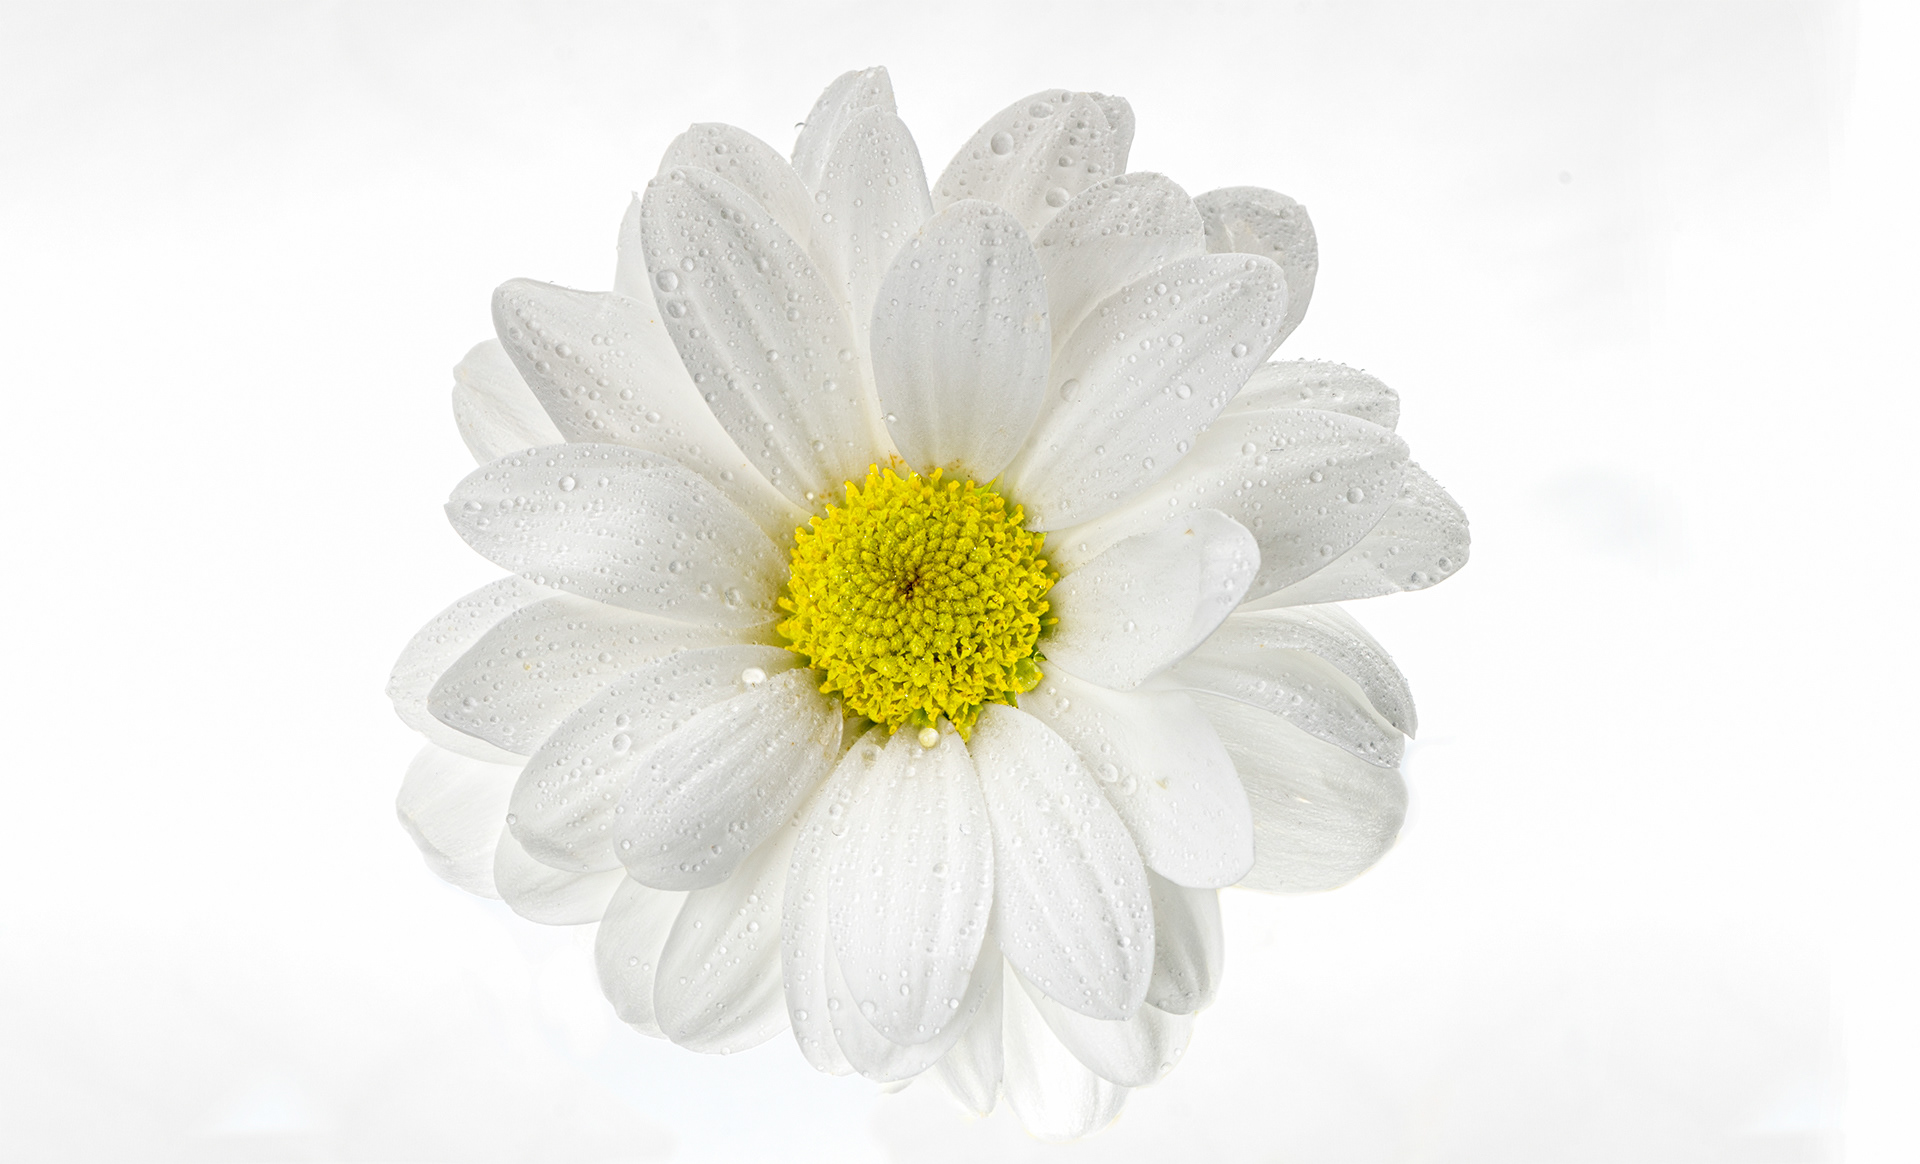
A macro of a daisy. Shot in a tent illuminated from outside and addition of Lume cubes for lateral textural lighting. Nikon D750 Micro Nikkor 105mm f2.8 + Kenko ext tube (36mm + 12mm) @ f16 1/2000s ISO 100 Novoflex Microrail

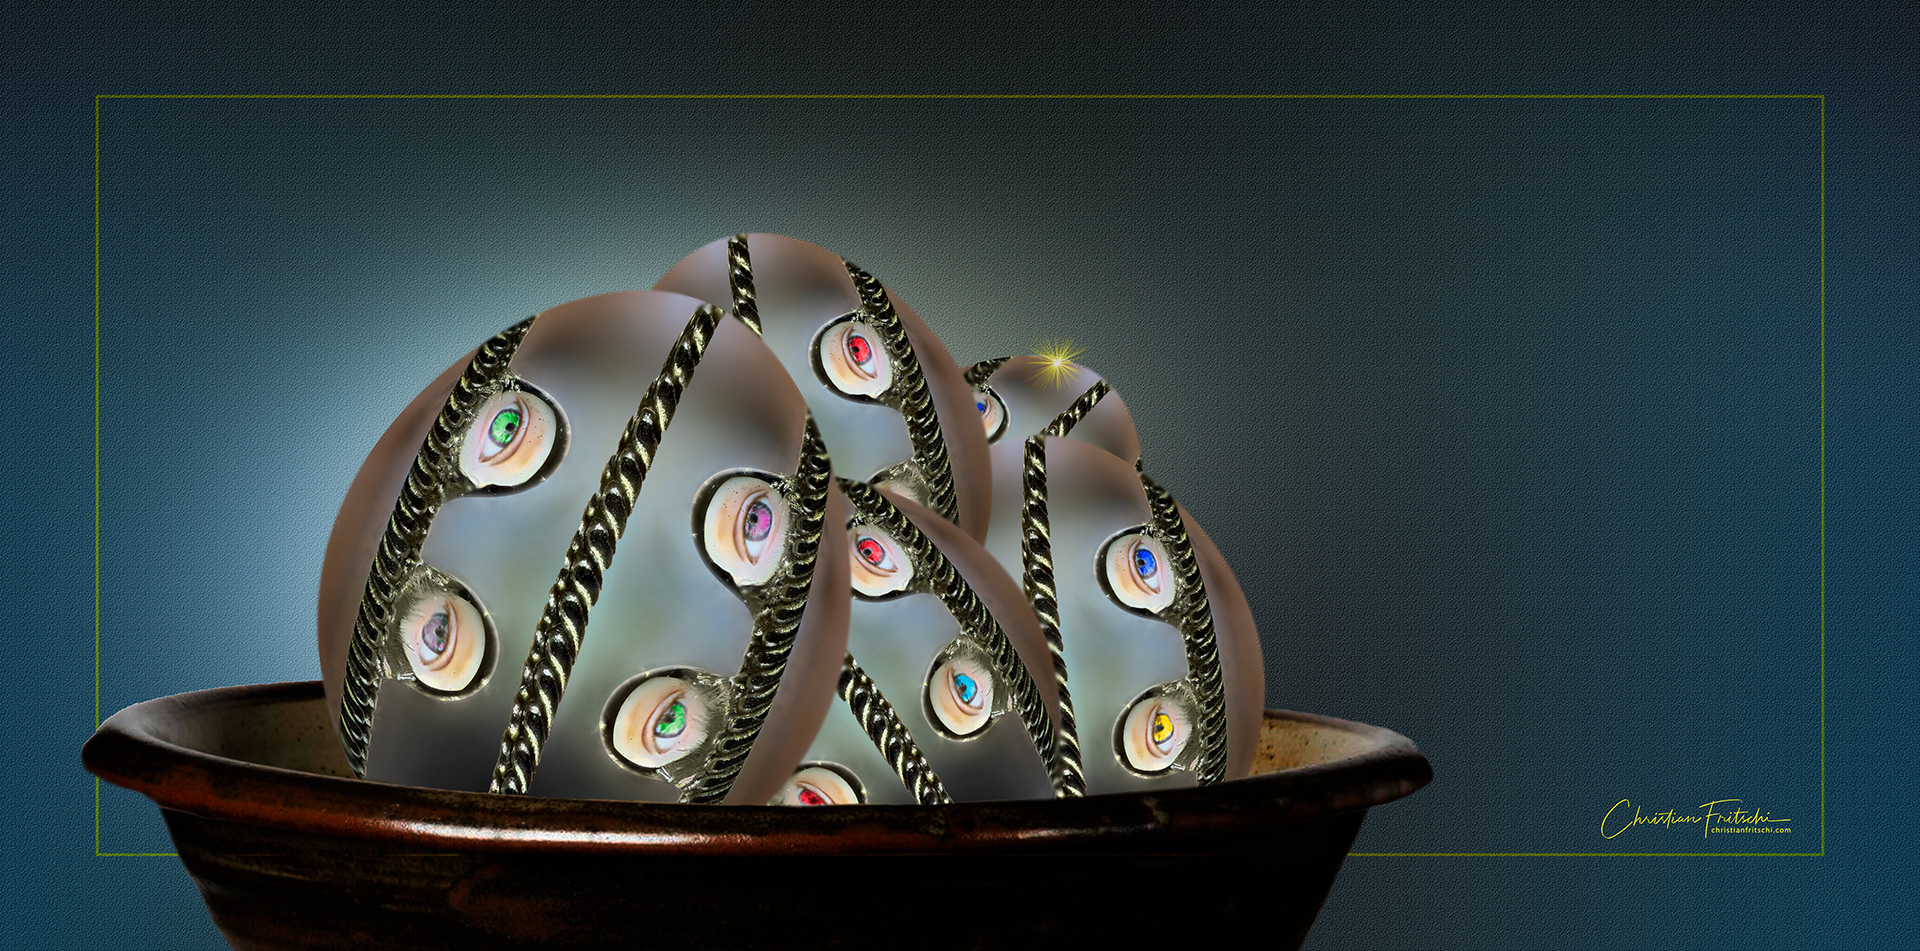
More of the same challenge. This time the eyes are the focus of the colorization. The Fabergé egg idea came to mind immediately. Several transform tools in PC CC 2020 to achieve spherization and elongation into egg shapes.

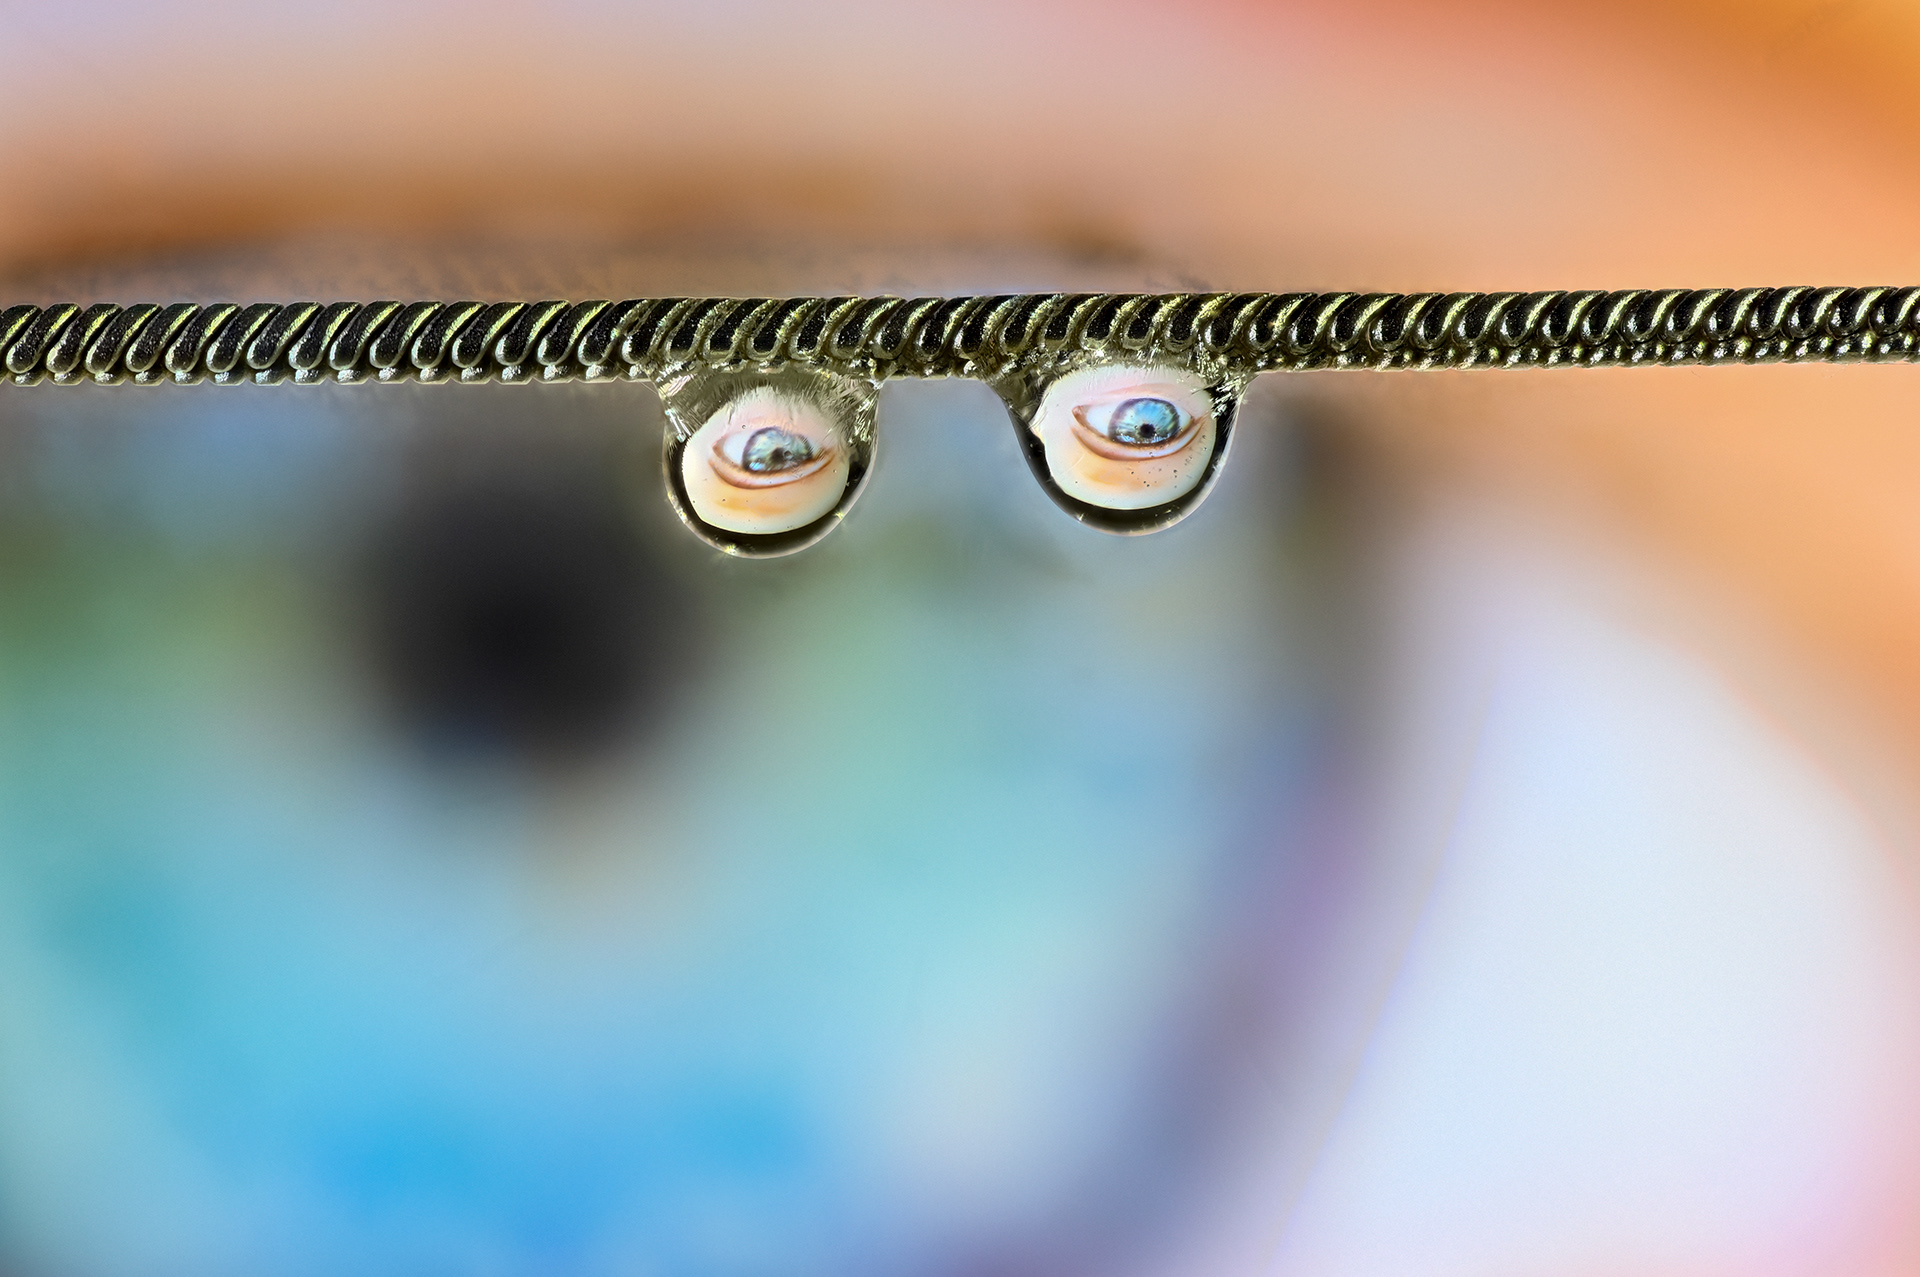
Water/glycerine droplets hanging on silver necklace reflecting the backgound poster. Nikon Z6 Micro Nikkor f2.8 @ f8 1/100s ISO 100 Lume cubes.

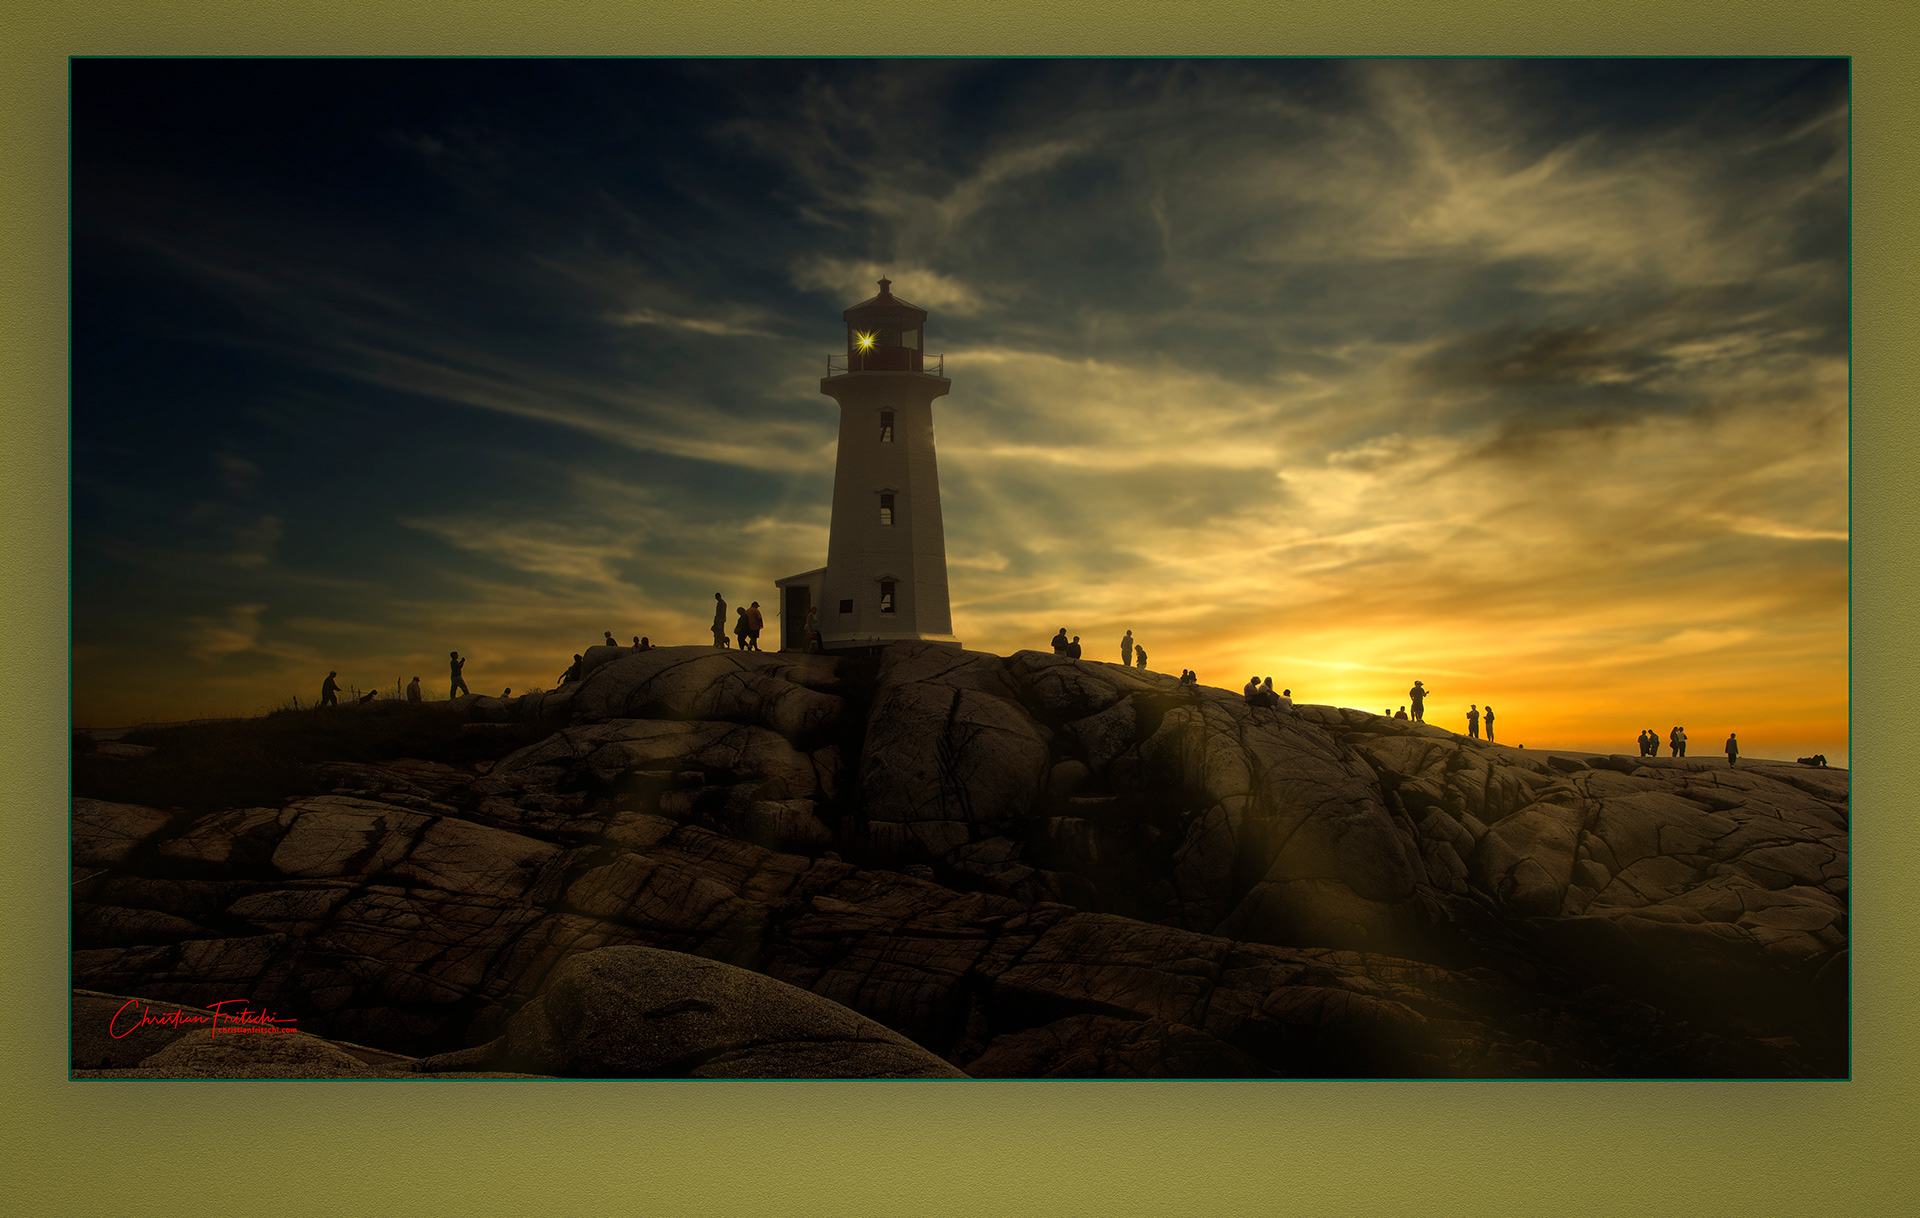
Peggy's Cove Lighthouse, N.S, 2007. The final image was clear to me. A very bleak contrastless day calls for a high contrast B&W. I liked the idea of having silhouettes cut across a replacement sky. The sunrays and the lighthouse spot also took on a life of their own. PS CC 2021, Luminar 4, Nik Silver Efex 3

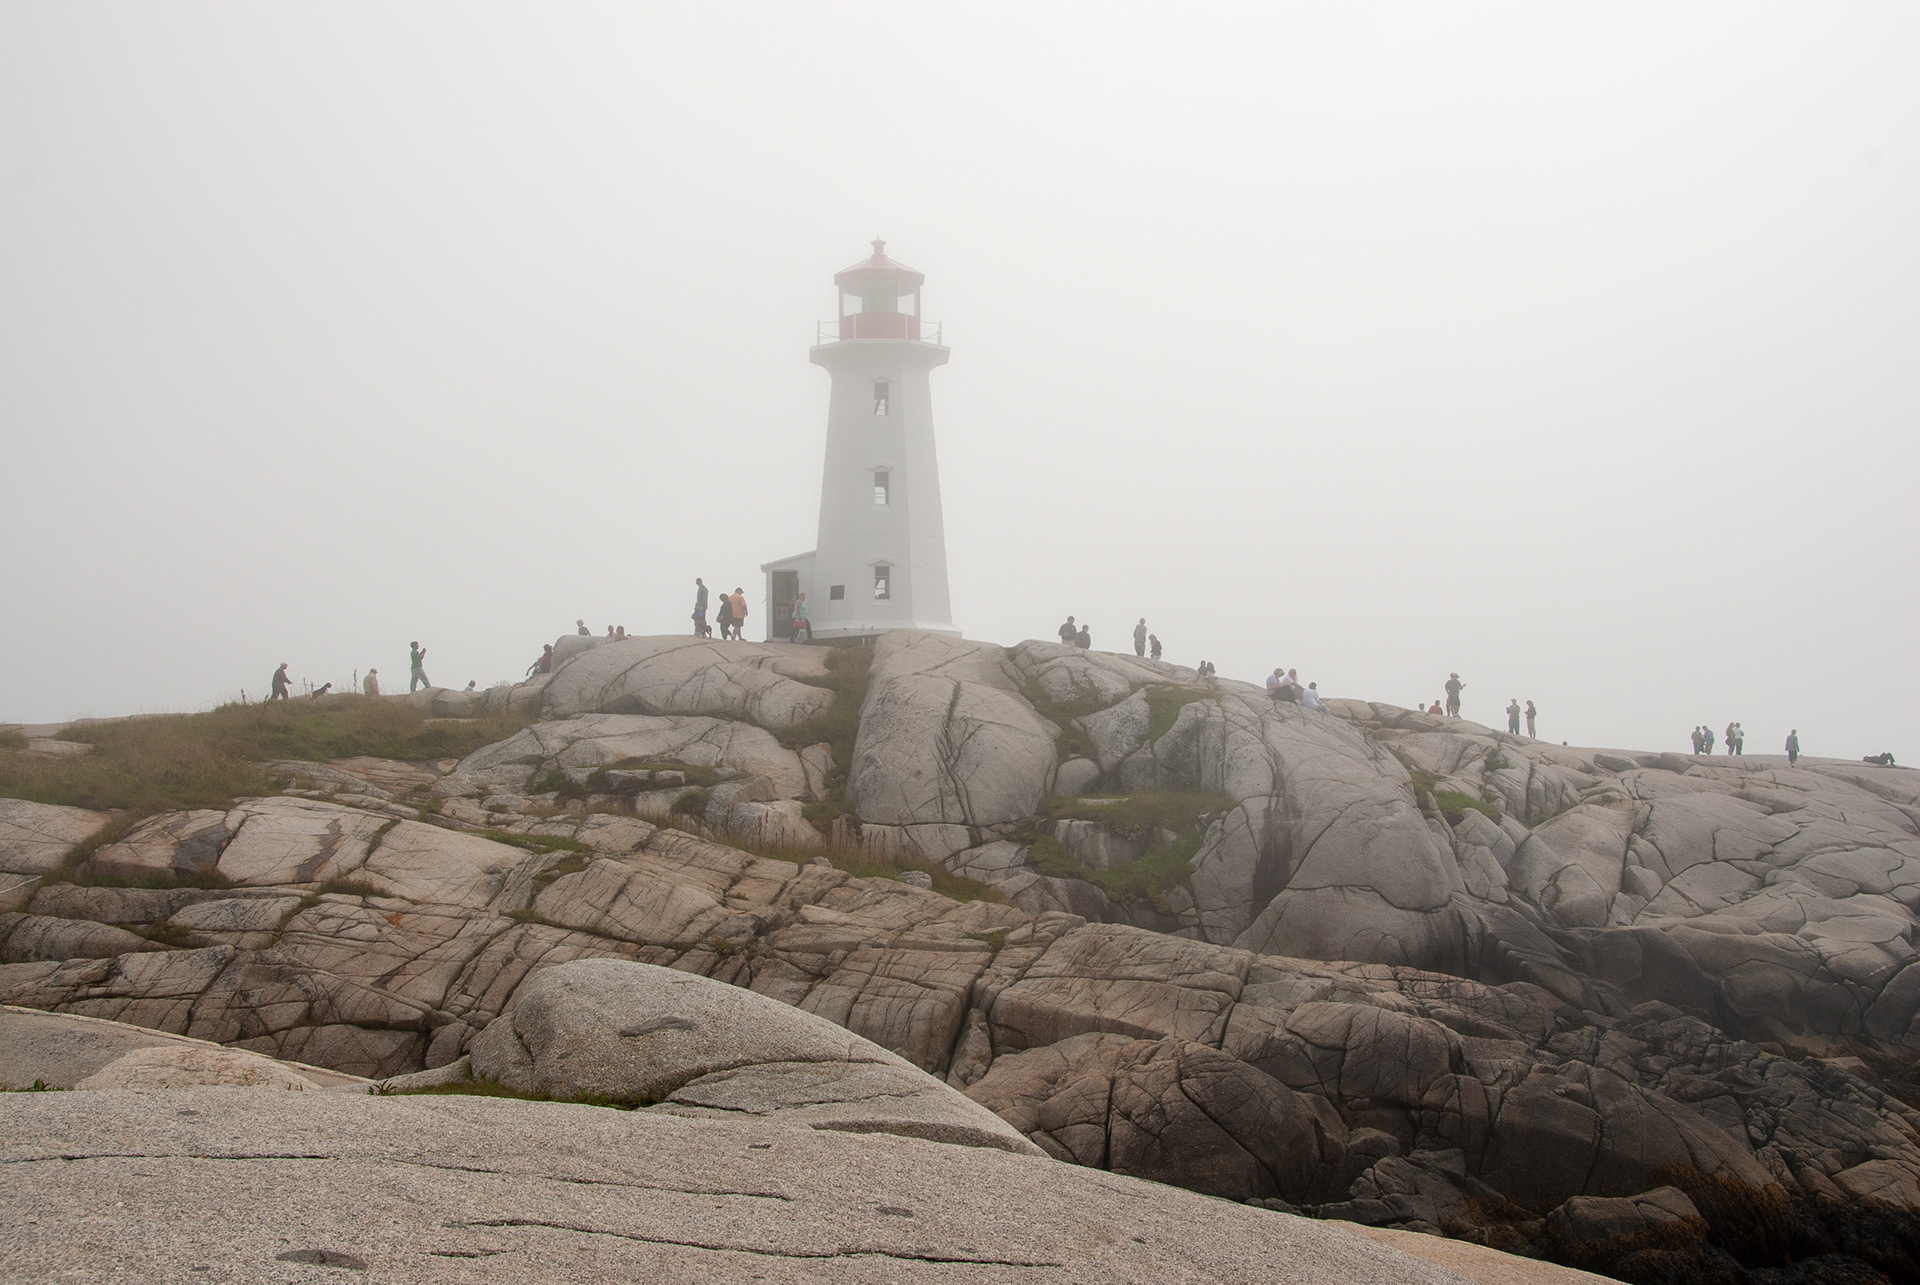
Nikon D200 Dx Nikkor 18-200mm @ 26mm f11 1/320s ISO 100

Back to Top